Once I decided to rebuild my S13 (first story HERE), it didn’t take long before my garage was overflowing with cars. After rolling the Lexus chassis out of the garage and onto the trailer, we were able to push my hatch back into the same spot it had always been parked in two years prior. I pulled the coupe into the adjacent spot and began to get to work.
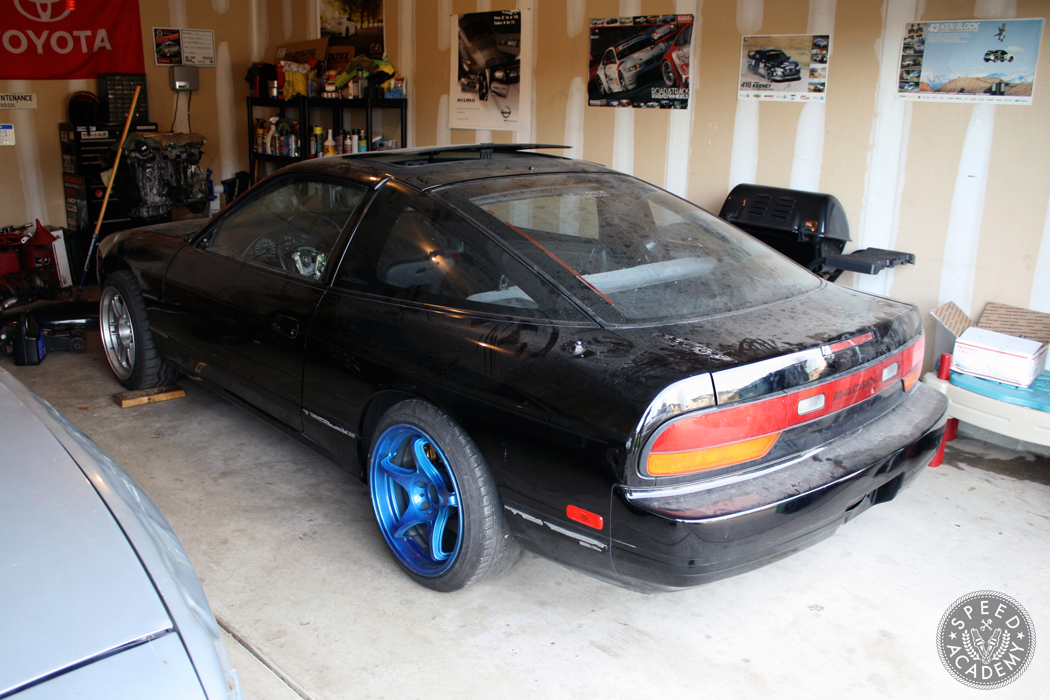
The first order of business was to strip the coupe of everything I would need to get my hatch running again and to dispose of the rotted out shell. Over the course of about two weeks, I was able to pull the full SR drivetrain, differential, axles, and coilovers while evicting a family of mice in the process. I’ve seen some rusty and gross cars before, but this was by far the nastiest. My hatch was fairly bare when I sold it, so I needed to use as many pieces from the coupe as possible if I wanted to get the car running without breaking the bank.

Though the Tanabe coilovers on the coupe were decent enough, they were beginning to show their age. I decided to sell them to recoup some funds and did the same with the Kaaz 2 way differential. While it is a great unit, it’s just overkill for the everyday street use my S13 will see. As soon as everything was removed, I sold the chassis for about the price of scrap metal and began to focus on how my hatch build would come back to life.
Over the years, my hatch became a fairly complicated build. Nearly every part on the car was aftermarket, and I definitely had a taste for high-end Japanese components. While it was a lot of fun to build and I really liked it, the car almost became a bit of a burden to drive. With aggressive wheels beyond the realm of improved performance, tons of suspension modifications, and lots of big-name parts all bolted to the car I was constantly worried about something happening to it. The car became overly complex and I started to wish that I had stopped messing with it about half way through the process.
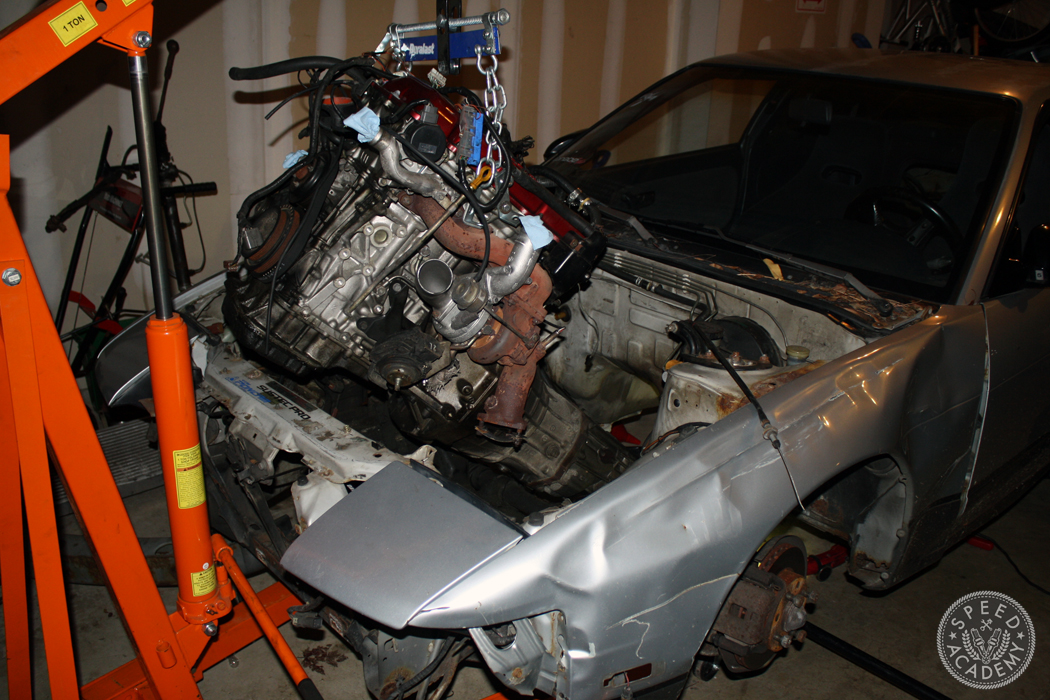
The goal this time around is to recreate the car in a simpler form. My hope is for this to be the car I keep for years and years to come, so there isn’t a terrible sense of urgency to modify every aspect of it. I decided it would be best to leave the drivetrain stock instead of going down the rabbit hole of engine internals, a larger turbo, and fuel system upgrades like I did previously. While it was a great setup and it was a lot of fun, leaving the SR stock would save me some cash and hopefully keep things simple, fun, and reliable. I’m sure I’ll have the chance to play with the engine again at some point in the future.
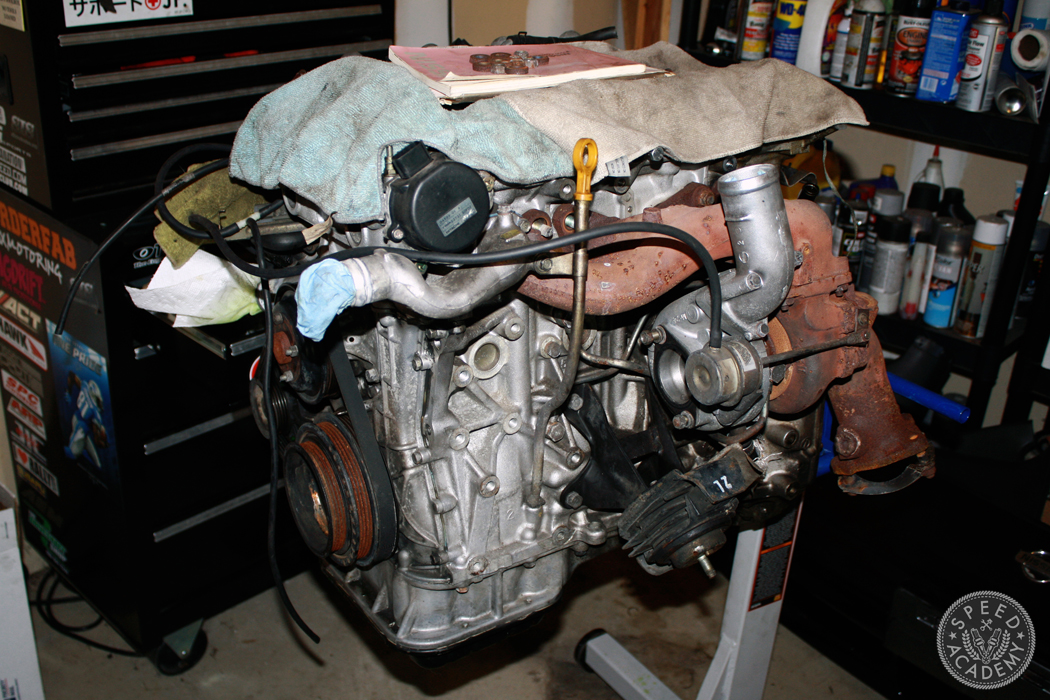
With the engine on the stand, I turned to my friend Russell Moore at NissanParts.cc for a complete engine gasket kit, as well as a new water pump. I decided to hold off on replacing the head gasket for the time being, but felt it would be a good idea to replace the other gaskets on the engine. Fortunately, the stock T25 turbo appears to be in decent enough shape.

The majority of the engine was filthy, so I spent a good amount of time with some degreaser and a wire brush cleaning things up. The turbo manifold had seen better days, so I hit that with a coat of high temp paint. While I would love to replace this with a tubular manifold at some point, it’s just not in the cards right now. I was able to trade the valve cover to a friend for the powdercoated red cover I ran on my previous SR setup. Pretty cool to get it back for the rebuild!
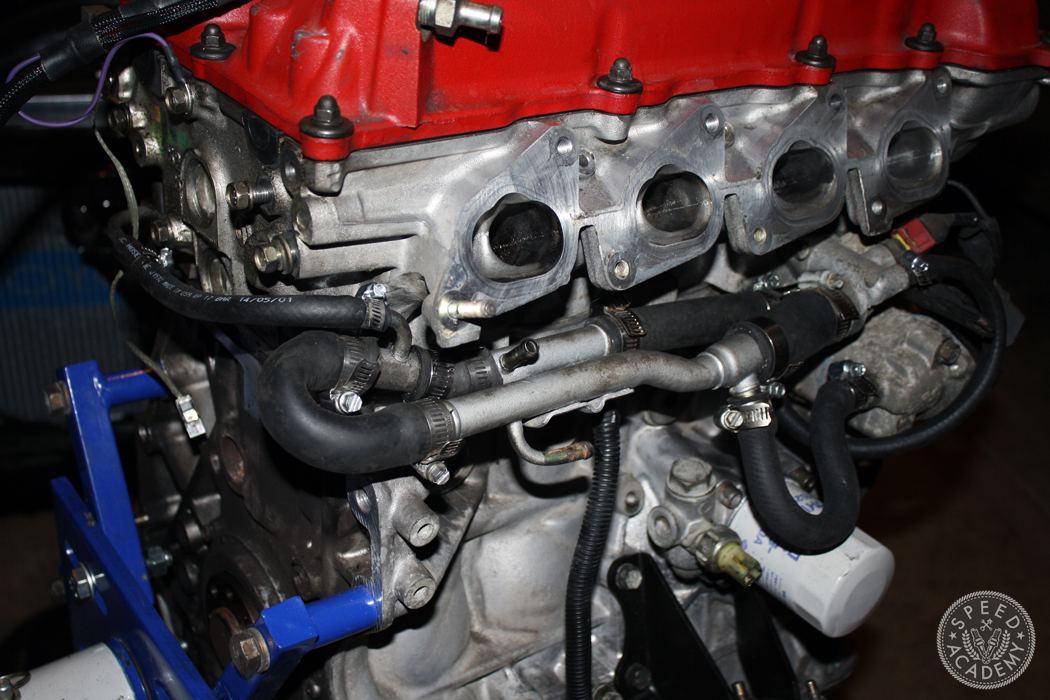
While I was at it, I also replaced all of the vacuum and coolant hoses on the car. Many of the lines had become old and brittle, and it’s a bit of a pain to get to the coolant hoses under the intake manifold with the engine in the car. I deleted my HVAC system back during my tucked engine bay phase when I previously owned the car, so I had to loop the heater core lines similar to how I did on my old SR20 before I could install the engine. A trip to the auto parts store for some heater hose and a die grinder made quick work of the task.
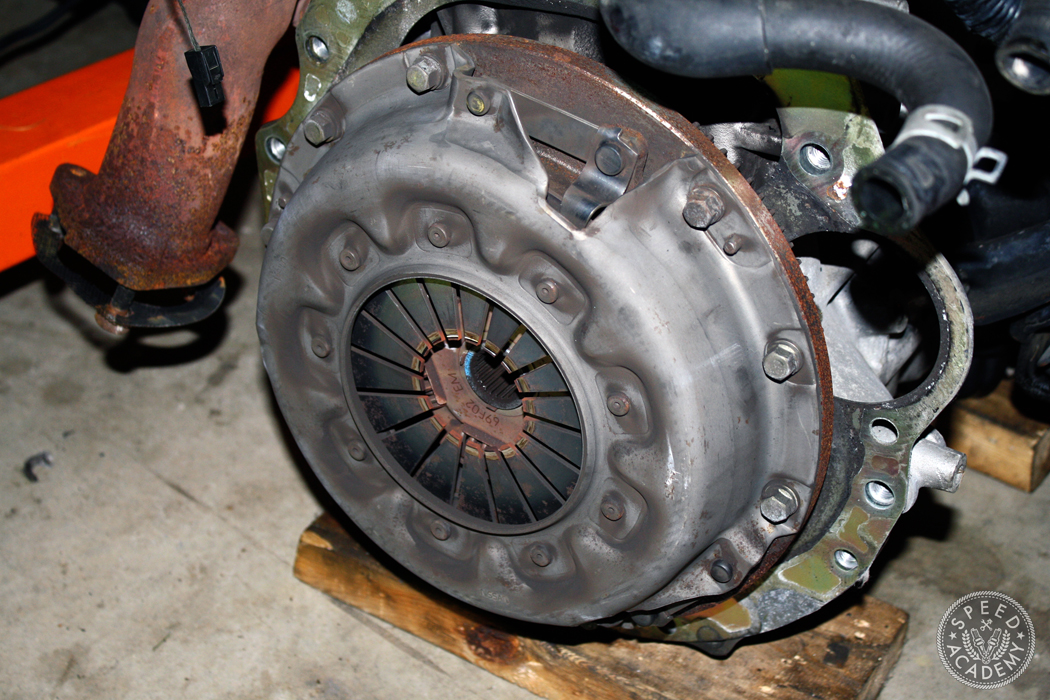
As for the transmission, I decided to install input and output shaft seals for good measure. The junky short shifter included with the transmission was broken, so I replaced it with an OEM shifter plate and a discontinued C’s short shifter assembly from Japan, complete with a Cusco brass shifter bushing. Hey, I’ve gotta keep some of the cool-parts-flavor going, right?!