When we first bought the ASS2000, a project supported by Turn14 Distribution, the interior was in pretty rough shape. The carpets were filthy and had holes in them, the blue leather seats and door cards had a slightly disturbing brown tinge to them, and the center tunnel cup holder and cubbie were caked in a thick brown paste we assumed to be made up of spilled coffee, random nasal fallout, and human(?) hair (lab tests were inconclusive).
Pete cleaned it up a fair bit before using it as his summer daily driver last year, but the time has finally come for us to give it a proper interior overhaul with both safety and support in mind, not to mention a serious freshening up.
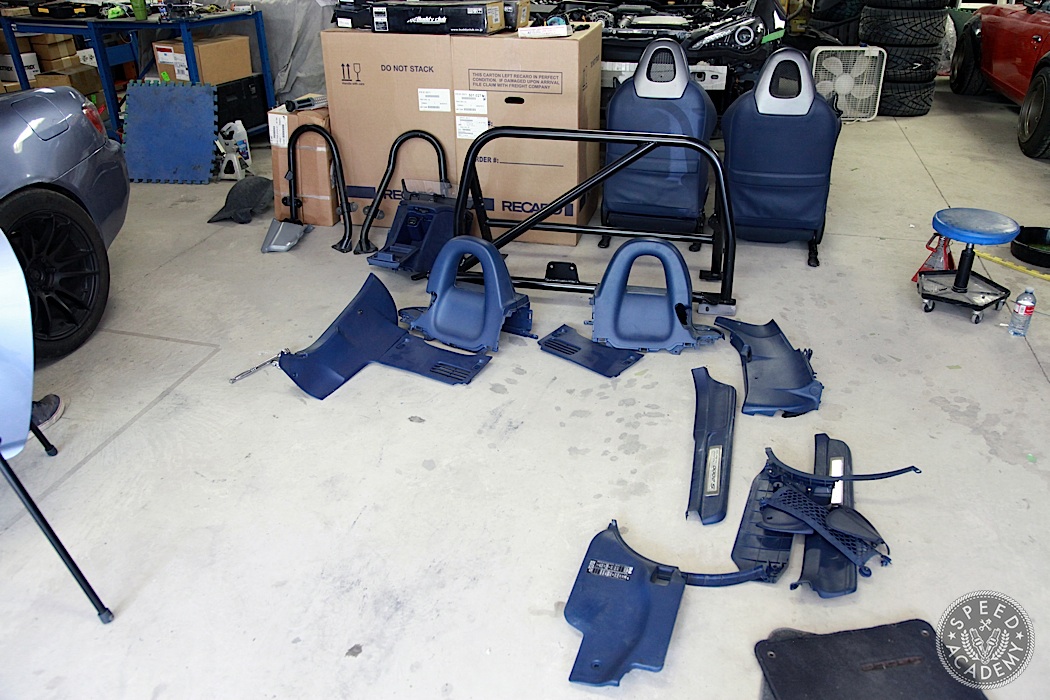
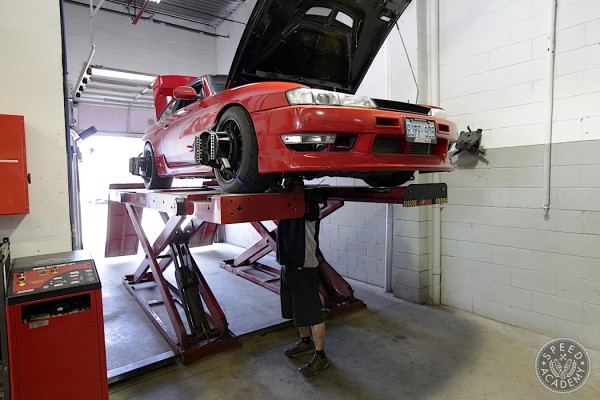
This process started with gutting the interior, so out came the OE seats, plastic trim, roll hoops and soft top. With Ken, Pete and I all attacking it at once, we had the interior out in about an hour.
Removing the skanky carpets and worn out soft top were highlights, since those were definitely the assiest parts remaining on the old ASS2000.
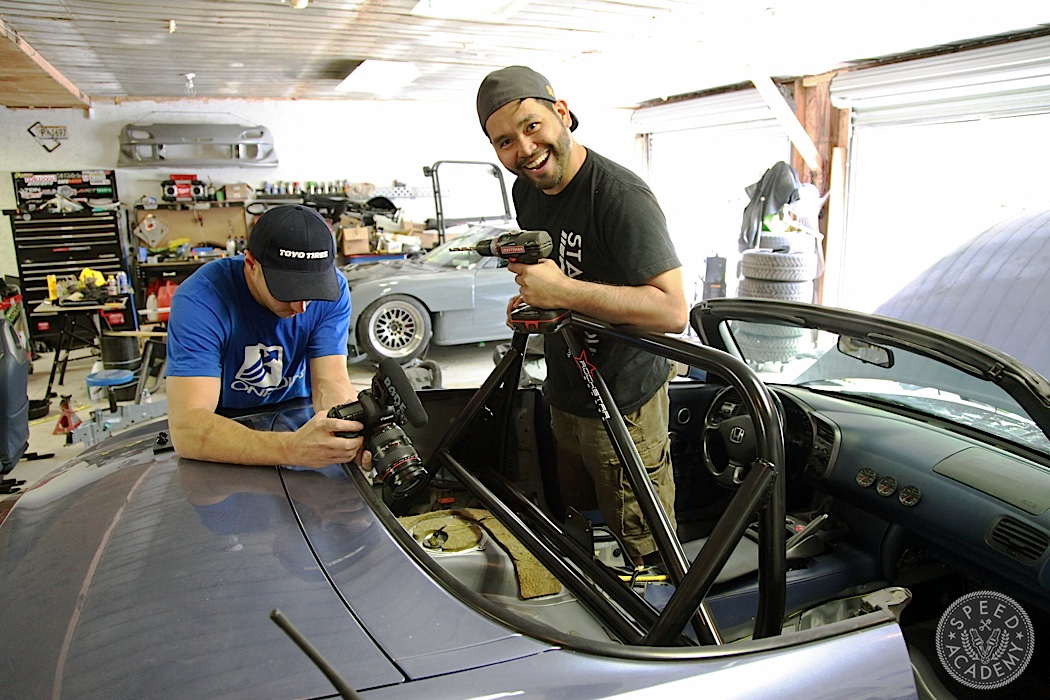
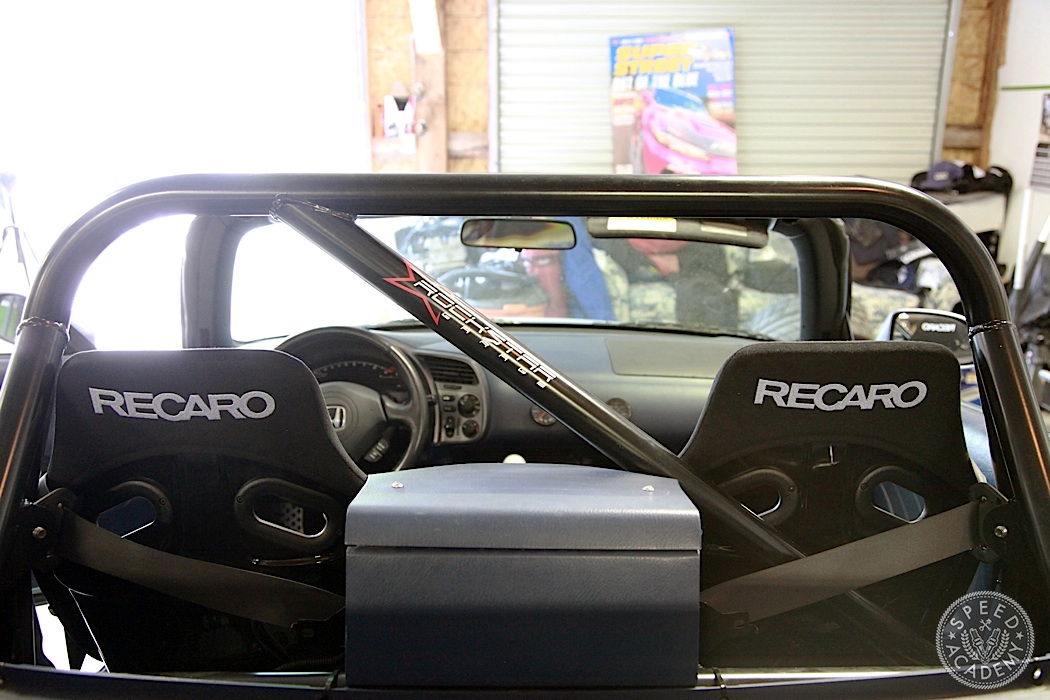
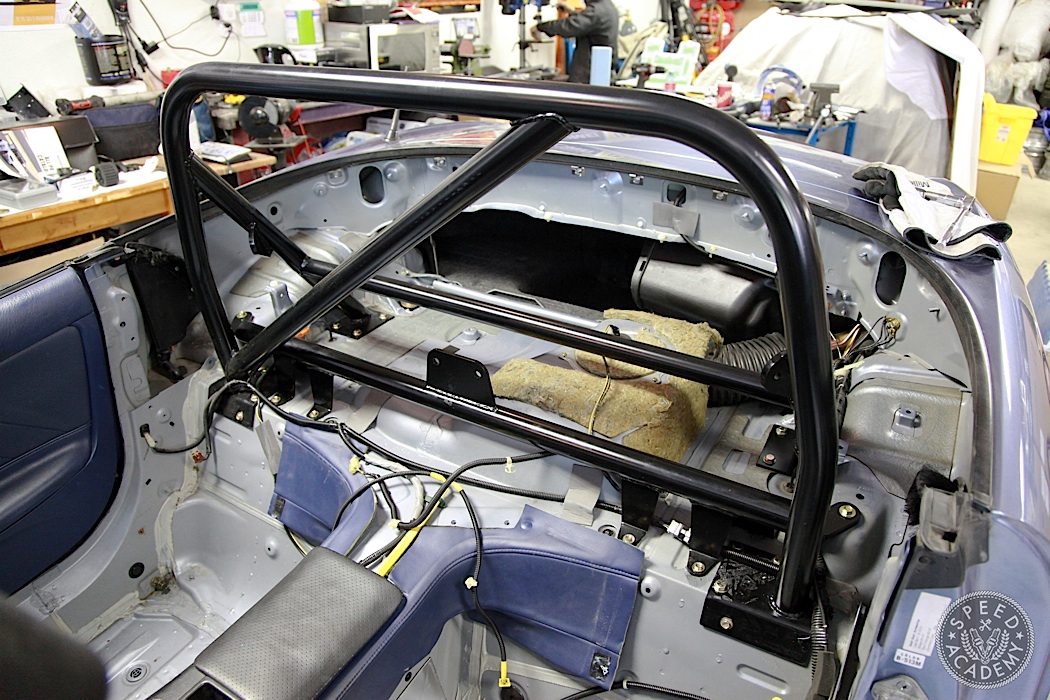
Ripping the interior out wasn’t just to replace all the worn out pieces, it was also to make room for a Rockstar Garage 4-point roll bar. When researching roll bar options for the S2000, we knew we wanted something bolt-in that was SCCA and NASA legal (and thus just about any other motorsports sanctioning body including CASC-OR up here in Ontario).
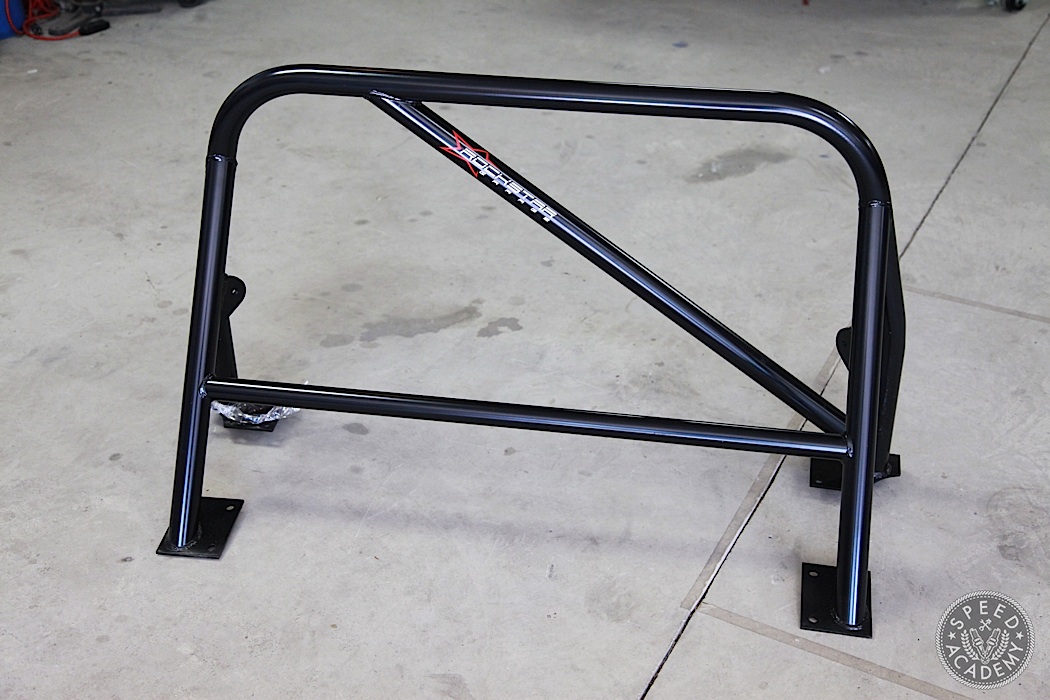
This left us with two main options, Hard Dog or Rockstar Garage. We prefer the RSG bar because it features mandrel bends that gives the bar greater strength, plus it comes with everything else needed to install it including laser cut 1/4” thick mounting and backing plates and Grade 8 nuts, bolts and washers, all of which meet or exceed SCCA and NASA safety standards.
You can order the RSG bar in either a single diagonal cross bar (joining each side of the main hoop) like we opted for, or you can choose the double diagonal design instead. In either case, there’s also a lowered harness bar which allows you to wrap racing harness shoulder straps at the correct angle and there’s also OEM belt guides should you decide to retain the factory 3-point belts.
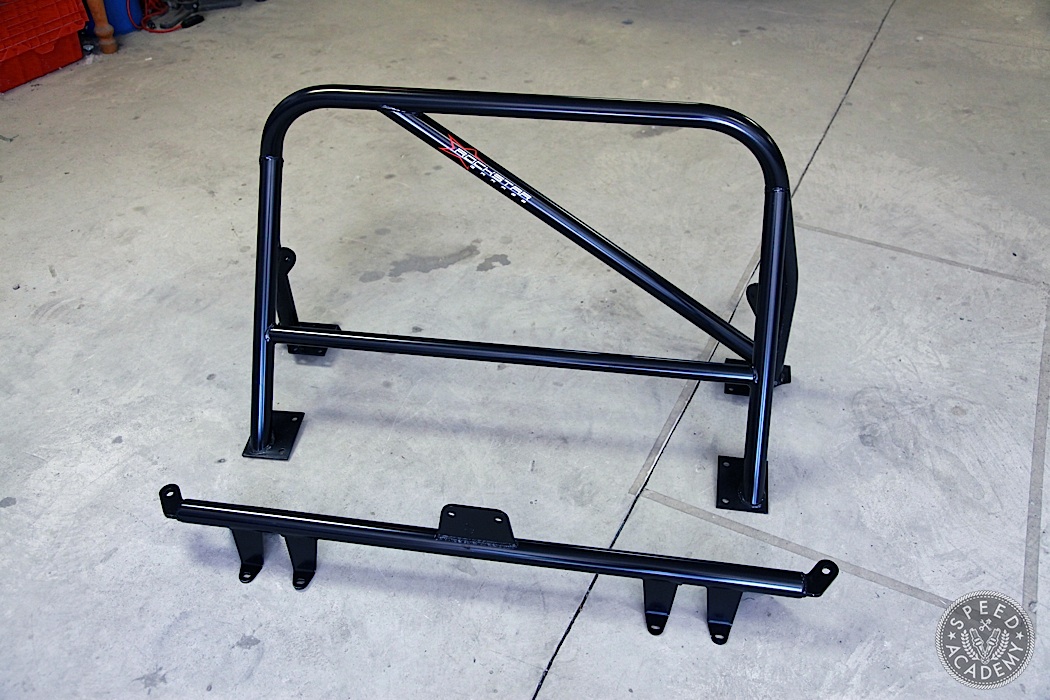
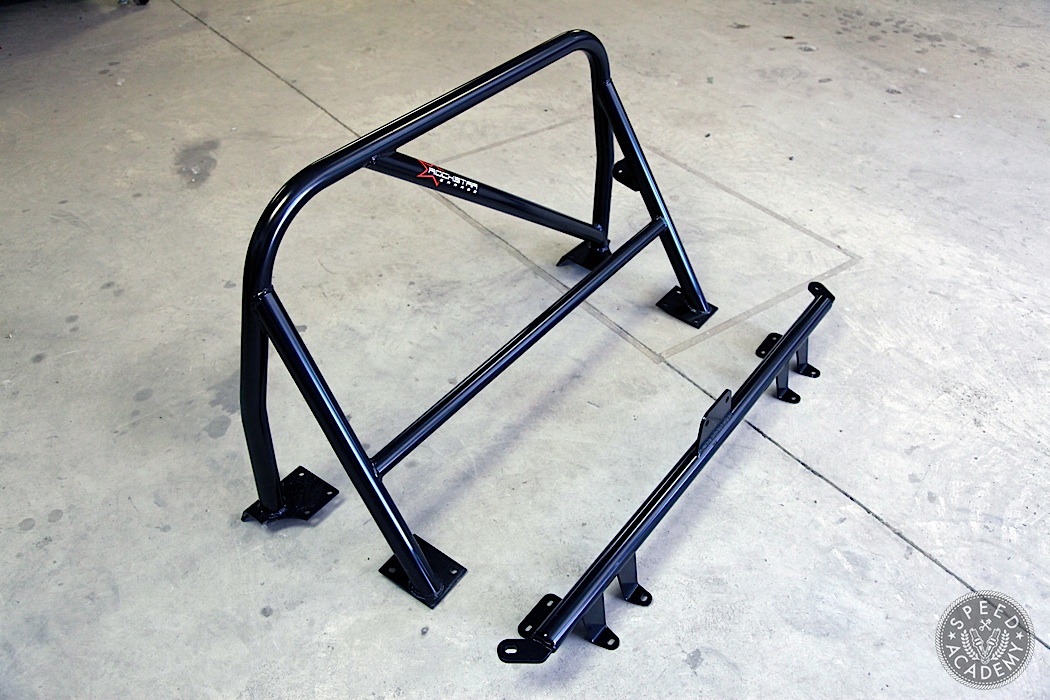
We also ordered RSG’s bulkhead bar, which you can see above on the ground in front of the roll bar. This bolts in place of the factory bulkhead (so no drilling required), and it not only adds stiffness to the chassis it also has a large central mounting bracket on it for the OE seat belt retractors to bolt to, meaning we’ll still have the factory seat belts for street use.

The fitment of the RSG bar is excellent. We literally just dropped it in position and started drilling holes to bolt it in place. And since the chassis is flat underneath the rear mounting points, we simply dropped the bolts through the holes and used the provided backing plates and nylon lock nuts to secure them. Easy peasy.
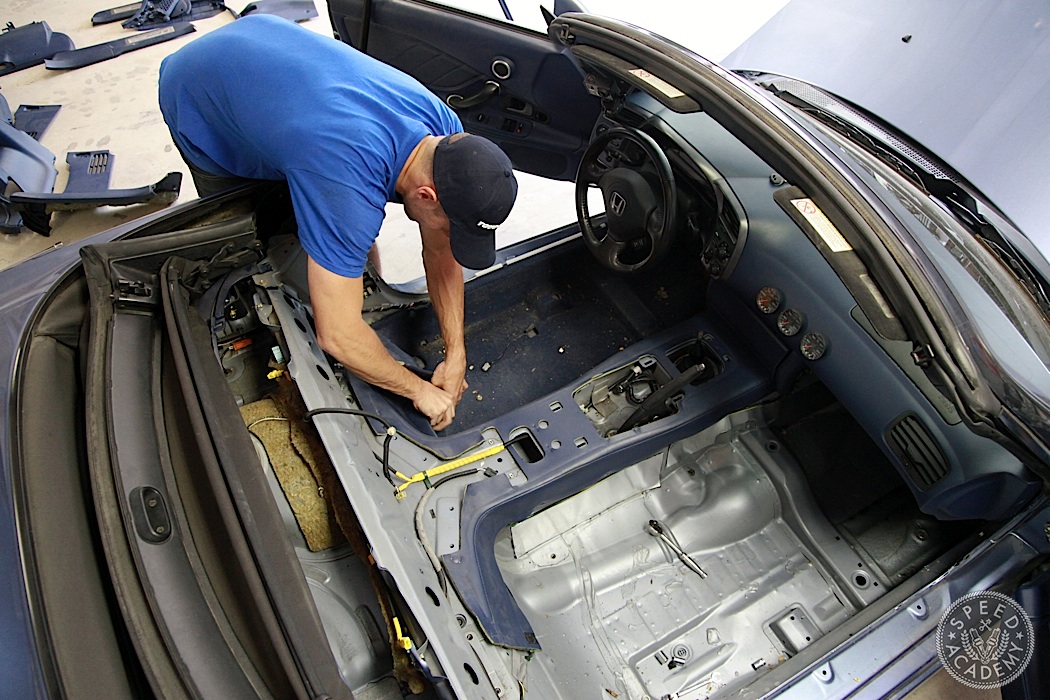
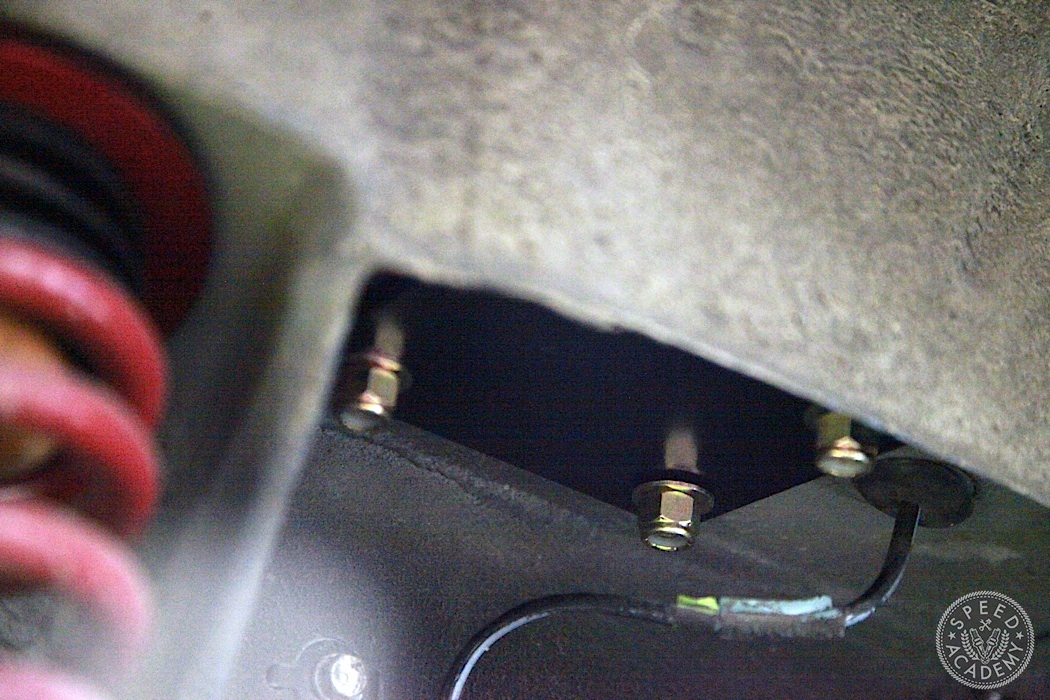
The front mounting points at the base of each side of the main hoop, however, requires cutting a fairly large rectangular opening in the underside of the chassis to access the floor beneath the baseplates. This is something we hadn’t researched prior to installation so it caught us a bit off guard (ok, a lot off guard), but with a bit of Googling we had it figured out.
The trick is to use the supplied backing plates as a template to mark the width and height of the opening that needs to be cut. From there it’s simply a matter of using a cutting wheel on a Dremel or air tool like we used to make nice, clean cuts.
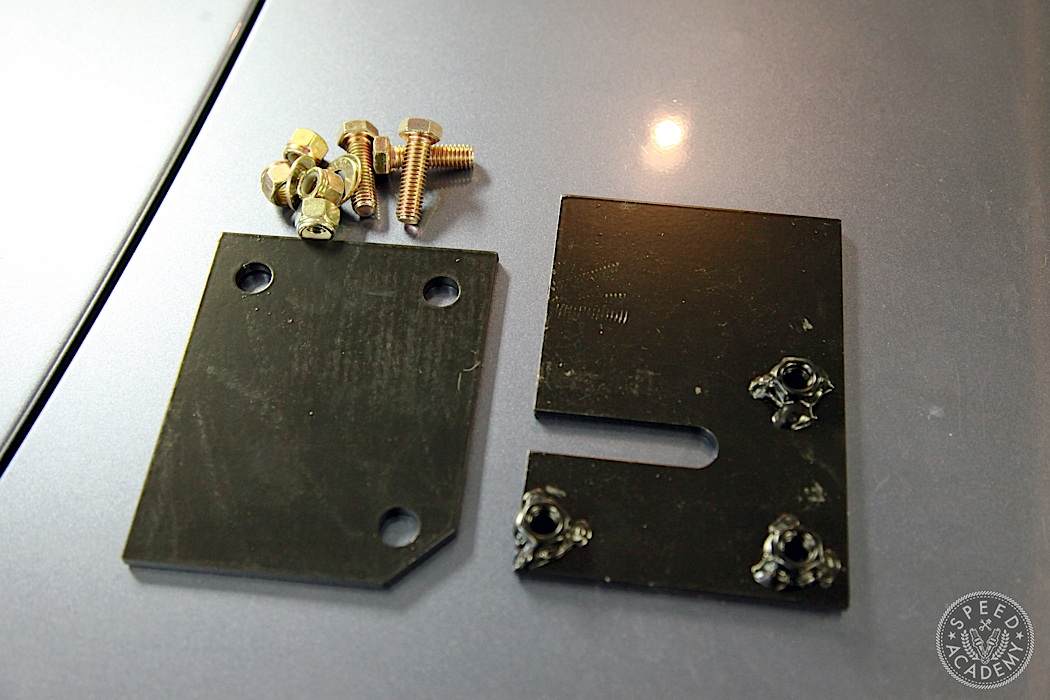
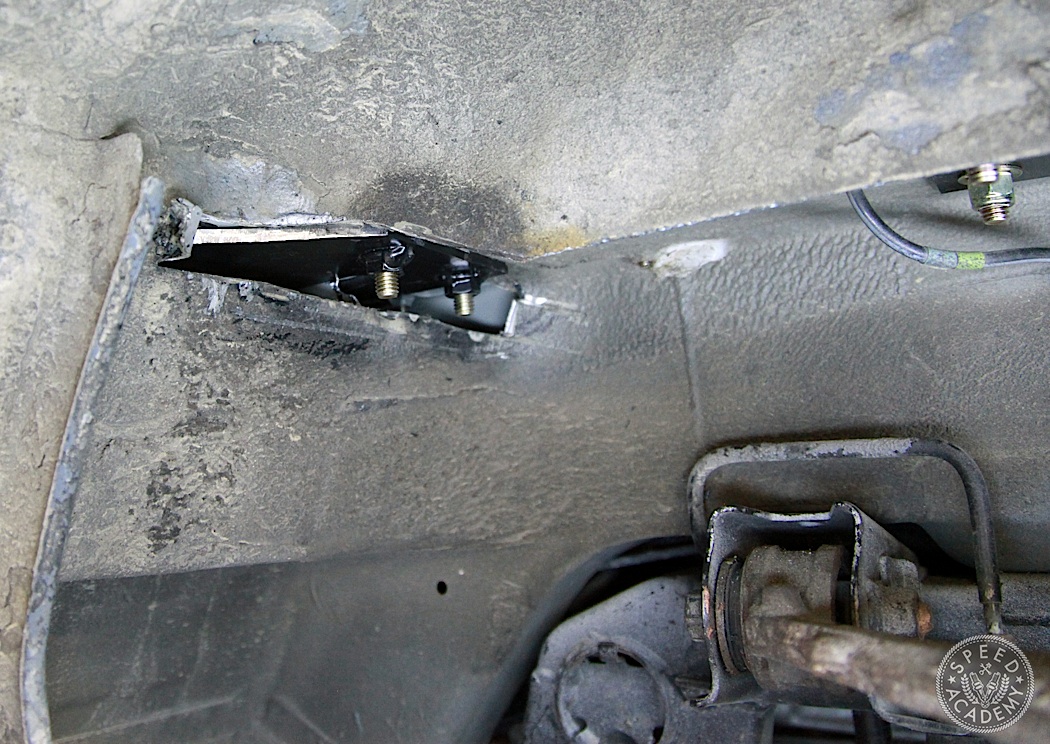
As you’ll see in the video at the end of this post, there’s actually a seam inside the chassis once you cut it open, which is why Rockstar Garage’s backing plate for this location (plate on the right above) has a notch in it. You literally slide the plate into the chassis with the notch giving you the clearance you need for that seam and bolt it in place from on top of the main hoop baseplates.
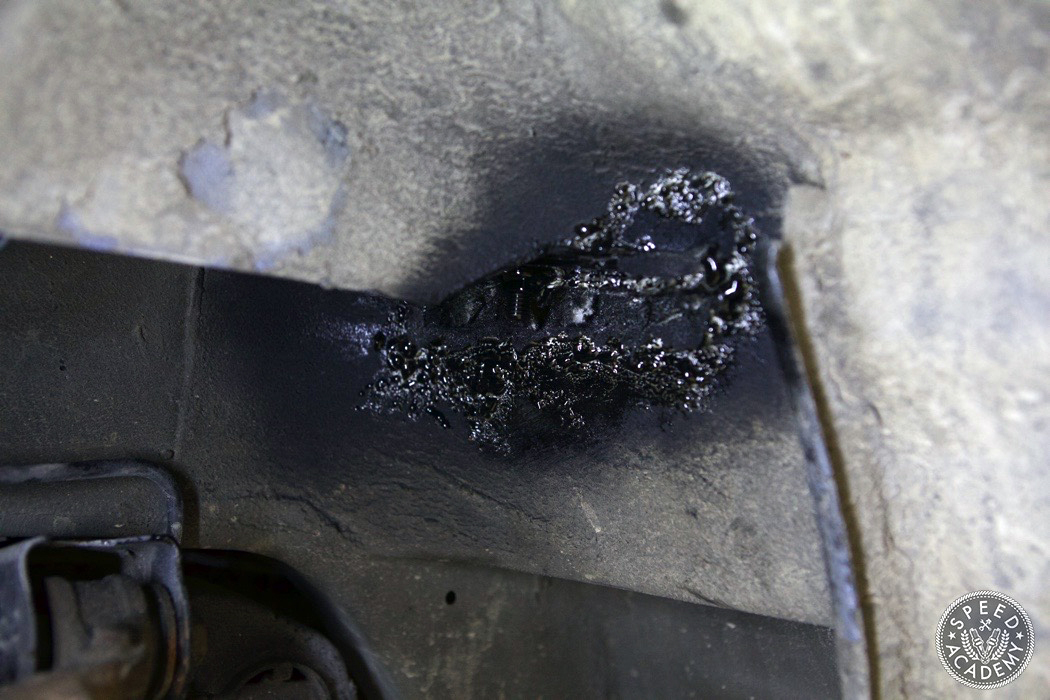
We filled in the opening afterwards using expanding spray foam and sprayed over it with Tremclad rust paint afterwards, but another option we considered is to weld some plate over the holes to seal them up.
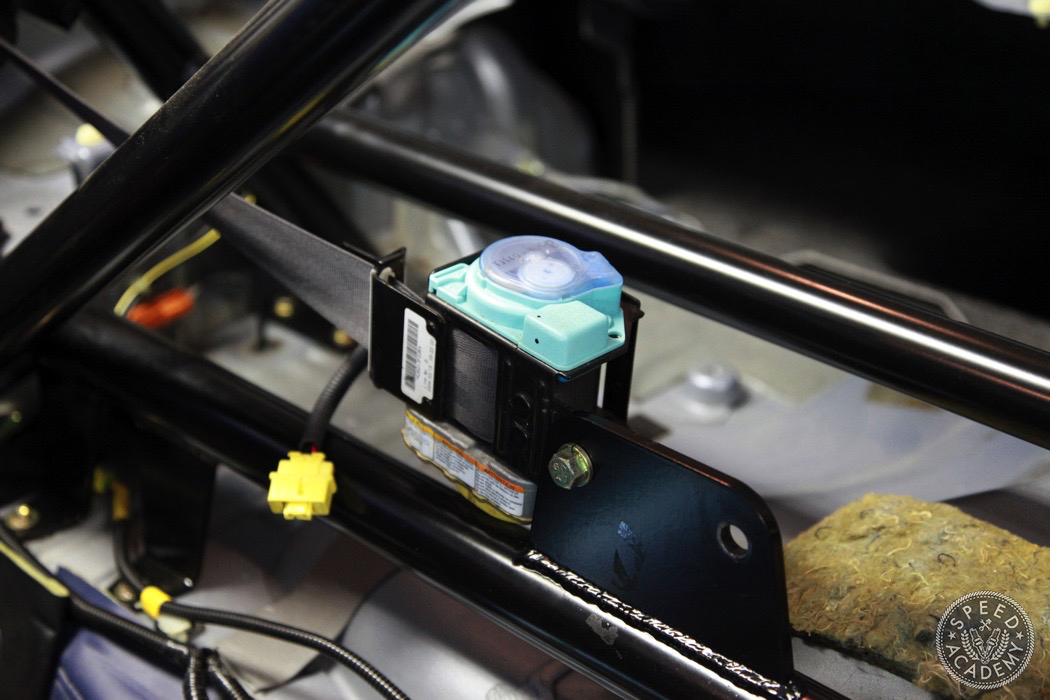
With the 4-point RSG roll bar installed, it was time to bolt the bulkhead bar in place. This is a super easy job, since the bar is designed by RSG to use the threaded bolt holes the OE bulkhead is attached with, so you just plunk the RSG bar in place and bolt it down using the OE bolts. Couldn’t be easier, and thanks to that bracket in the middle of its span we have somewhere to mount the OE seat belt retractors.
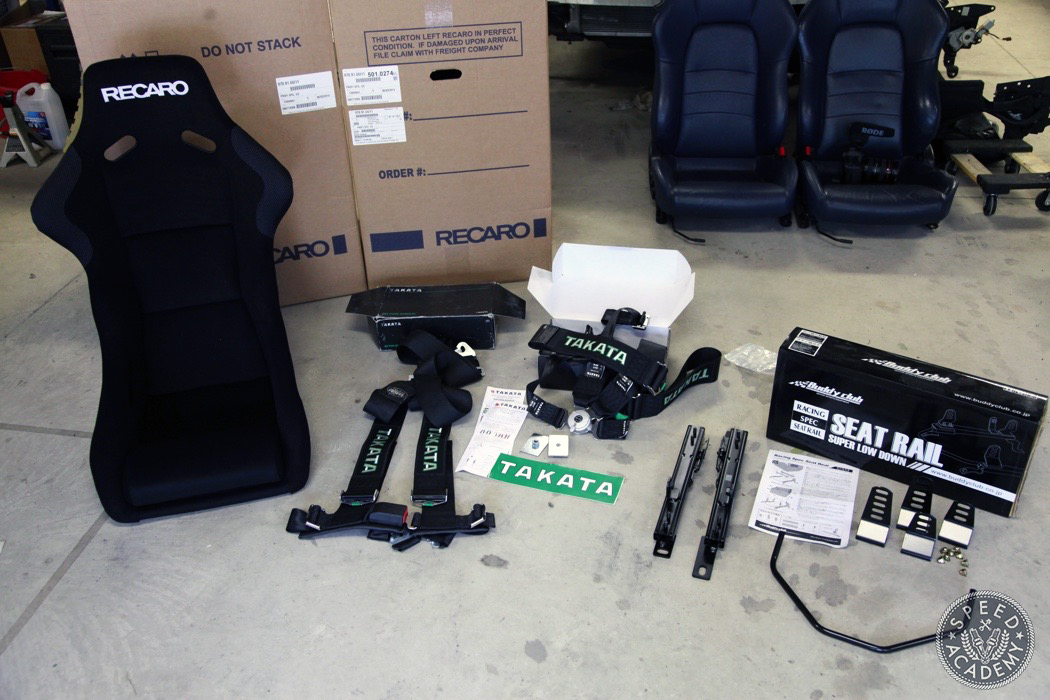
With the roll bar and bulkhead bar installed, we installed some newer black carpeting and fitted all the rear interior plastic trim. Then it was time to fit the Recaro Profi SPG racing seats, using a pair of Buddy Club USA super low down seat rails.
Pete and I completed Targa Newfoundland in a pair of Recaros just like these and we loved them so much we sourced another pair for the ASS2K. They’re a top quality racing bucket, fully certified to FIA/SFI safety standards, and proved to be both durable and surprisingly comfortable during Targa NL in our FR-S.
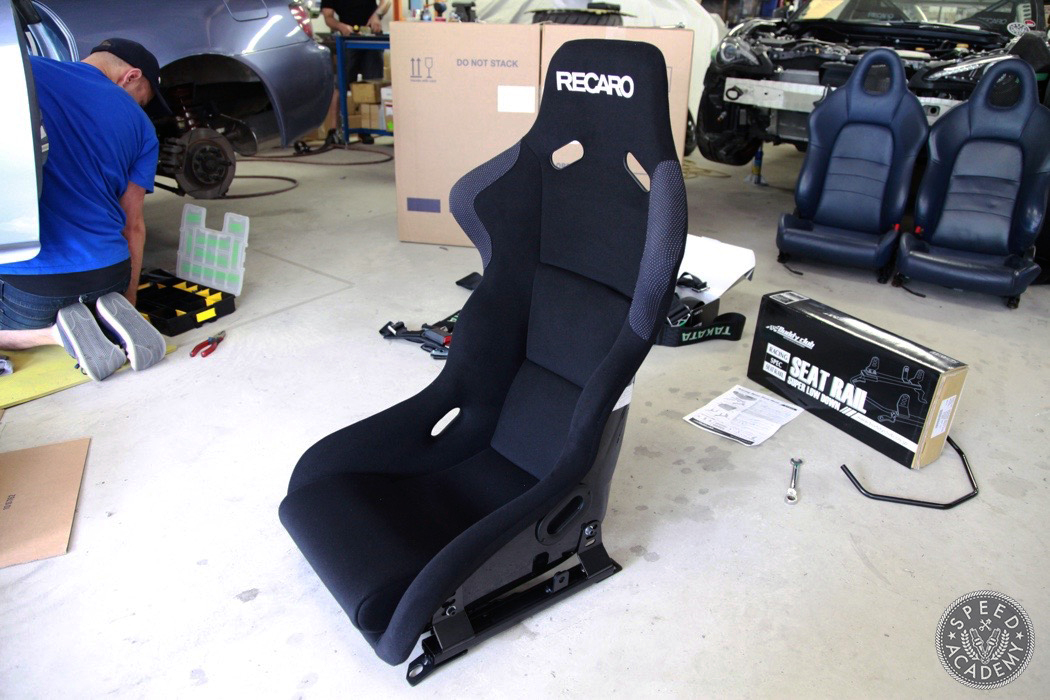
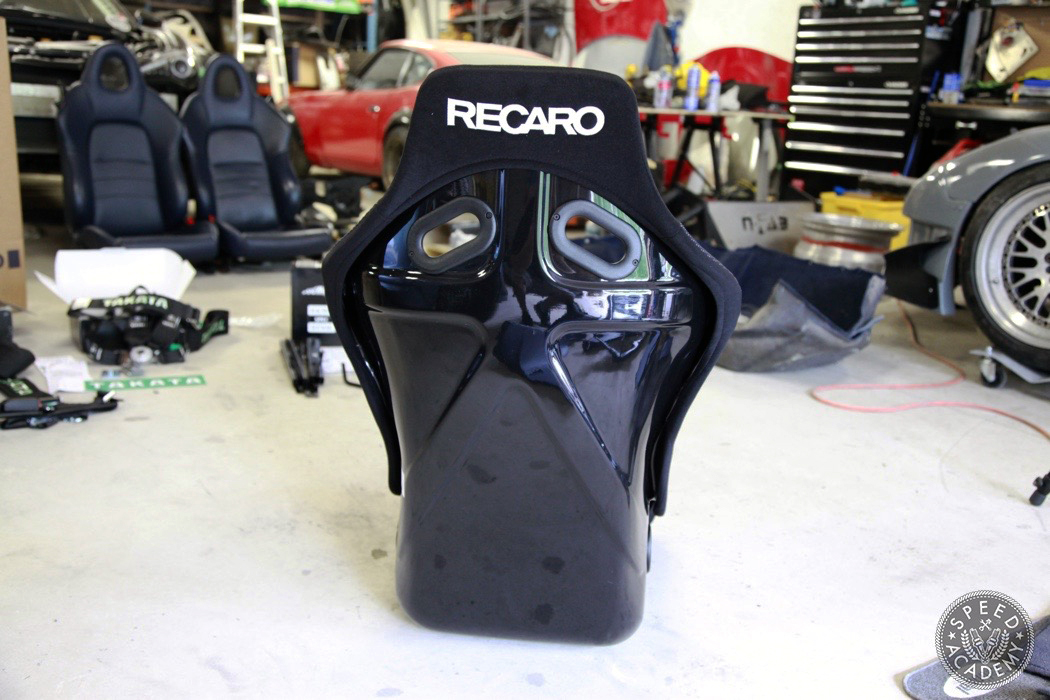
They also offer tremendous support while cornering at racing speeds, thanks to the deep ergonomically shaped shell, high bolsters and high grip material in the shoulder areas. The support they offer helps prevent fatigue while ripping hard at the race track, too, and even for street driving Pete and I both find the Profi SPG fits well enough that we can spend hours in them without even a hint of the discomfort that sometimes comes with a fixed back racing seat.
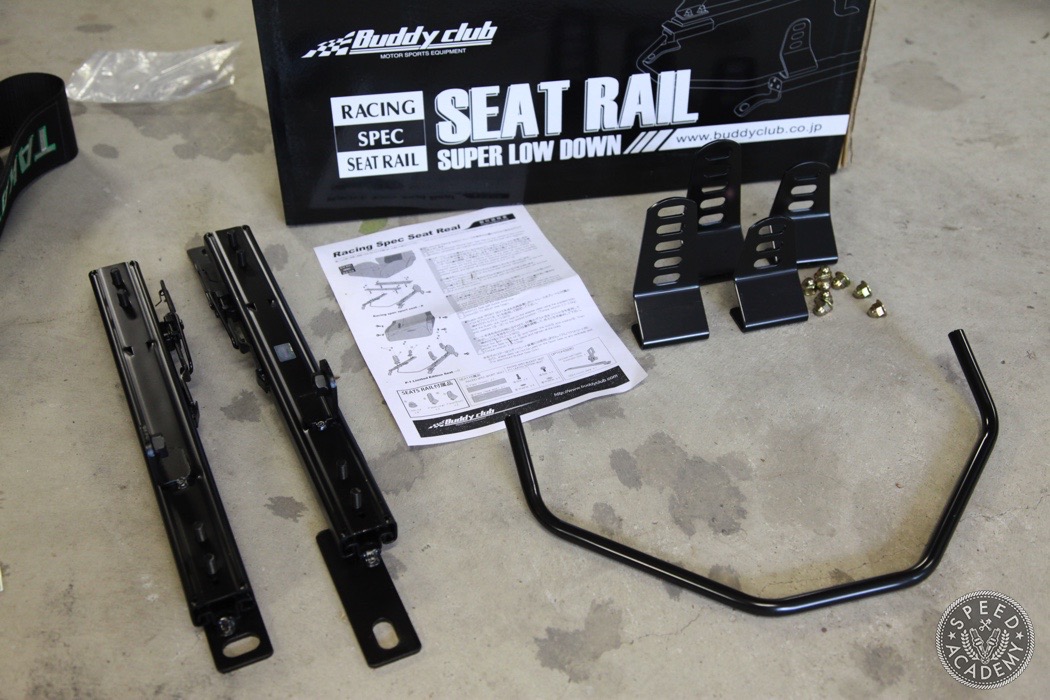
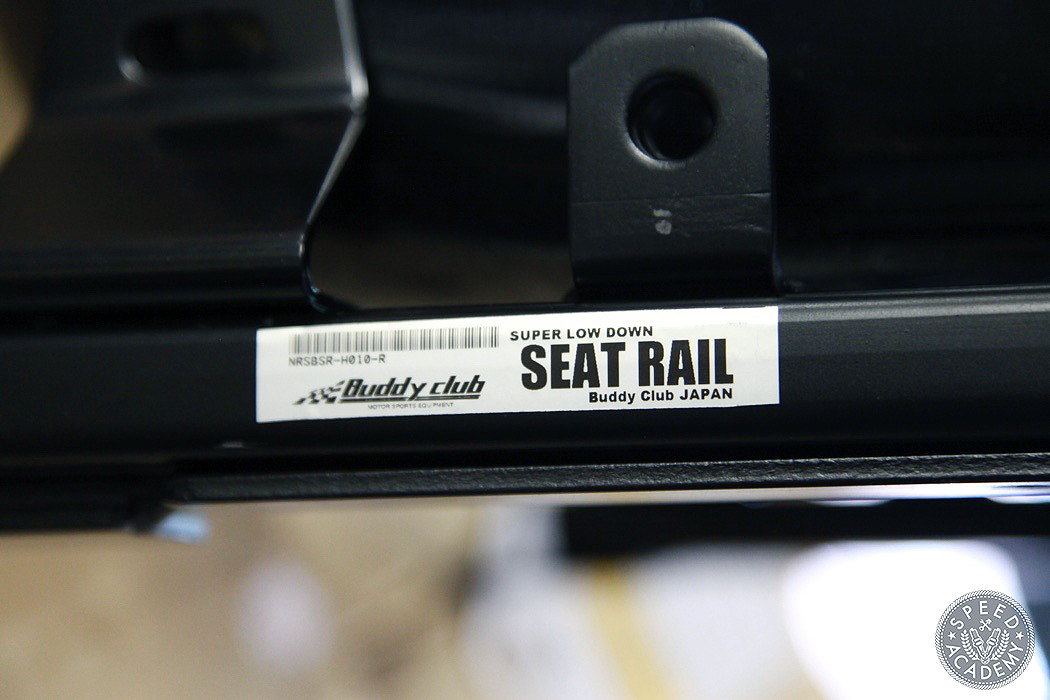
If we were going road racing we would have mounted the Recaro buckets on Recaro’s side mounts and sliders, since these are SFI/FIA certified parts that will pass tech anywhere on the planet, but since the ASS2000 is still a street legal machine we decided to used Buddy Club USA super low down seat rails instead.
These are a direct bolt-in slider and rail system for the AP1 and AP2 chassis, so no custom fabrication required, and because of the huge range of adjustability the side mounts provide we were able to get the Recaros as low as possible.
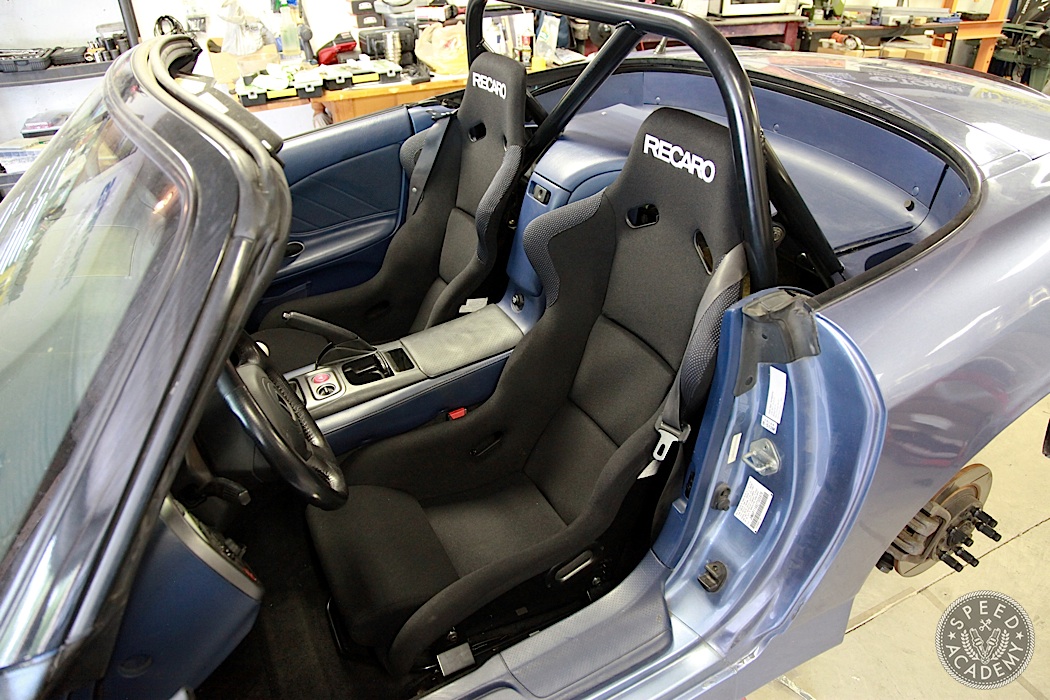
If you’ve ever tried fitting aftermarket seats in a S2000, then you know it’s a seriously tight fit. The adjustability the Buddy Club seat rails provided made it a much easier job, though it still involved lots of back and forth before we got the seats in a position where they mostly cleared the doors (still some light contact on the outer shoulder area of the seat when closing the door) while leaving enough room on the inside to access the OE seat belt buckle. Still, there’s no denying how good the Recaros look in the car and they certainly offer a whole new level of support.
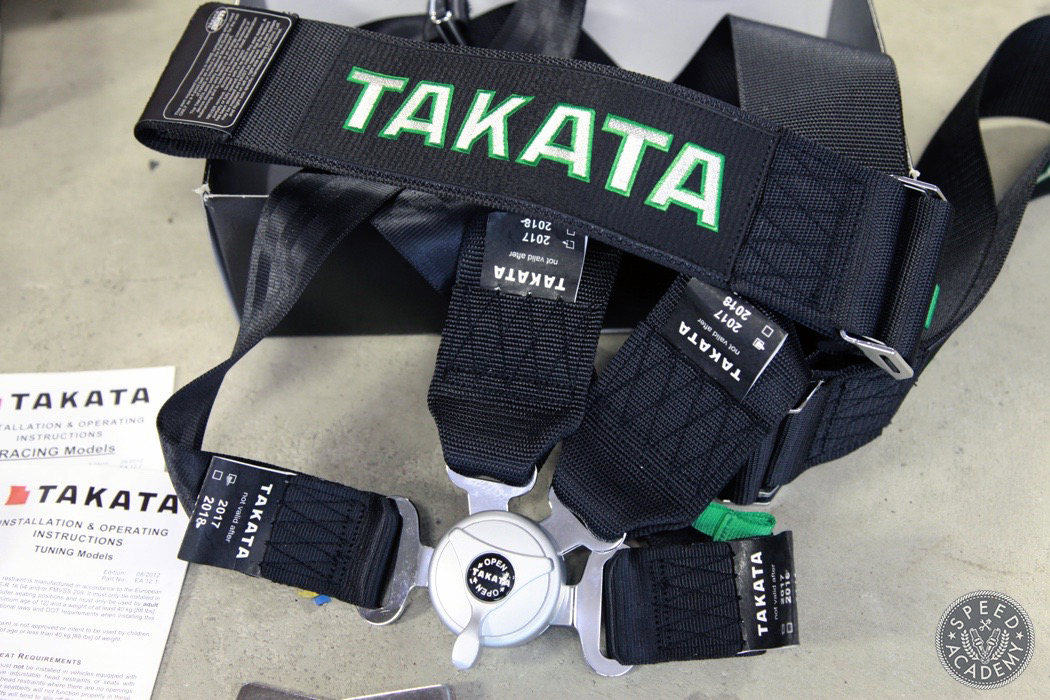
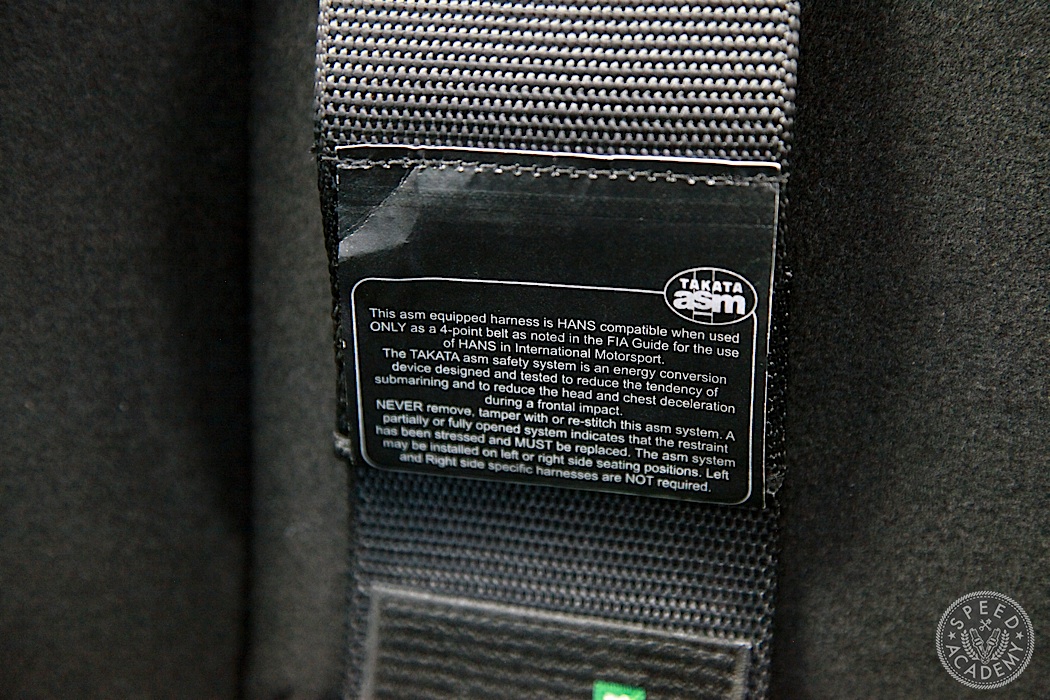
With the seats bolted in place, it was time to install a Takata Racing Race-4 harness on the driver’s side. We want the support and security of a 4-point system when driving at the track, and because this belt uses Takata’s patented ASM technology in one of the shoulder straps they’re completely safe to run without sub belts (or crotch belts, if you prefer) since the ASM system allows your upper body to rotate during a big hit and this prevents your body from submarining under the lap belts. Plus you can swap out the latch and convert the Race-4 to a 6-point belt should you start racing in a series that mandates it.
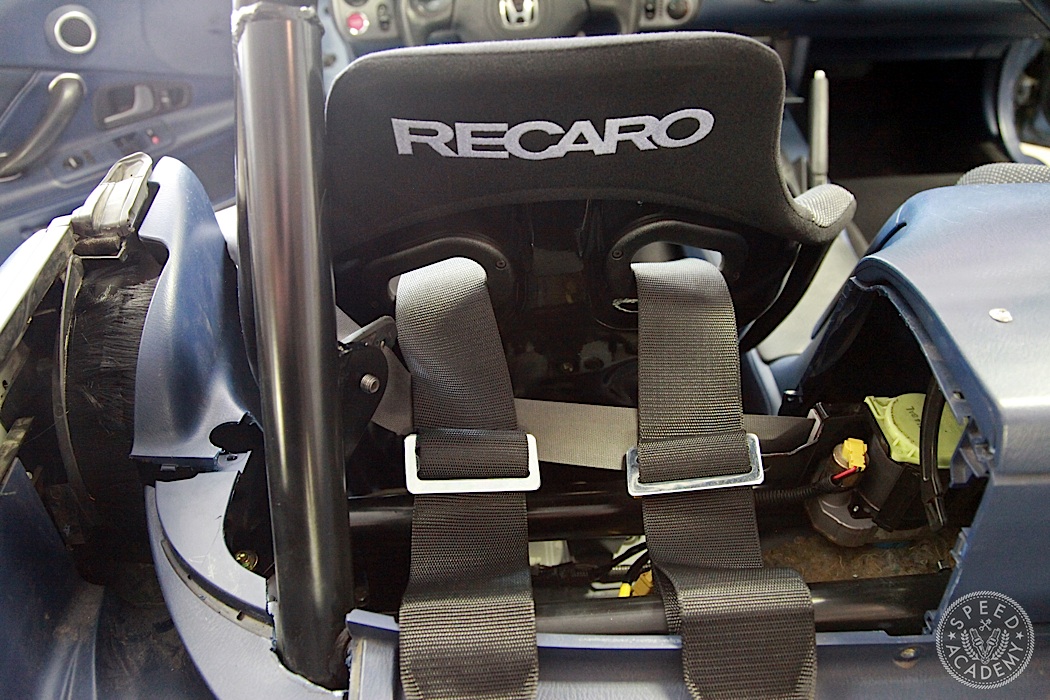
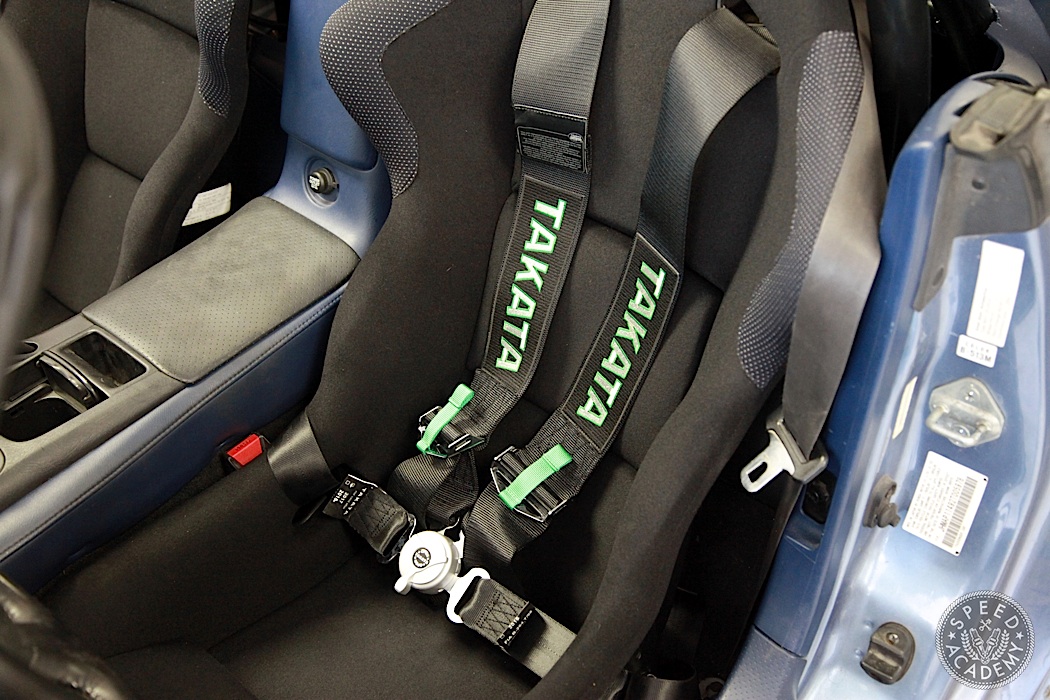
Installing racing harnesses isn’t terribly difficult, especially since Takata supplies extremely detailed instructions, plus there’s also outstanding How To videos on HMS Motorsports’ YouTube channel for this job, but if you’re at all unsure of how to do this, please take your car and belts to a race shop because if you get it wrong it could cost you your life. We’ve installed harnesses enough times to be comfortable tackling the job, which included installing the eye bolts for the belts to snap into as well as wrapping the shoulder straps around the harness bar on the roll bar.
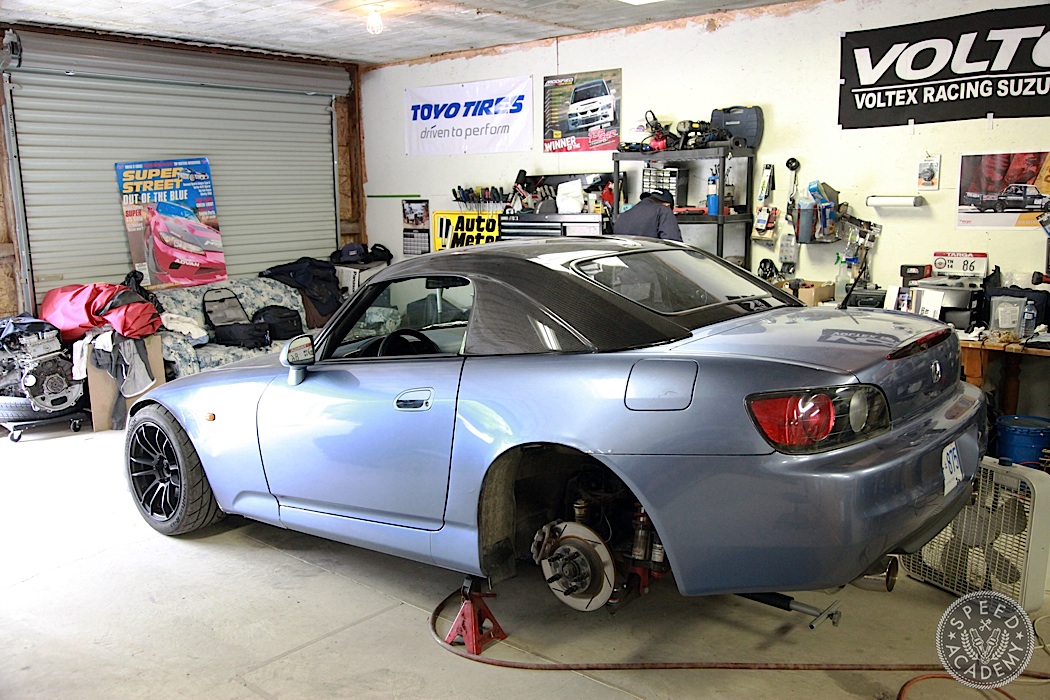
We planned to bolt up the Seibon carbon fiber hard top sourced from Turn14, but like a couple of newbs we didn’t realize the mounting hardware needed to be ordered separately. So for now I’ll leave you with this teaser of the carbon hard top simply sitting in place, but next time we’ll show you how we bolted it in place, along with a few sexy new aero mods.
To see all the pain and suffering involved in this interior overhaul in the form of moving pictures, check out our YouTube episode on it. And hey, if you enjoy it, hit the Subscribe button while you’re at it, would ya?