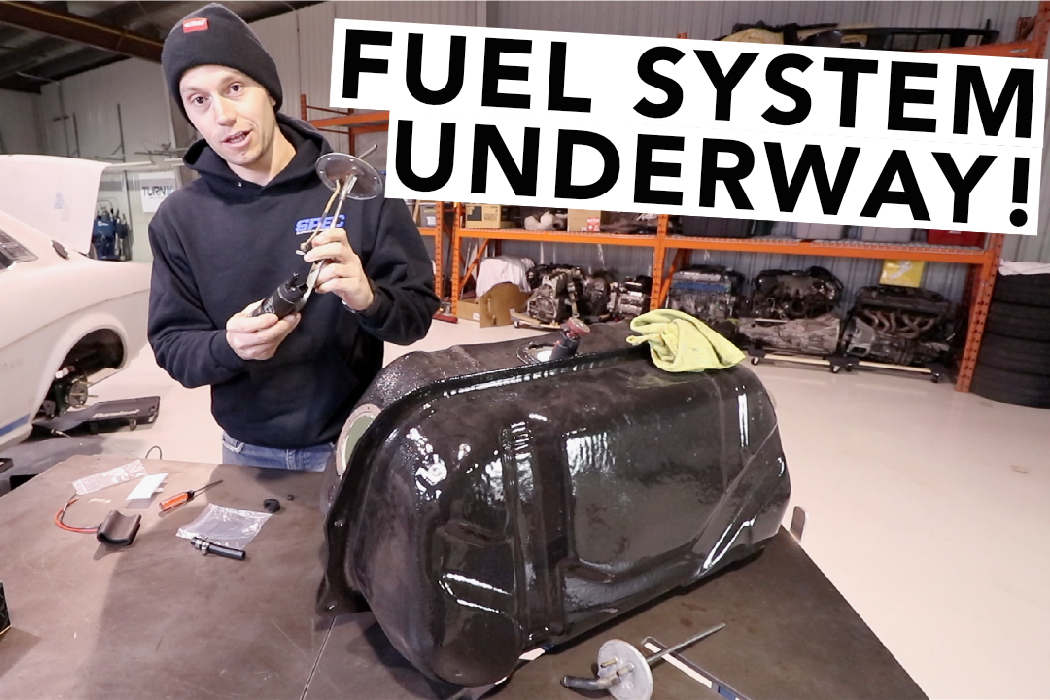
In Part 1 and Part 2 we covered the basics of fitting a Beams 3SGE Blacktop in our 1977 RA24 Toyota Celica GT coupe, which got us to the point that the engine and transmission are bolted securely to the chassis via an AE86 front cross member and an Xcessive Manufacturing trans cross member. All that was left to make it a runner was fuel, electrics, and cooling. Lets cover off the fuel system right now.
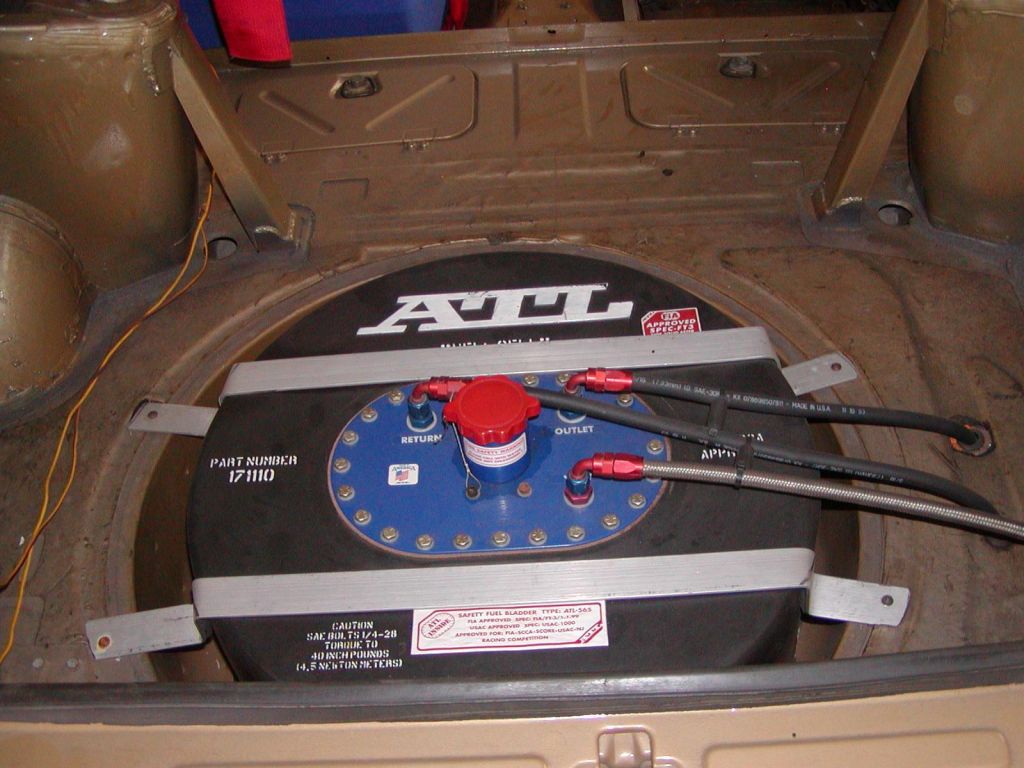
There’s a lot of different ways to set up a fuel system, so how we approached it is by no means the only or best approach. It’s simply what made sense to us at the time. In fact, I was initially planning to install a fuel cell in the spare tire area of the trunk floor using an ATL Well Cell like the one pictured above, since I wasn’t a big fan of the OE gas tank design.
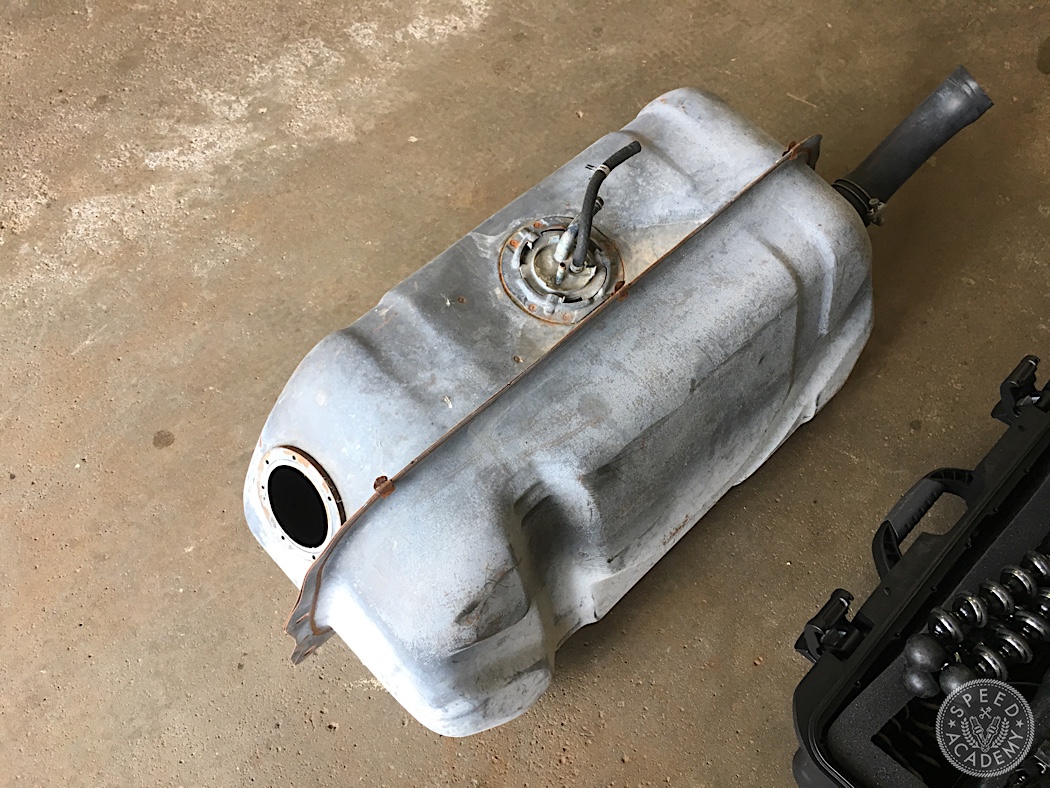
Being a 41-year old tank, I had concerns about its overall safety, plus having peered inside it I could see it had very little baffling, so I had concerns about fuel slosh and pickup problems at the track. But in an effort to keep things simple and get the car up and running before I die of old age, I opted to have the OE tank refurbished by a local shop called Gas Tank Exchange. They thoroughly cleaned it and then coated it inside and out to seal it against any sort of leaks or corrosion. This wasn’t inexpensive (around $350 Canadian), but is about a third the price of a fuel cell, so not a bad option for you ballers on a budget.

The advantage of using the OE tank was that we were able to quickly and easily bolt it to the factory location against the rear seat back bracing at the very front of the trunk. This may seem like an odd location at first, given that it’s not ideal for center of gravity, but it does protect the tank quite well in a rear end collision as it tucks the tank up under the rear parcel shelf. This location also makes sense once you realize the gas cap and filler neck are up high on the c-pillar behind the rear driver’s side window. The other advantage of using the OE tank in its factory location is that we could reuse the factory fuel hard lines without any modification, all of which were still in excellent condition since this car had lived the first 38 years of its life in the metal preservation paradise known as Arizona.
We really only needed to use one factory fuel hard line, the feed line from the tank to the engine, since we decided to set up the fuel system as a returnless design. The Beams 3SGE Blacktop is also set up a returnless design in the Toyota Altezza RS200, the car these engines are sourced from, so we figured why convert it to a return system and add complexity for no good reason.
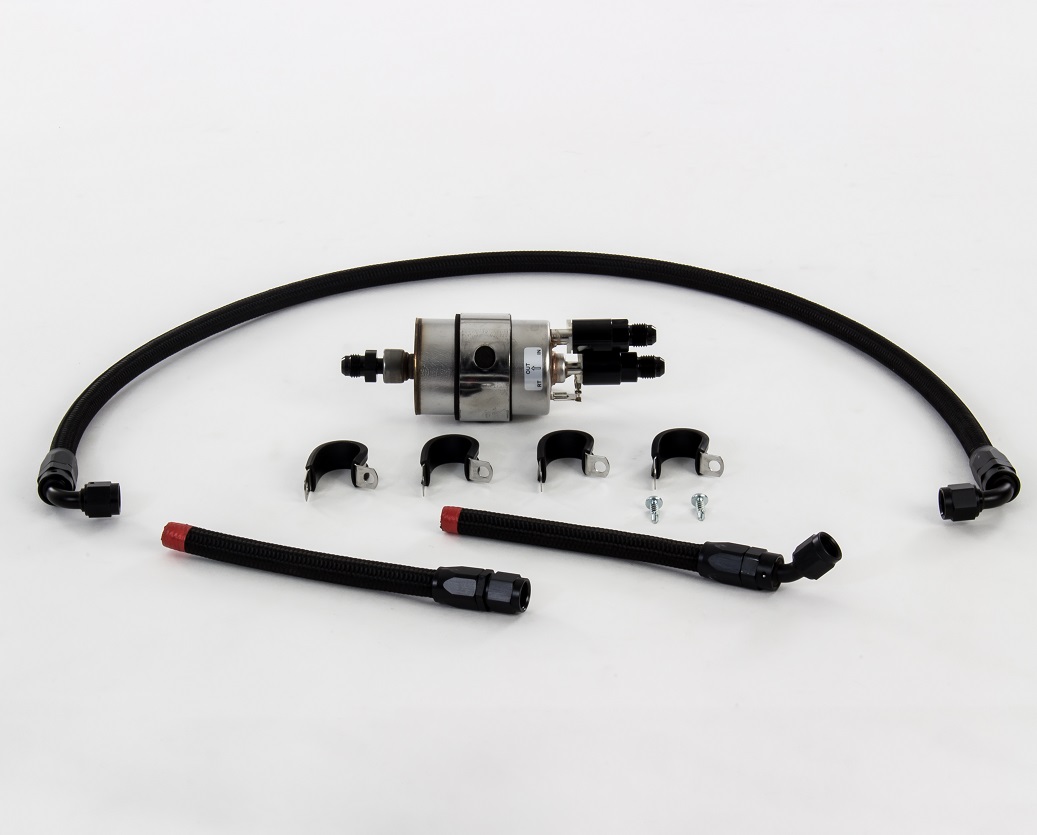
To set this up we decided to use a Sikky Manufacturing universal fuel line kit, which includes a C5 Corvette fuel filter and pressure regulator. This regulator is widely used for LSx engine swaps, but is really a perfect solution for anyone wanting to build their own returnless fuel system and have fuel pressure set at 60 psi (which coincidentally is exactly what Toyota set the fuel pressure to on the Beams 3SGE Blacktop). This kit worked out beautifully for our setup and made quick work of that part of the job.
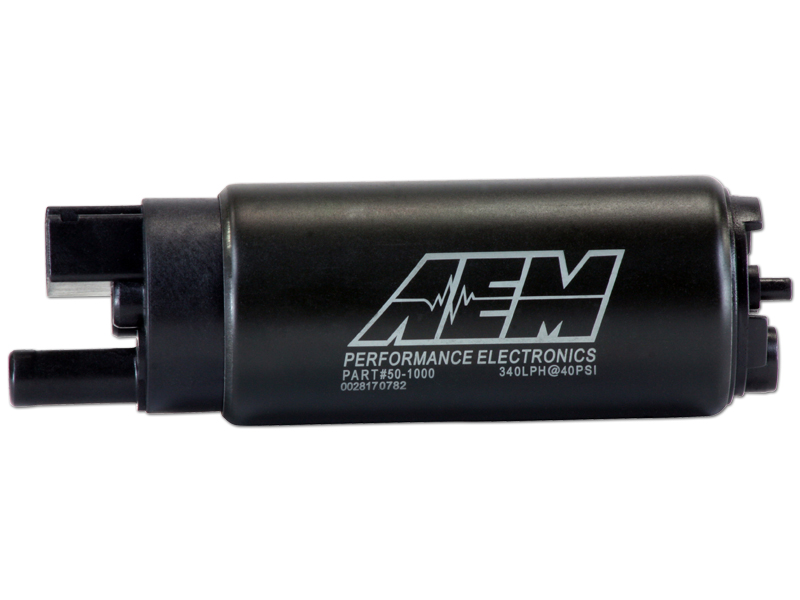
We also needed to address the fuel pump, and for that we turned to our friends at AEM Performance Electronics and their 340-LPH high flow in-tank fuel pump. We were able to install this pump in the factory location in the tank with a few minor modifications to the in-tank arm it mounts on. This pump supports up to 1,000-HP at 43 psi, so we’ve got tons of room to grow with this fuel system should we do anything silly like swap in a 1JZ or 2JZ. Plus AEM offers this pump in an E85-compatible version for all you corn juice addicts out there (we went with the regular version, since Connie is running 94-octane Sunoco pump gas).
Other than that, all we really needed to do was modify the OE Beams 3SGE fuel line that runs from the fuel rail to the chassis hard line using an adapter and a few hose clamps. Check out the two videos below to see how we built the entire fuel system in detail!
Some YouTube commenters did express concern that the factory fuel feed line, which is only 1/4” in diameter, would cause problems, but if you watch our latest videos in the series you’ll see we had no issues with fuel delivery on the dyno or at the track, just a leaky gas cap.
Next update we’ll cover the cooling system, and then after that we’ll go over the engine and chassis wiring. Thanks for reading and feel free to hit us up on social media, in the Comments section, or via e-mail for more information on this engine swap or any of our other projects.