

What is MIG?
To quickly recap what we talked about in Learn How To Weld: Part 1 The Basics, MIG welding is an electric arc welding process where a filler wire is fed automatically which also doubles as the electrode. After the arc starts and the puddle forms on the part, the wire melts into the puddle and the machine automatically feeds more. There are different ways that the wire can feed, such as big globs falling in or the metal pulverizing before it hits the puddle and spraying on. But the most common transfer mode is called short-circuit, where the wire gets into the puddle in one piece as the arc keeps things melted. The whole time, a shielding gas is blown out of the nozzle that the wire comes out of in order to keep the weld clean. These are the components abbreviated into “MIG” – Metal Inert Gas.
The technical name is GMAW – Gas Metal Arc Welding but everyone knows what you mean by MIG, even the curmudgeons who will correct you. The only reason I bring this up, besides telling the Technically-Correct Police that I know and don’t care, is that the I in MIG is misleading. That’s why it’s also sometimes referred to as MAG – Metal Active Gas. This is because the gas isn’t actually inert. In fact, you don’t want it to be. Pure Argon is not the preferred shielding gas because the gas plays a greater part in MIG welding besides shielding, but more on that later.
As a word of warning again, a machine that can’t feed shielding gas is NOT a MIG welder. There are some economy machines on eBay and such that people try to pass off as MIG, but they are really flux core machines and pretty scary ones at that.
Is MIG any good?
MIG welding is simple, economical and, most importantly, very effective. The process may not always produce the sexiest results compared to TIG, but a skilled hand can make them look very good indeed (there are also ways you can cheat, we’ll talk about that when we get into tips and tricks).
Simplicity:
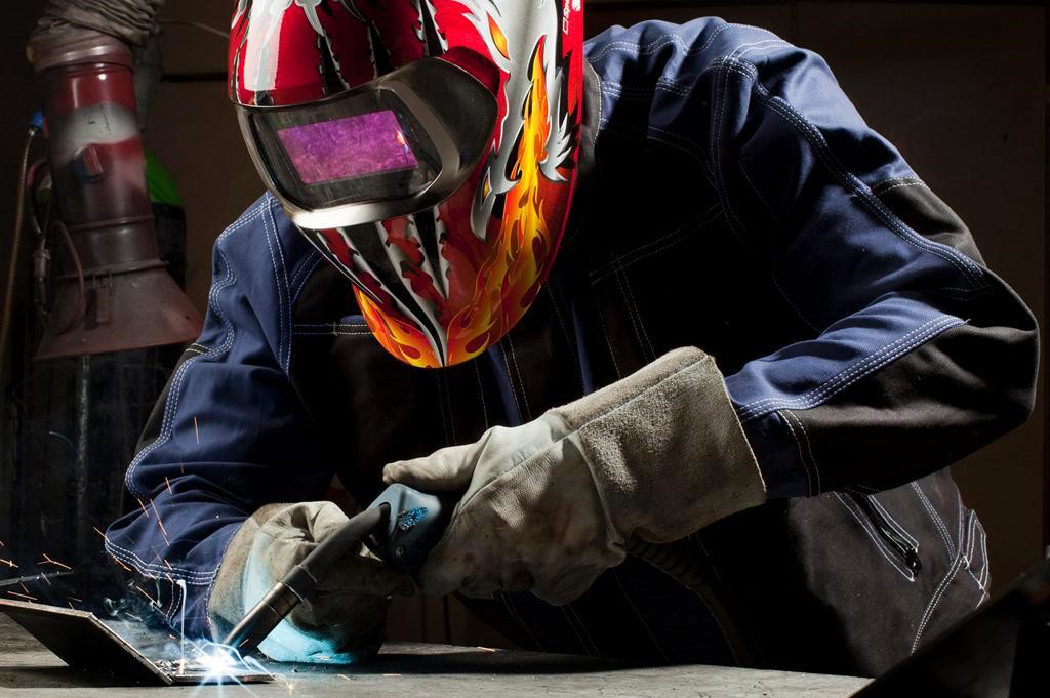
MIG welding only requires you to use one hand. It’s a lot like using a glue gun except delivering metal. The rest of your body is free to help your torch hand succeed. You are free to find the most stable position with your torso and legs. Your other hand can be used like a mobile prop. This is why MIG welding is typically the gateway drug into welding for most people. That and cost.
Cost:
Nowadays you can get yourself a perfectly capable MIG welder for only a few hundred bucks. Yeah, they are Chinese made but guess what? So is your cell phone. More importantly, the good ones work just fine (MIG welders, cell phones too). The brand names also have very affordable entry level machines with Lincoln being the most prolific. Pretty much every big box store that sells tools, sells a Lincoln 140 and 180 (known as MIG-PAK, EASY MIG and others, all the same). The Miller entry level machines are significantly more expensive but they are still an excellent price point and offer worthwhile benefits for the money. And both can be found on the used market for an even better deal.
Brand whoring isn’t always a logical thing, and not that emotional reasons aren’t valid but when it comes to welders, there are some logical justifications to be made. The major brands stand behind their products very well and have lots of certified service centers. They will continue to support and make parts for your old welder long after it’s out of warranty. They also have their own standards so you can often upgrade your machine with parts and kits from the manufacturer (such as spool guns for aluminum).
Effectiveness:
There isn’t a whole lot you would need to weld on a car that either wouldn’t be perfectly adequate to do with a MIG welder or in some cases, even preferable. MIG has a much cooler puddle because the puddle is created by the arc from the wire being fed, not just melting the base metal. This makes welding very thin steel much easier (and there are tricks that can make it even better). Even for the entry level brand name machines and those from companies like Eastwood, there is support for spool guns, and with these you can MIG weld aluminum. It has limitations, namely due to the amount of jam that comes out of an aluminum MIG welder, it’s very difficult to do thinner pieces. I used to say that MIG welds on aluminum, while it can be effective, also looks like cat vomit but I’ve since been shown the light by an expert MIG welder who showed me his aluminum MIG welds which would rival half-decent TIG welds.
Things get sketchier or perhaps, in practical terms, impossible, when you get into the more exotic materials, such as stainless steels and beyond. But unless you’re doing a stainless or baller Titanium exhaust, this isn’t much of a limitation for a car guy. And MIG can do stainless, just not well. I’m sure like with aluminum, someone has a spectacular picture with which to crap on my point but just because it can be done, it doesn’t mean it’s practical in reality. I’m sure you can eat soup with chopsticks or a fork but I’d still rather use a spoon if I can.
We may talk about this later in an article on equipment discussion, but I want to add here that some of the limitations I’m talking about are for the box store grade machines. Higher end machines (read: $$$) can do things like pulsed spray transfer, where the weld metal is sprayed in a pulverized state, off and on, keeping the penetration under control, letting you have a much easier time welding things like thin aluminum.
MIG Anatomy 101
At minimum, a MIG welder will have two key adjustments: voltage and wire feed speed. These take some experimenting to find a happy balance for each application and most machines will have a chart inside the door, and you can look up a good starting point based on the thickness of the part you’re working on, the thickness and type (MIG or flux core) of the wire you have and the shielding gas. These will usually work quite well unless you do something whacky like have a massive stickout (more on that later).

Cheaper machines will have a fixed number of voltage settings, called taps. The next step up will have an infinite adjustment like the wire feed. Having started with a fixed voltage selector, I can tell you that this really doesn’t matter much in practice. We will discuss heat input in detail another time, but if you find that one position is not enough and the next is too hot, err on the side of too hot and you can do things to change the heat input by varying the wire feed speed, travel speed and stickout. In fact, many excellent old timers tell you to set the damn thing to 11 and move it. I wouldn’t agree with that for all situations, obviously, but it’s a good general idea to keep in mind – flow it as hot as you can while keeping it under control.
Inside the machine you will find the wire spool and drive roller. For those old enough to know what it is, it’s a lot like a reel2reel. The wire is unspooled from the reel, and fed out of the machine by a roller that pinches the wire against a loaded idler. More expensive machines advertise as having an all-metal drive mechanism but I never had any issues with the plastic one in my Lincoln.
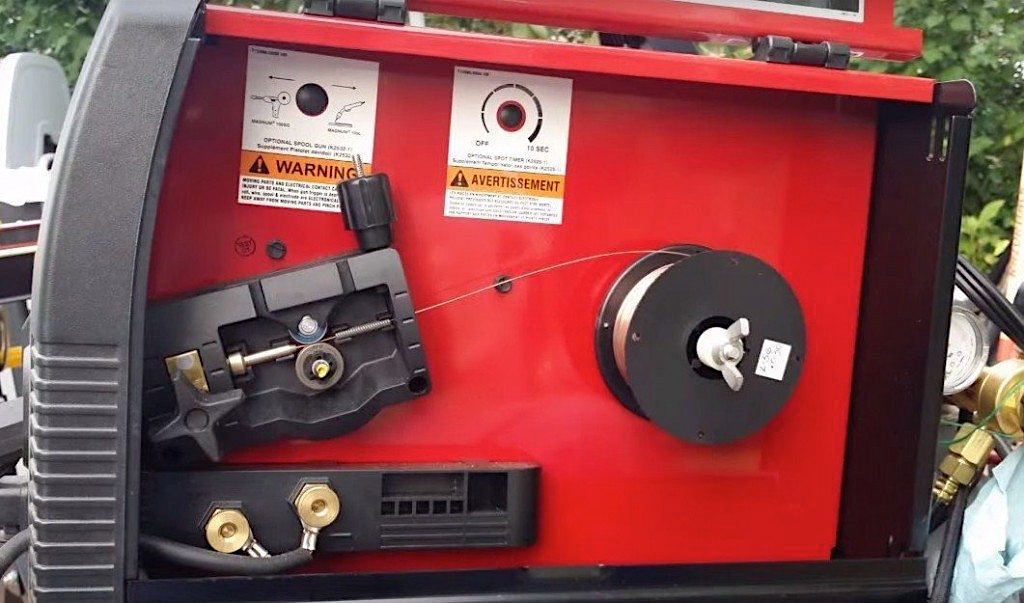
When setting up your machine, pay attention to which roller you select. MIG wire is solid metal and the drive roll just has a smooth groove which the idler is driven against under tension. You will need to install the correct sized wheel for the size of wire you’re using. Flux core wire has flux infused in the middle and if you use the amount of tension required to drive the wire like with MIG, you will crush the flux and have feeding problems. The flux core drive wheel will have teeth cut into the drive groove and you will want to use the minimum amount of tension required to get the job done.
Here by the drive mechanism, you will also find the attachment for the gun and the ground clamp. This is one of the most common sources of issues for beginner welders because the machines often come wired for flux core, which uses opposite polarity from MIG (determining which of the gun and ground clamp are +’ve or –‘ve). Flux core needs something called EN or electrode negative, meaning that the current comes out of the gun/wire and into the part (gun connects to negative, ground clamp to positive). This is also called “straight” polarity because you’re shooting the electrons forward. MIG requires EP or electrode positive, meaning that the current flows from the ground clamp/work piece and up into the gun (gun connects to positive, ground clamp to negative). This in turn, is known as “reverse” polarity. If your welds look like you’re on acid, first check that your gas is on if MIG welding, then check the polarity.
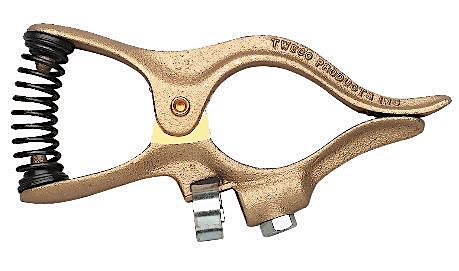
You can also see those pathetic wire spools that are included with machines, along with the stupid flat face shield with a fixed shade lens. The only use for those is for them to claim that they are selling everything you need to weld in the box. Most of these should be replaced but the ground clamps are usually OK, especially the Lincoln ones. The ground clamps included with the Miller machines should be thrown in the garbage. Get yourself a Tweco of the appropriate voltage range. It’s the first thing I do to any machine with a ground clamp.
Shielding Gas:
The most common shielding gas used for MIG welding is called C25 – a mix of 75% Argon and 25% CO2. This mix results in the best combination of welding heat and weld quality. The CO2 contributes to the reaction, especially in the form of getting more heat into the part. In fact, you can use straight CO2. This will save you some money and if you need to get a bit more jam out of your machine before running out of amps, either in the machine or your breaker, CO2 will get you a little extra. It comes at the cost of a dirtier puddle with a lot more spatter and it’s generally tougher to get it dialled in to get a nice result. Also, because of the added heat and difficulty of control, you don’t want to use it for things like bodywork sheet metal. When you’re just starting out, definitely stick to C25.
Spool It:
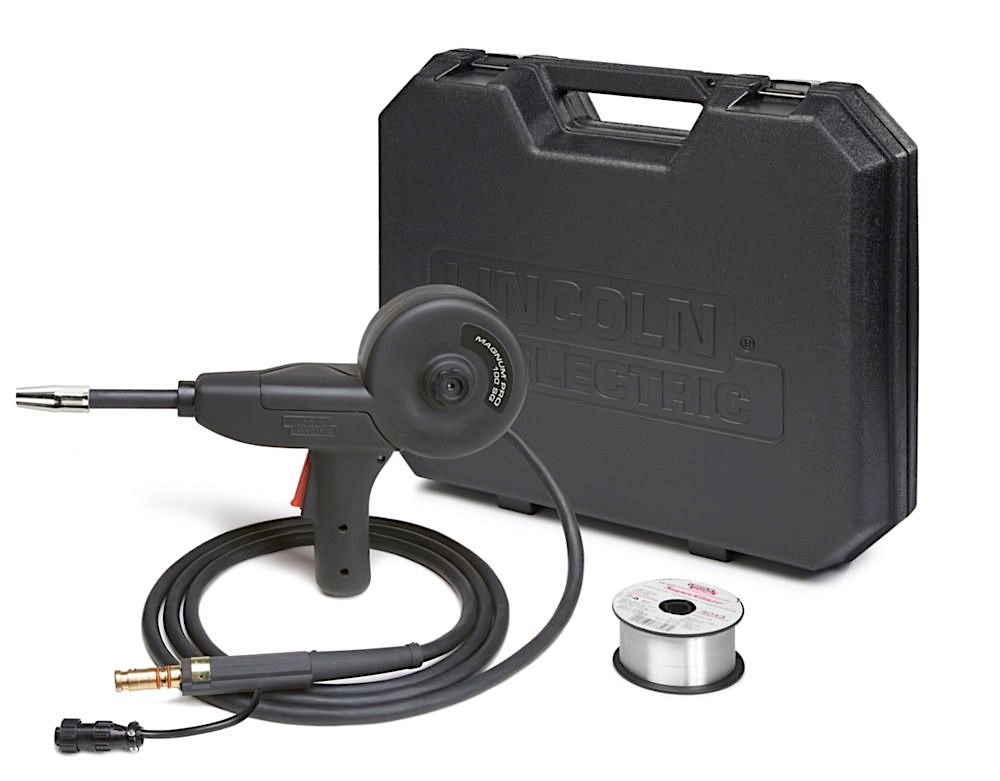
If you want to MIG weld aluminum, the biggest challenge is how soft the wire is. MIG welders typically “push” the wire. In other words, after the wire comes off the spool, the drive inside the machine pushes the wire up through the torch cable and through the torch. But aluminum wire is so soft that it will just bend and coil up. You can buy MIG welding guns that pull, where the drive mechanism is in the torch. So the spool is still in the machine but you get it fed once and after that the gun will pull it. The more common approach is a spool gun and as the name suggests, the gun contains the spool and the drive mechanism. This gives the wire a straight shot out of the drive roller.
If you’re just starting out, don’t worry about this too much. Just make sure, if MIG welding aluminum is even a possibility in your future, that the machine you select supports a spool gun and has a spool gun available for it, either from the manufacturer or through 3rd party compatibility. The machine needs to have a way to switch to spool gun mode to disable the internal mechanism and control the wire feed of the gun.
MIGing Aluminum:
The reason you don’t want to worry about learning to use a spool gun if you are a MIG beginner is that it takes everything that’s challenging about MIG welding and makes it all more critical and the window for things to work well a lot narrower. Aluminum is welded using spray transfer so you need to maintain it in that mode. Spray transfer requires a lot more amperage to occur and it’s almost at the point where it’s too much. As a result, if you use a bit too much jam, you will melt the contact tip (the wire will burn all the way back to the nozzle and melt it). And if you don’t move steadily and quickly, which is one of the hardest things to master initially, you will either burn through your part or deposit a giant pile of filler metal that won’t be of any use (you’ll probably be able to pull it off with pliers, there will be so little penetration).
Spool gunning aluminum with a MIG welder can work great. And if you master it and you need to do high volume work, like welding trailers, it is absolutely the way to go. You can make perfectly good welds very quickly, and after enough practice, make them look damn good. But wait until you have your steel MIG game down before trying or you will be suicidal. You will also want to invest in a high end MIG machine, with optimized capabilities for aluminum. But these machines are very expensive so if you decide you need one, you will know it without a doubt by then. But for everyone else, if you have any intent to do significant aluminum welding, plan to learn TIG.
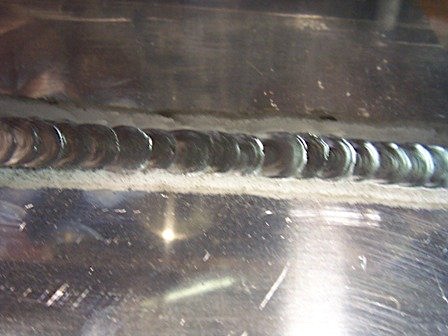
Aluminum MIG welds can look like this:
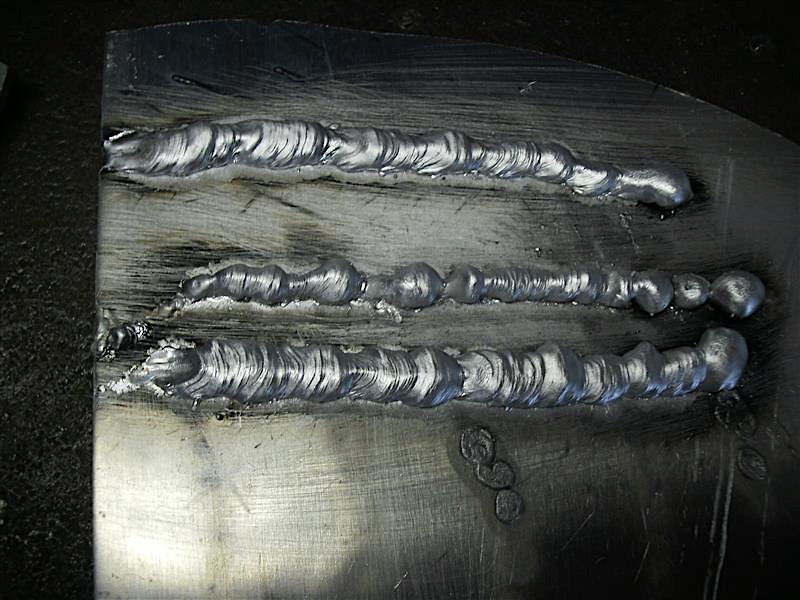
But for a long time, yours will look like this or worse:
Once your steel welds start reliably looking more like the first pic than the second, get yourself a tank of Argon (aluminum MIG requires 100% Argon), a spool gun and a pile of patience (or a dealer quantity of Adderall).
Getting Started
First thing’s first, decide on a machine. Before narrowing down your selection, you should realistically determine if you have access to 220. Do you need it? Honestly, probably not. The problem is that if you do end up needing it, there’s not much you can do. It’s a tougher decision with the newer inverter machines because due to their efficiency, they will do more on 110 with a typical household breaker. For up to about 1/8” you are fine. Past that, it will depend on the efficiency of your machine and the circuit. Most households have a lot of things on the same breaker, so even if you have a 20 amp breaker serving your garage, it doesn’t mean you have 20 amps to play with. Having a blackout in your garage while welding under the car sucks.
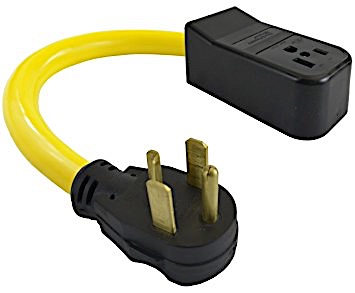
If your garage doesn’t have 220 and you have no easy way of wiring it in, or don’t feel like doing it, one option could be to use the dryer plug. If you’re fortunate that your laundry room is within reasonable reach, then you can get a long extension cord and an adapter from the typical 3 prong welder 220 plug to the 4 prong dryer circuit. I did it this way for a long time. It was a pain but it worked, until my welding became sufficiently prolific to motivate me to hard-wire it.
Another reason that 220 is desirable is that if you’re going to try MIG welding aluminum, then MIG aluminum is even more power hungry, so limiting the machine to 110 will limit your aluminum capacity even more.
The following are my personal recommendations for starter machines:
Lincoln:
The most common Lincoln machines to start off with are the MIG PAKs that most box stores with tools will carry (known as EASY MIG in some markets). If you went through the decision tree above and you won’t have access to 220 then the MIG PAK 140 is a viable option. But I would urge you to get the 180 because at this power level, you will be able to do pretty much anything you would ever need to do on a car – even the heaviest brackets and reinforcement plates. If you really can’t see yourself getting 220 to the garage or you want to primarily weld on 110 then I would suggest a different brand.
Another Lincoln option if you find a good deal in the classifieds is the higher end Power MIG line, especially the 180c.
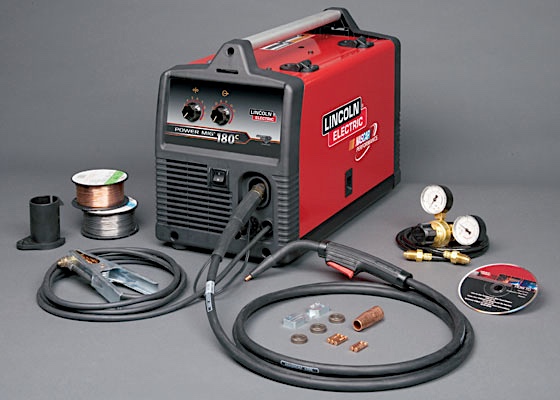
I wouldn’t pay the retail difference from the MIG PAKs but on the used market the difference becomes smaller so it would be a worthwhile investment. The Power MIG have a metal drive mechanism and they have the infinite voltage adjustment. But in practice, I don’t think these are a big deal. They’re better to have than not but don’t sweat it if you can’t find one of these for a good deal.
Both of these will take the Lincoln 100SG spool gun to weld aluminum.
Miller:
If you can save up a bit more, it would be worth it to go blue in my opinion. The Millermatic 211, both the old and new version, offer several appealing advantages. First is the fact that they are dual voltage (they call it MVP – Multi Voltage Plug). This gives you the obvious flexibility of being able to weld using a 110 outlet and then simply swapping plugs and plugging into 220 if you need the extra jam.
The 211 also has “auto set”, where you pick the size of wire you are using and the thickness of metal and the machine picks the power level and wire feed speed for you. I’ve used these a lot and it works really well. You can fine tune it by turning the thickness/voltage knob a little higher or lower if you’d like a hotter or colder weld.
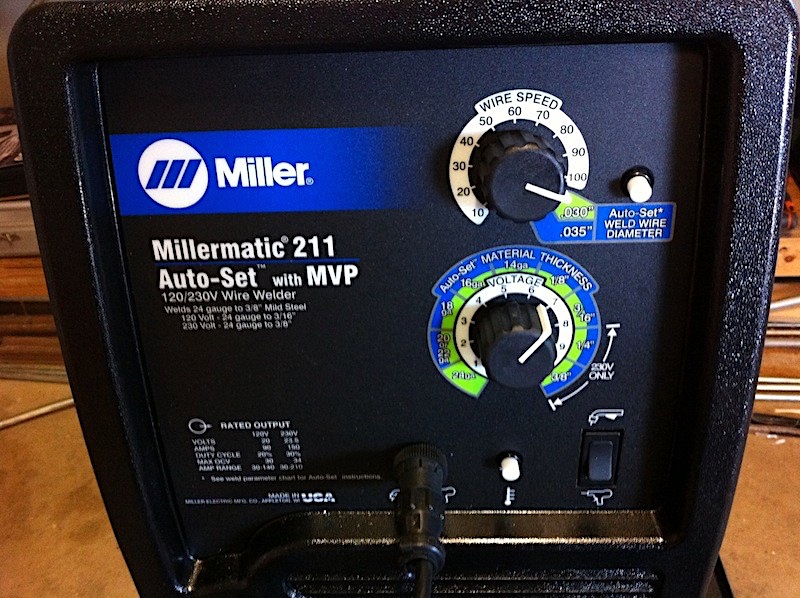
This is the older 211 and there is absolutely nothing wrong with it, so if you can find one for a good deal used, go for it.
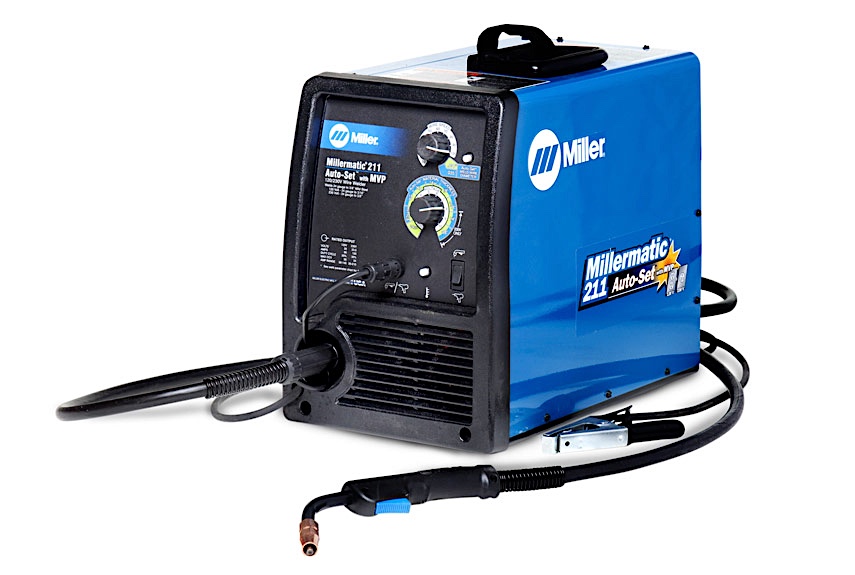
The new 211 is basically the exact same thing but more efficient. It’s drastically smaller and lighter due to being an inverter (as opposed to transformer), and as a result it’s also more efficient so it will consume lower amperage for the same output amps. This is especially beneficial for welding on 110 because you will be less likely to blow your shared breaker.
For what it’s worth, this is the machine I personally use right now. I’ve yet to plug it into 220 and I have hard-wired high amperage 220 outlets in my garage. I’ve welded close to 3/16” steel brackets with it on a shared 110 plug on a long extension cord and I’ve never tripped the breaker. It also has a very cool feature where it feathers the wire feed at an internally programmed rate relative to your actual set rate. This is desirable because it takes time for the arc to start and for the puddle to form so without this, the weld is usually extra cold and spattery at the beginning and then things settle down. With the new 211, it starts really smoothly.
Hobart
Hobart makes some excellent machines and as of the mid-90s, they have the same parent company as Miller. Conveniently, after Miller released the new 211, Hobart has started offering a 210 MVP which looks suspiciously like the old Miller 211 minus the auto-set but with the dual-voltage. So if you can get a good deal on a Hobart 210, you can see it as getting a non-autoset 211 for cheaper.

Eastwood
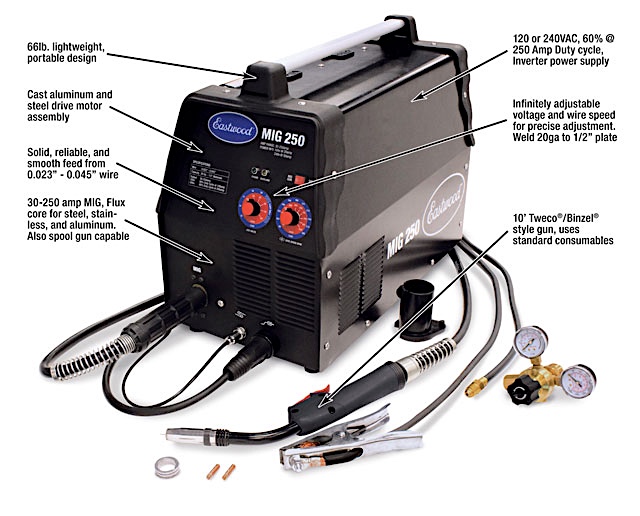
The best of the Chinese brands, in my opinion, is Eastwood. Mainly because they’ve been around for quite a long time now and have a very diverse lineup. So the odds of getting continued support is very good. Functionally, this level of machine offers a lot. From dual voltage to infinite voltage adjustment and metal drives. Eastwood also offers a spool gun. I’m sure others do as well but I know Eastwood does. Their support is also terrific. I know of guys who bought their TIGs and plasma cutters, and some have had the machines arrive dead, or had them fail after some time and before they had a chance to ship their machine back to Eastwood, a new one was at their door. So the functionality and price, combined with this level of support makes Eastwood a worthwhile gamble in my mind.
Others
Many guys online have reported good success with Everlast but I don’t know anyone personally so can’t say. There are many others, brand name and not. As far as the non-brand names, I don’t have any first or second hand experience to share so I can’t make any recommendations other than to warn you about going too cheap. Again, the cheapest wire feed welders, are not actually MIG welders but basically they’re stick welders that feed flux core wire. This is because they not only do not support shielding gas but the electrode is always hot! So the trigger literally only fires up the wire feed motor. I’m not going to presume to tell you what to do with your money but if it’s tight, then I would lean towards finding an older used brand name machine that fits your needs and budget.
That’s cool that MIG welding only requires you to use one hand. I imagine that can be really useful in any number of industrial projects. If I worked in an environment where I had to weld regularly, it would be nice to use equipment that is convenient and safe.