

My plan for the day had changed from the last post, and I now aimed to remove the heater matrix/blower fan/climate control unit from behind the dashboard.
Having arrived and put the car up on axle stands, I first drained the coolant out of the system and set about removing the dashboard trim pieces and centre console. Having pulled the airbags and stereo out previously, this step went fairly quickly and easily.
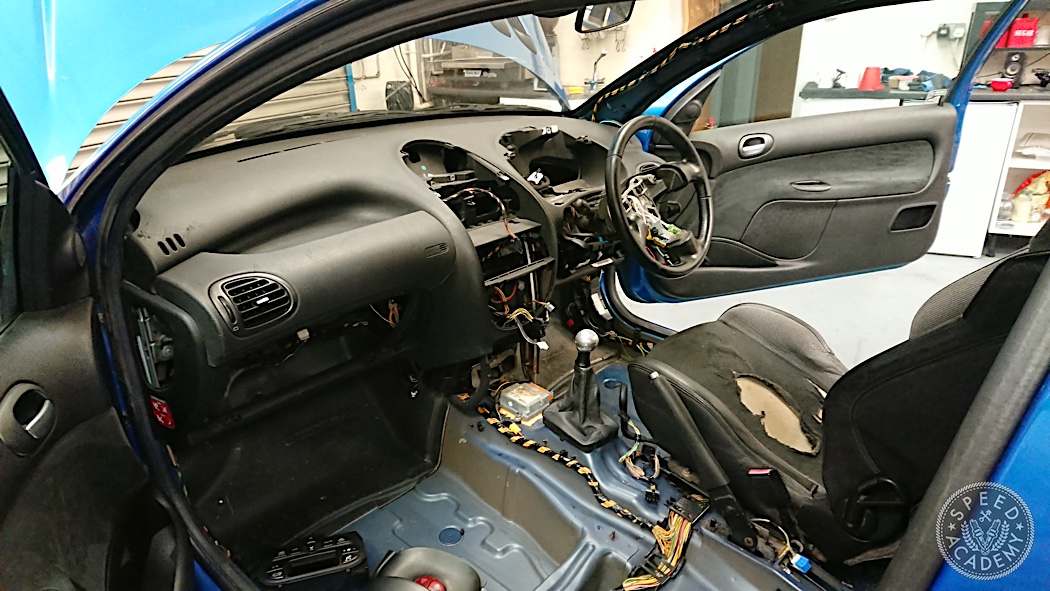
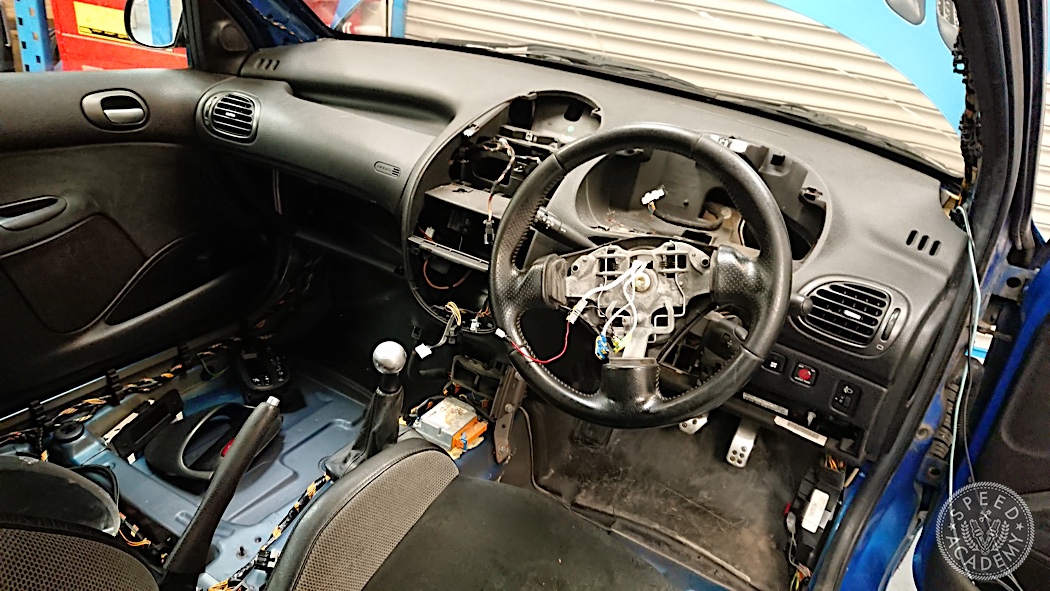
In order to gain access to the climate control unit, I would have to remove the entire dashboard, so the steering wheel, indicator/wiper stalks, multi function display and gauge cluster all had to come off first. With these parts removed, the steering column un-bolted, and the bolts retaining the dash to the chassis removed, I set about trying to remove the dash.
Removing the dash was more complicated than previous cars I’d undertaken this task on, and I had to disconnect a lot more electrical connections than I’d hoped to. With these disconnected, the only challenge remaining was to pull the dash clear of the steering column, this is particularly difficult as the column passes through the dash, and by trying to remove minimal electrical connections, the column somewhat more cumbersome than I’d have liked it to be.

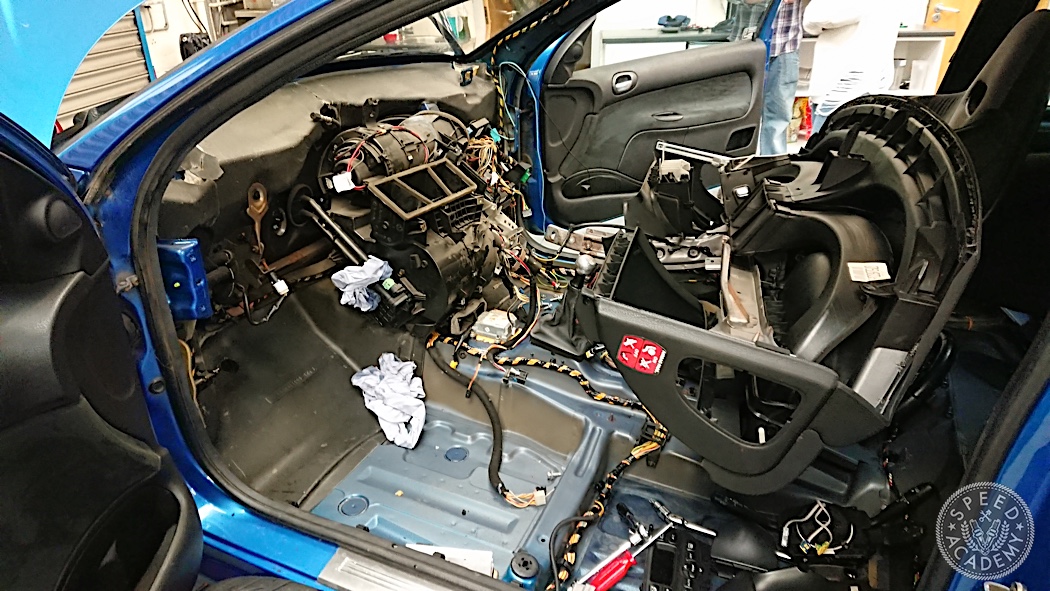
Having finally got the dashboard clear of the steering column and free from the car, the climate control unit could now be removed. This required the heater core fluid lines (coolant lines) to be bypassed, and the air conditioning evaporator lines to be disconnected. As the air-conditioning system had already been de-gassed, the air-con lines on the engine bay side were cut to allow the unit to be pulled free, and the coolant lines were crudely bypassed, to be completed in a more reliable method at a later date.
The climate control unit pulled clear of the chassis without much difficulty, leaving just a thick layer of heatshielding/acoustic foam lining the firewall. This was then removed using a box cutter and a good amount of pulling & tearing.
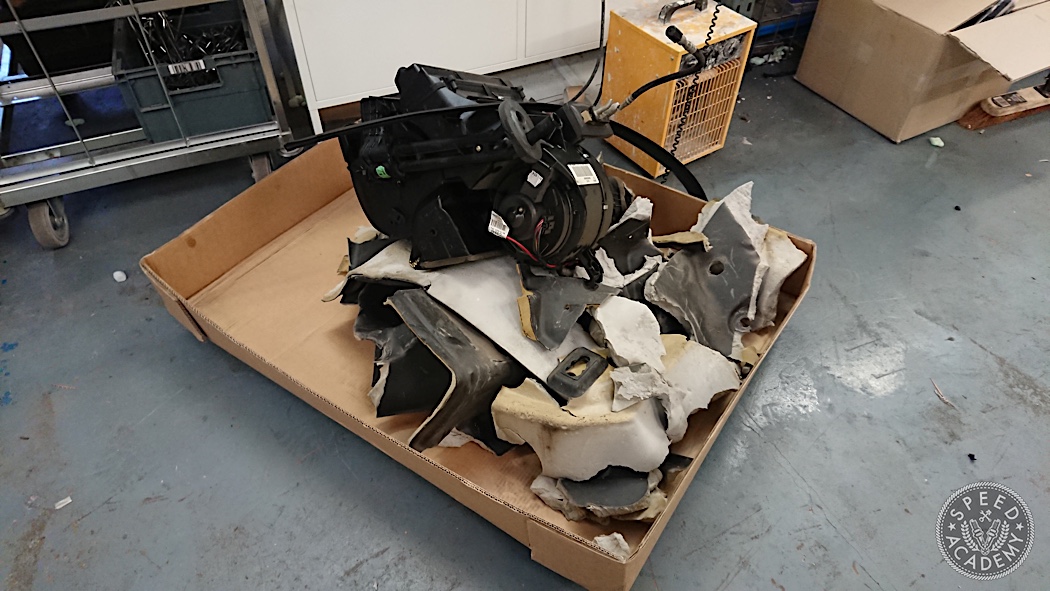
With the heatshield removed, the dash was re-installed, electrical connections all restored, and all the trim pieces re-assembled. The car was then briefly started to ensure no electrical faults had been caused in the process of dis-assembly. Unfortunately, I forgot to take any pictures of the firewall with all the heatshield removed before I re-installed the dash, so you’ll have to settle for a picture of the pile of heatshield I pulled out of the car. In total I managed to get 16.2-kg (just under 36-lbs) out of the car today, not including the amount of fluid the heater matrix and lines would have held.
The next task to complete was re-locating the battery from the engine bay to inside the cabin. This is a fairly simple task, that I know many people have written up before, so I’ll keep it short and simple. The 206 has a 2 into 1 splice on the battery positive cable (one to the engine bay fuse box, one to the alternator), so I chose to use this point as a place to connect the new battery cable. I connected a distribution block to keep things clean, and ran the cable through the firewall, using a grommet to ensure there won’t be any chaffing. For the moment it’s just connected to the standard battery which isn’t securely located, with plans for a new smaller battery to be mounted in a location to be determined when the car gets corner weighted.
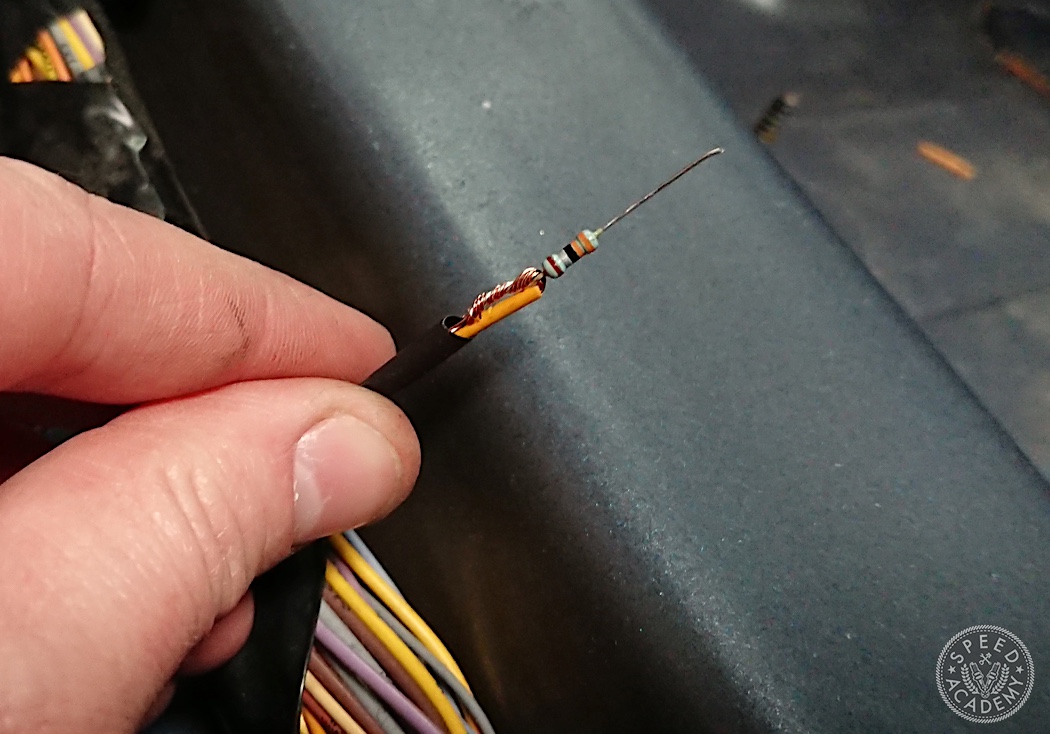
Another task that I’d been meaning to get to was a more permanent method of cancelling out the airbags. As it stood, the electrical shunts had been quite temporarily installed to confirm the effectiveness of the solution; however these wouldn’t be suitable for ongoing use. The shunts are just electrical resistors, the temporary installation was to insert the resistors into the airbag connectors, but the permanent installation involved cutting the airbag wires on the loom as short as I dare, stripping the wires, and installing the resistor before heatshrinking the whole lot to cable tie back into the loom.

Whilst doing the shunts I took the opportunity to remove some other sections of loom that won’t be used on the track car. This is predominantly to clean up the loom, but will come in handy in diagnosing any electrical issues should I run into any down the track. I didn’t get excessive with the loom minimisation, as I didn’t was to tear it all apart, but rather just removed what stood out.
When I bought the car I had a good look over it, but sometimes you just won’t spot something until it’s on the hoist. In this circumstance it was the fuel tank support strap, a notorious point for rust on the 206, and this car was no exception, as before I could photograph the part, it fell apart in my hands. I’d bought a replacement, and it should have been a simple case of undoing two bolts, and fitting the new part. Whilst fitting up the new item, it became obvious that it wasn’t a particularly good fit, as such I ended up cutting some silicon hose open and to size to act as a compression gasket between the fuel tank and bracket.
The last task was to investigate the effect of disconnecting the cars secondary air injection pump. The pump is designed to improve emissions upon cold-start by pumping additional fresh air into the exhaust, which since this is a track car, isn’t a huge priority. I disconnected the air line between the pump and engine, and started the car. I ran the car until it warmed up, and it didn’t show any errors or warnings, as such I concluded the whole pump system could be removed without issue. As the system only operates on a cold start, I couldn’t test the effect of electrically disconnecting the pump, so I left the job for the next working day.
Thanks for reading, and as always, please like/follow/share the James Performance Engineering facebook page and stay tuned for future updates.
What was the size of the resistor you used for the airbags
3 Ohm was used for these, although this varies from one manufacturer to another
Oh my! Having a GTI 180 and seeing these pictures of it dismantled that much were a bit horrifying! It’s like zombie Nah Mean!