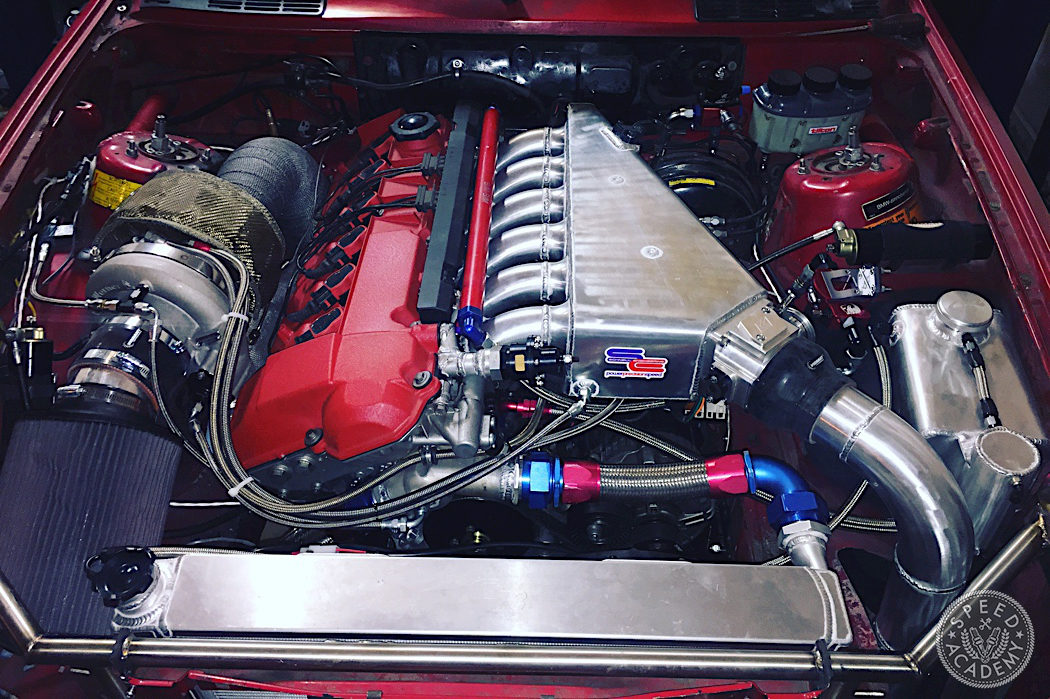
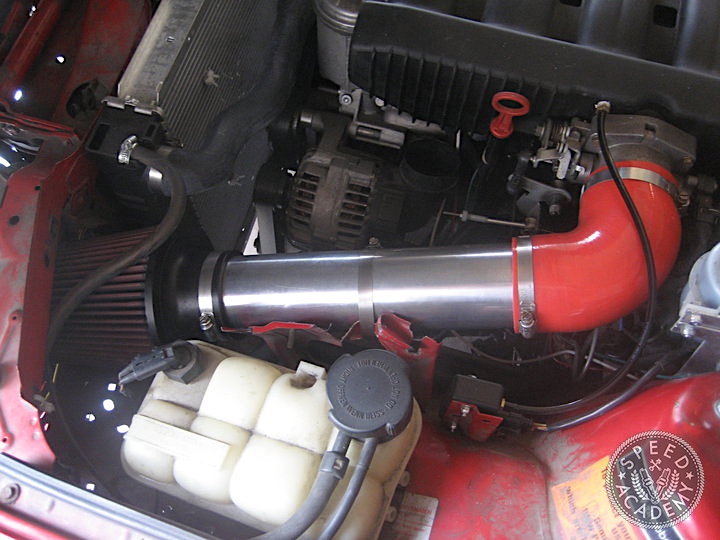
The intake on my BMW E30 track car, like everything else on it, gradually evolved with project ideas and my ability to implement them (usually keeping my ideas at least a step ahead of my abilities). The intake manifold was originally the plastic piece from an M50 (the straight-6 used in the 1992-95 E36). It’s a robust design with large runners and flows surprisingly well.
Shortly after swapping the S52 in (the cast iron block North American spec E36 M3 engine), I started looking into options for more power and I had settled on turbocharging. I still have this post from r3vlimited saved because it is absolutely adorable in retrospect. [editor’s note: “adorable” because Dmitry’s E30 is now equipped with a 1000+hp fully-built engine]
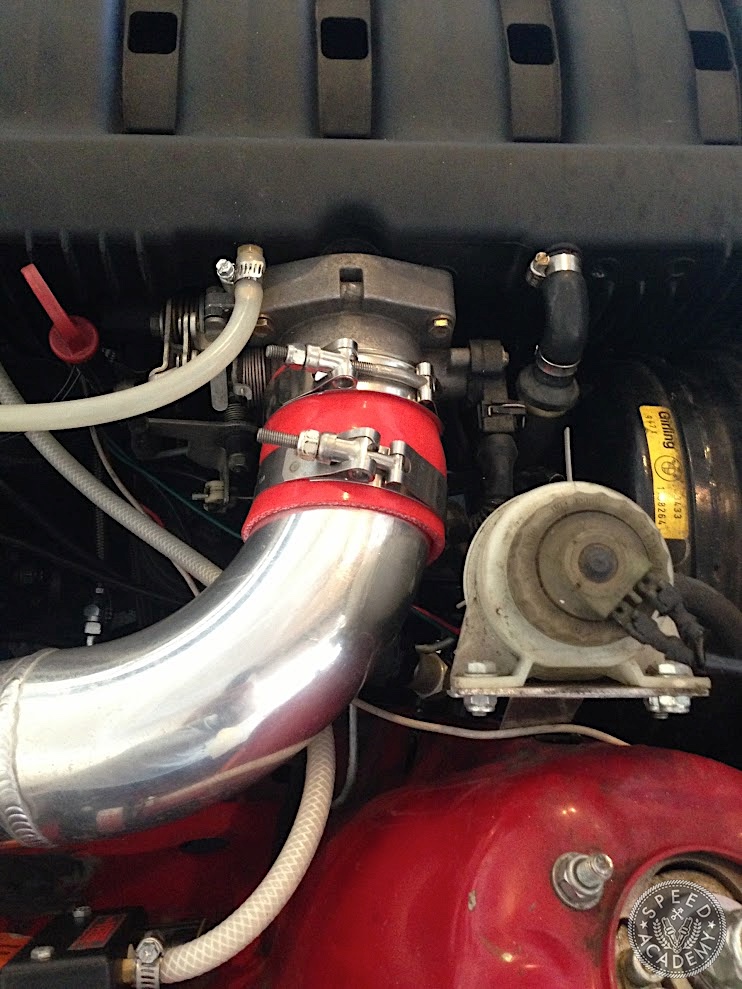
In preparation for this, I wanted to convert the engine to standalone management, using the speed-density strategy (engine speed vs manifold air pressure/temperature = amount of fuel). This meant adding a MAP sensor to the intake. When I started the turbo project, it meant adding more vacuum references. I could have used a vacuum block but for redundancy, I added extra nipples to the intake.
These were done using NPT brass fittings tapped into the plastic.
I realize that this seems super sketchy and it did to me as well. With several atmospheres of pressure in the manifold, it seems like those fittings threaded into the thin plastic would come shooting out like a bullet the first time the engine sees boost. But others’ experience reassured me that this would likely not happen. And to give credit where credit is due, the now 25+-year-old BMW manifold never failed. I have watched it expand on the dyno as we hit north of 30PSI and it never gave up any of its nipples.
That didn’t stop it from bothering me. Beyond the sketchy fittings, the manifold design is really not great for a boosted engine. The plenum has no baffling so only the middle two runners have a clear shot at the throttle body and to get to the others, the air has to do a hard 90. Not a huge deal when the engine is drawing the air, but not so much when the air is being crammed in at high pressure and velocity. Or so I felt. Again, in practice, it really seemed to work fine, probably because the intake was quickly pressurized so the delay in filling the outer runners was negligible.
Next was the size of the throttle body. The stock BMW TB is 2.5” in diameter, with a good chunk of the area being taken up by the butterfly, leaving not a whole lot of room for air to flow through. The TB itself is small, so even modified the largest aftermarket option I had seen was about 2.7”.
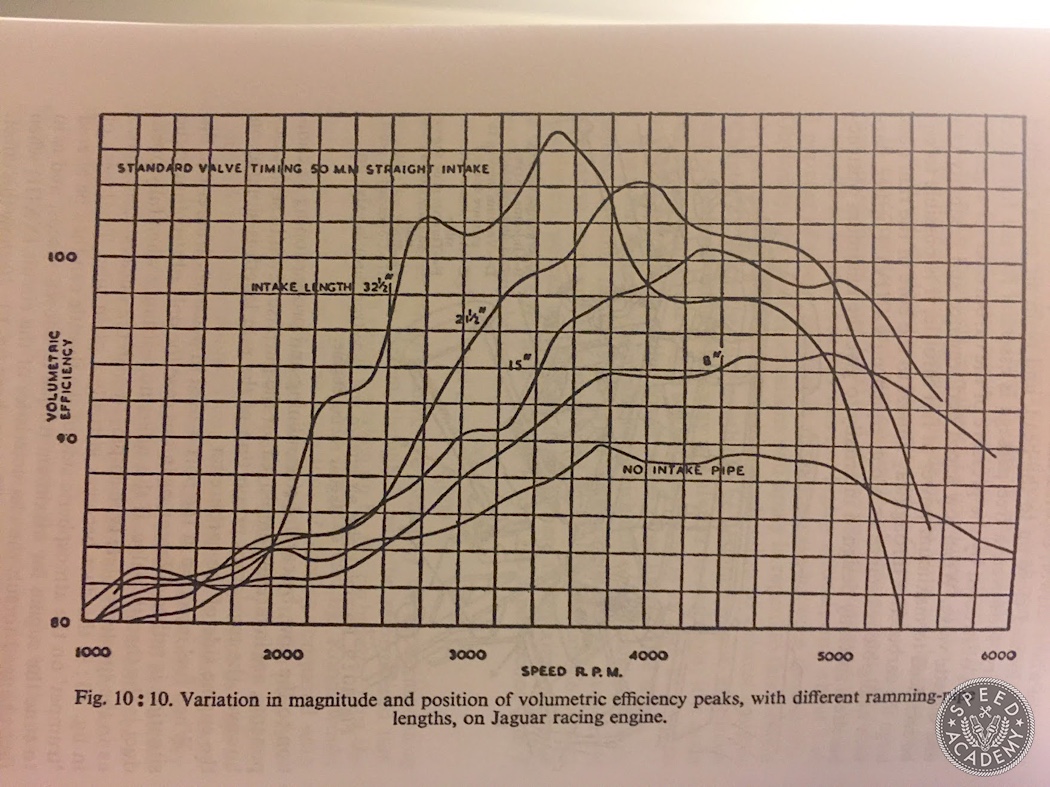
The general geometry of the manifold is also not ideal for a high-performance application, as the plenum is small and the runners are very long, both things conducive to low-end torque but not so well suited for high RPM jam.
This page from Scientific Design of Intake and Exhaust Systems, by Philip H Smith and John C Morrison, gives an idea of how drastically runner length affects the amount and timing of peak torque.
I had seen some aftermarket aluminum options, with a wide price range. From $350 eBay specials to the $2500 Driven Innovations manifold. All of these had drawbacks in my mind. I’m not a motorsport engineer or fluid dynamicist, so these were based on my feels but in the end, since I’m not out to win professional racing trophies but to be happy with my car, that’s most important. The Driven Innovations intake, for instance, was meant for OEM fitment so it was constrained in dimensions beyond what I wanted.
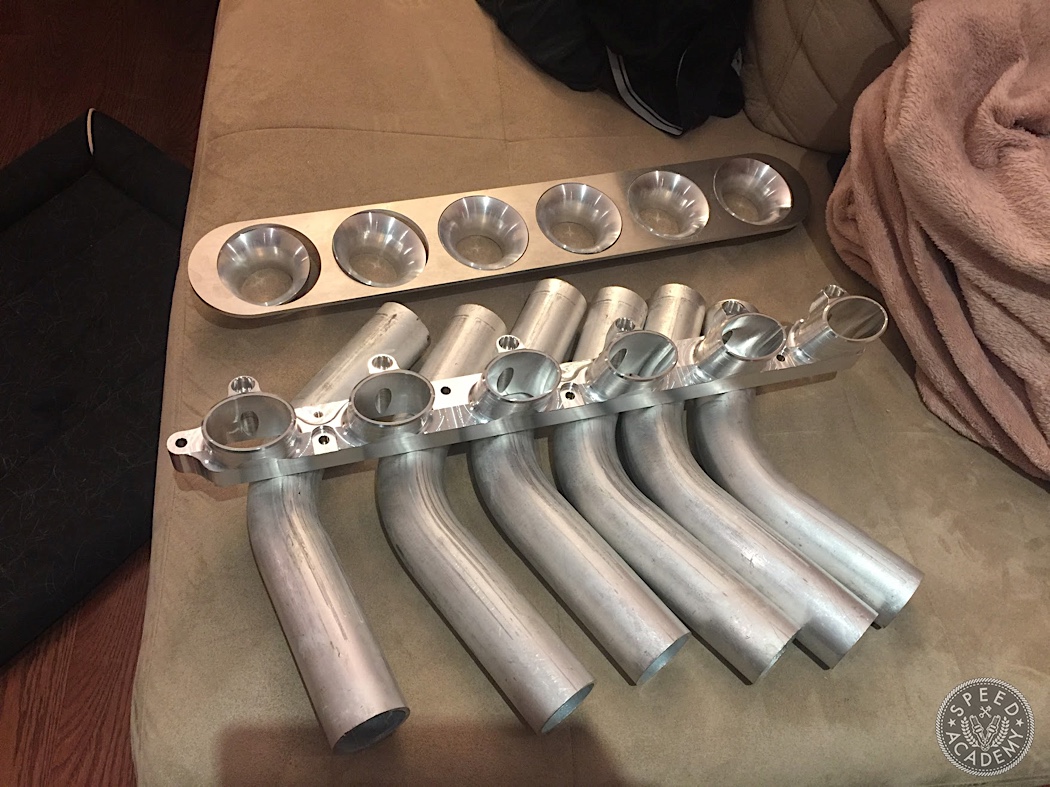
Over the past few years, I had taken up TIG welding and had become quite proficient, including with sticking aluminum. Then one day while discussing Pure Performance Factory cams with a friend and cruising their website, I came across their fabrication components section and they made a CNC head flange and trumpets. It was scary to consider, but at this point, I knew that this had to happen.
The parts arrived from Sweden faster than UPS can deliver from California. Maybe they go the wrong way and fly things over Russia from LA? I digress.
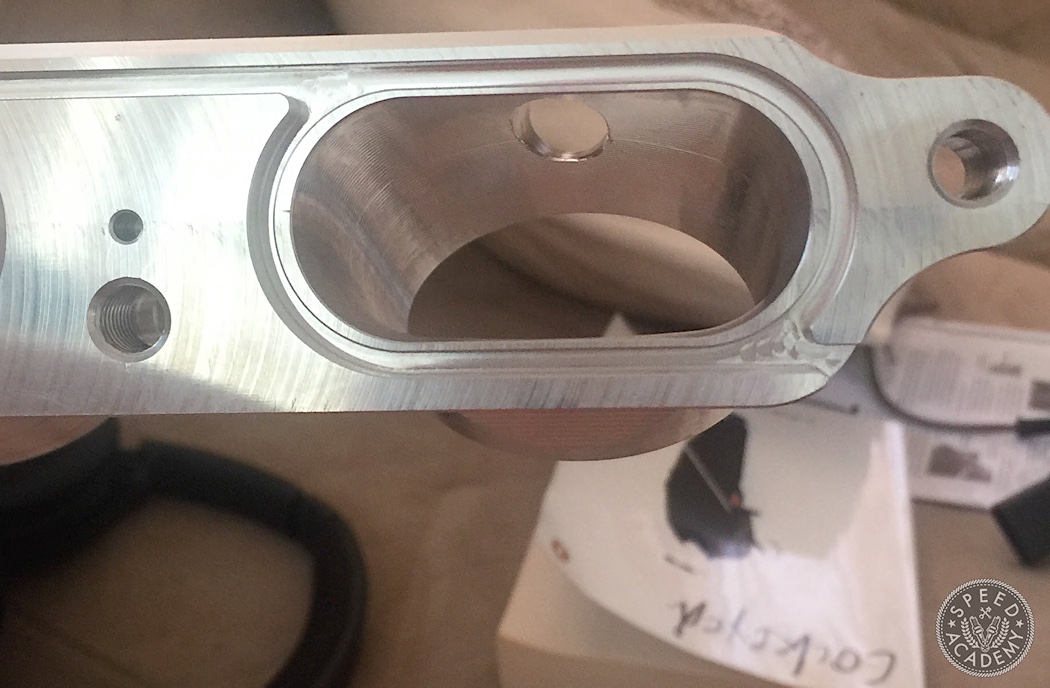
The head flange is perfection. One of the things that worried me is injector positioning, as this is quite critical. The PPF flange nails it.
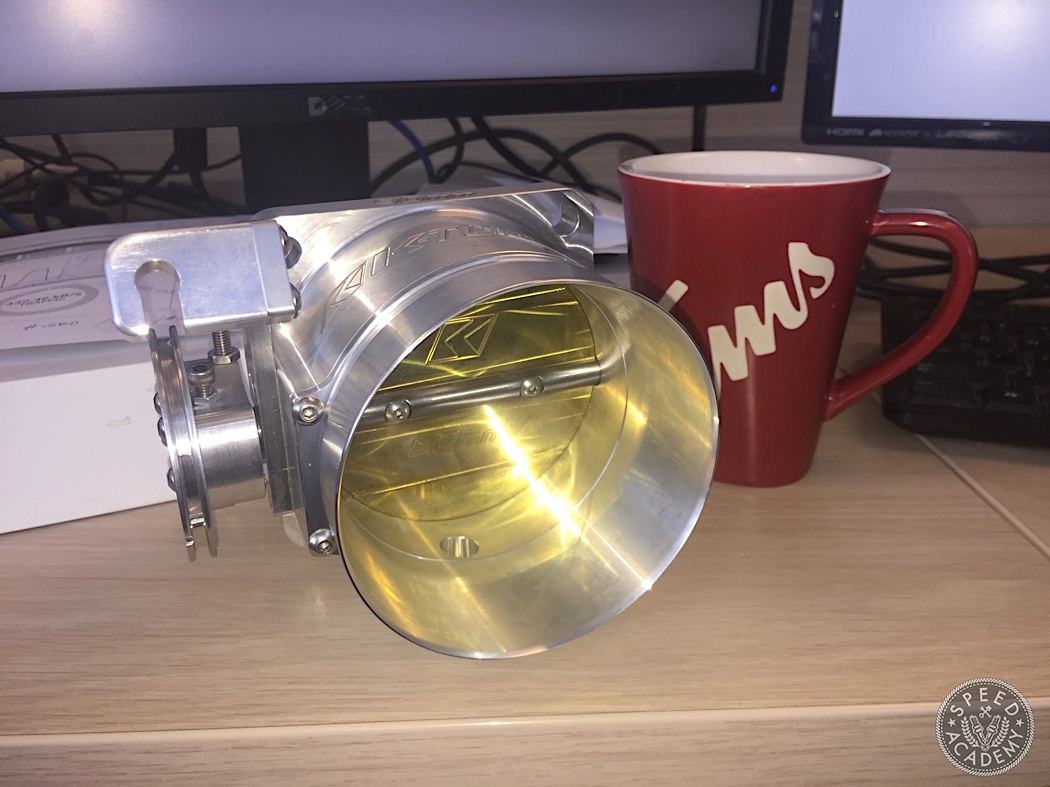
The next question was the throttle body. Like all non-ITB BMW owners, I suffered from major TB envy so I wanted to go big. I heard of K-Tuned making some nice throttle bodies and I checked their website. They make a 90mm throttle body with fitment for a Mustang (both flange and TPS). It’s also made here in town (Toronto) and for a great price, so I stopped by the K-Tuned office to pick one up. It’s quite the showpiece! K-Tuned now sells a weld-on flange for it, making it easier to mount their TB to a modified or fabricated manifold, but at the time they didn’t have this available so I used a Freed Engineering flange instead.
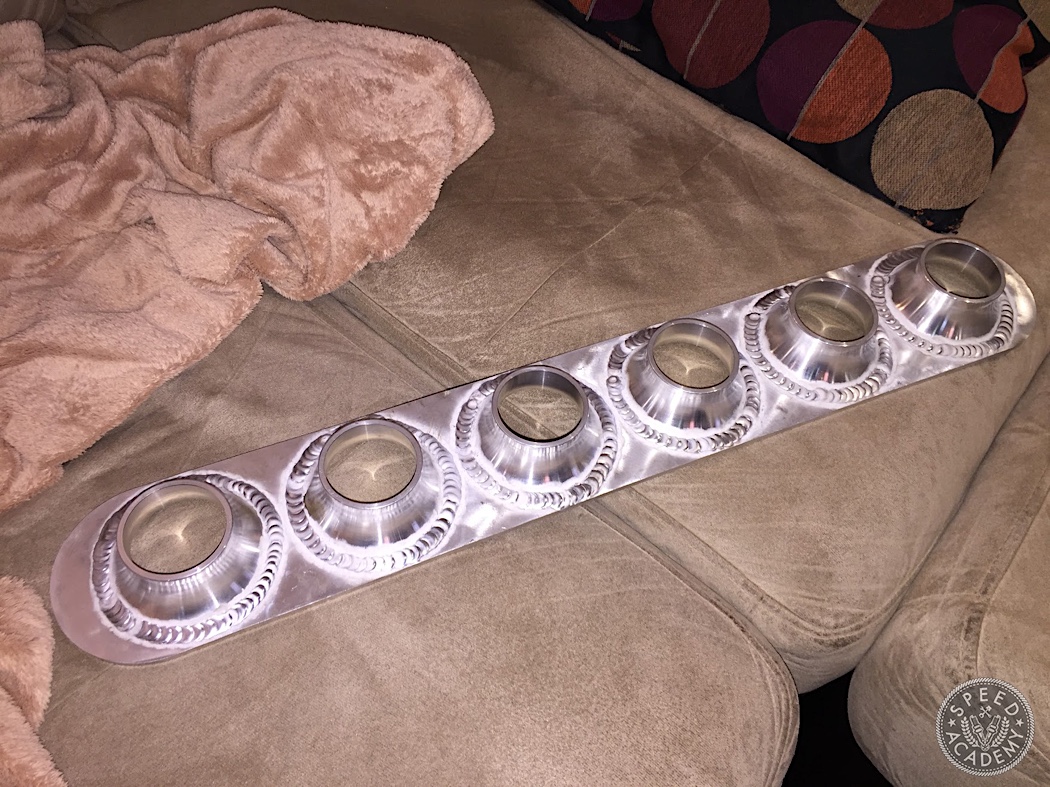
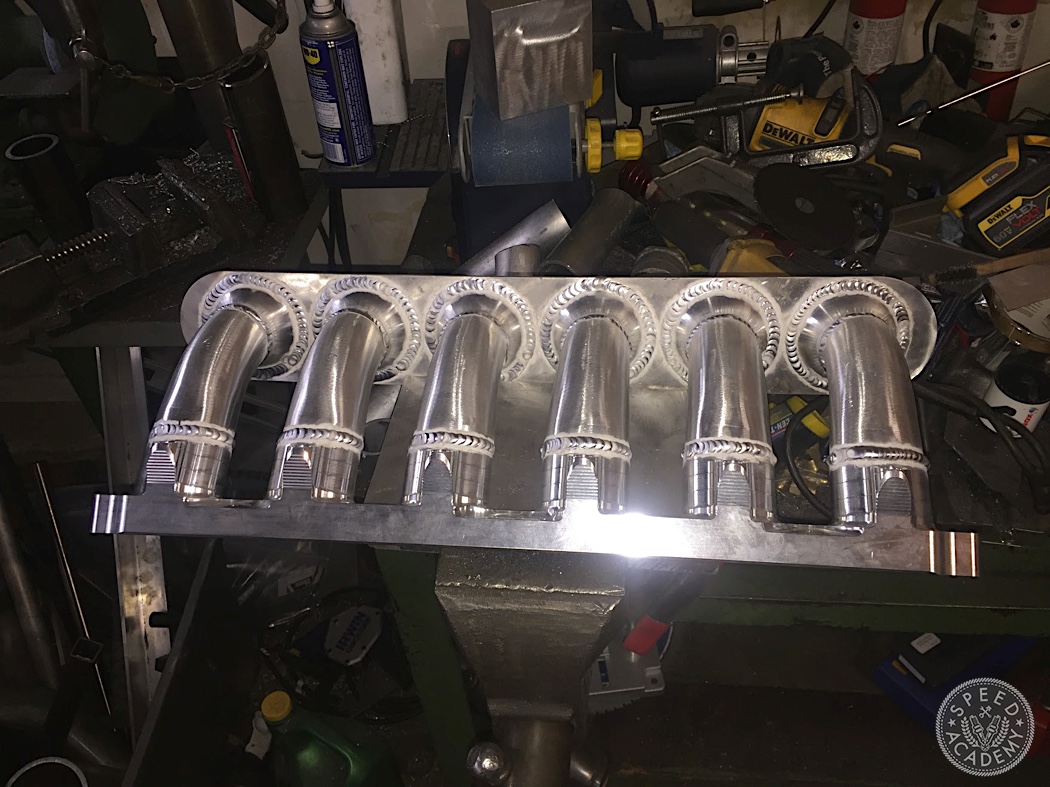
I began sticking things together. Clamped the flange template to a big chunk of aluminum and welded the PPF trumpets inside. On a semi-side note, this was my first project using 4943. It is now my absolute favorite aluminum filler rod. It is almost as strong as 5356 with none of the concerns and most of the desirable properties of 4043.
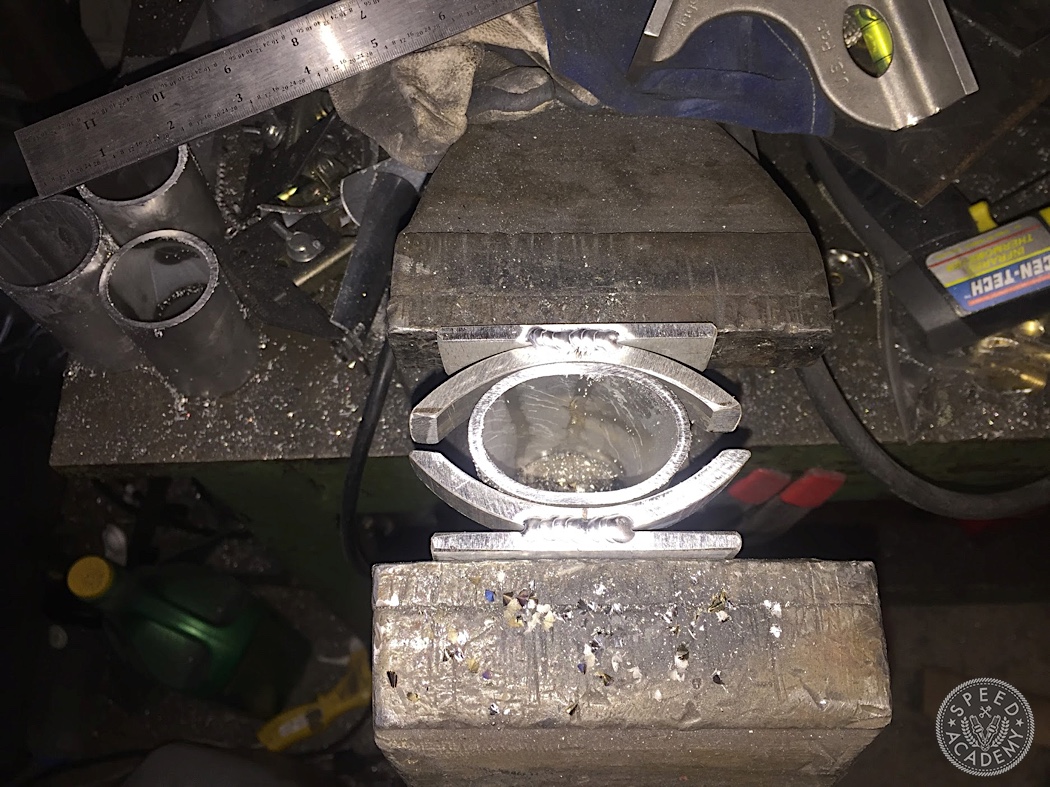
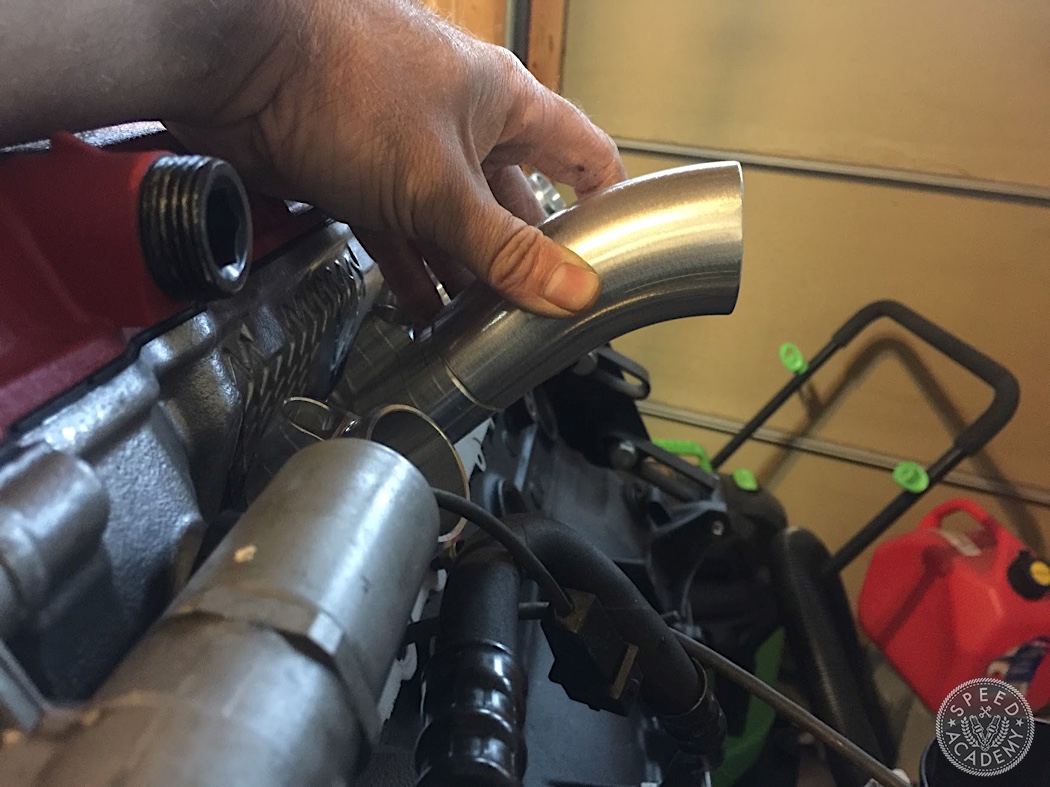
Now I had to figure out the runners. The tubes I got from PPF were mandrel bends at the correct angle but they are just generic round tubes. I asked PPF and they said that they’ve had good luck carefully crushing one end in a vice. I knew this would result in major surface marring so I made a little jig by cutting sections from a 6” aluminum pipe, welding them to flat bars. It worked like a charm!
The basic manifold was now ready.
Now I had to figure out the plenum. The throttle body dictated the height of it. I liked the look of the DI manifold, which emulated the stock one but with a deeper manifold and tapered front. But after mocking it up with this throttle body, it meant the plenum or runners would be too small.
So I went back to the typical front-facing TB placement. This bugged me since I’ve personally never liked the rounded log intake manifolds you typically see on boosted JDM cars, especially the hand-fabricated ones where you just use half of a pipe for it and a plate to fill it in. I decided to keep the plenum shape I had planned on but basically just having the throttle body on one side.
The material for the plenum was something I thought would be trivial since any metal should be better than the thin plastic. But Andreas from PPF warned me that in his experience if you use less than 4mm thick aluminum the plenum will eventually crack – plastic might be weaker but it doesn’t fatigue the way metal does. I picked 3/16” wall, which is almost 5mm thick.
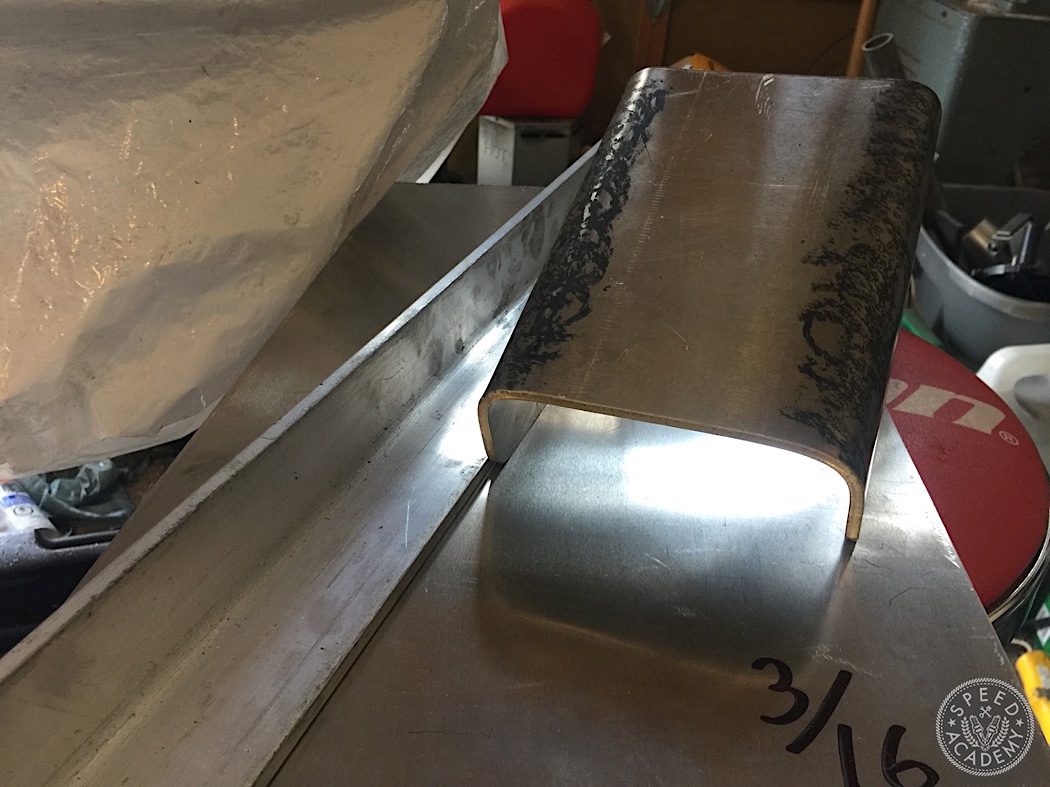
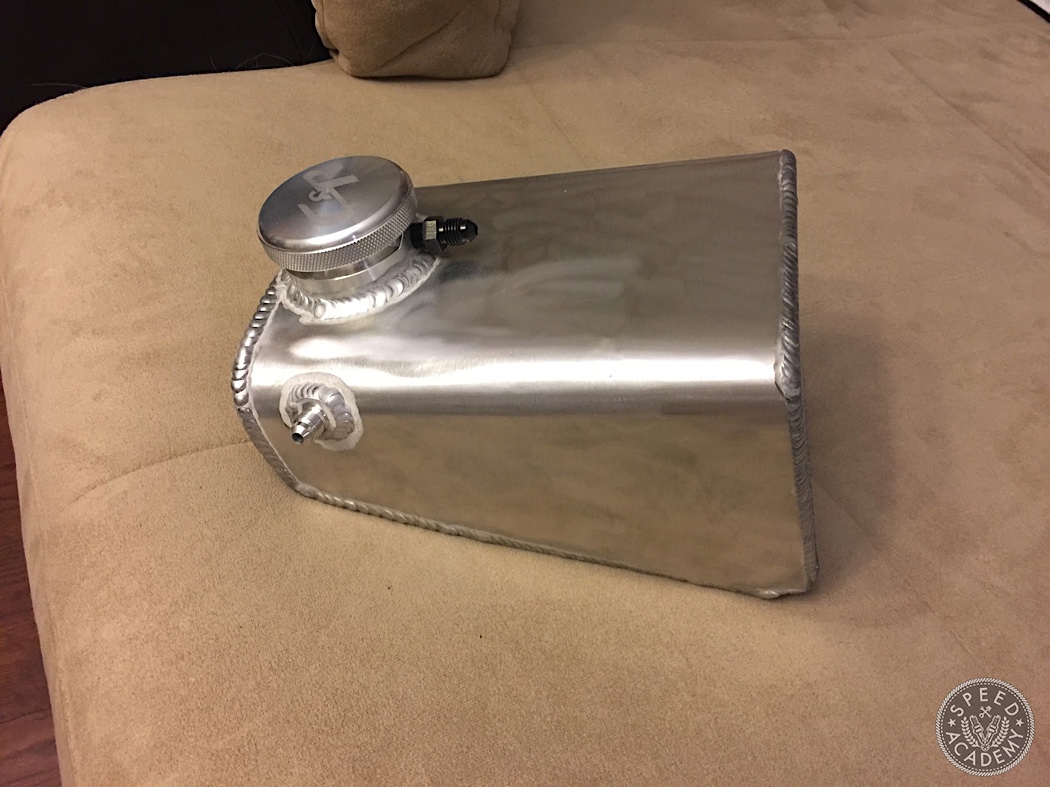
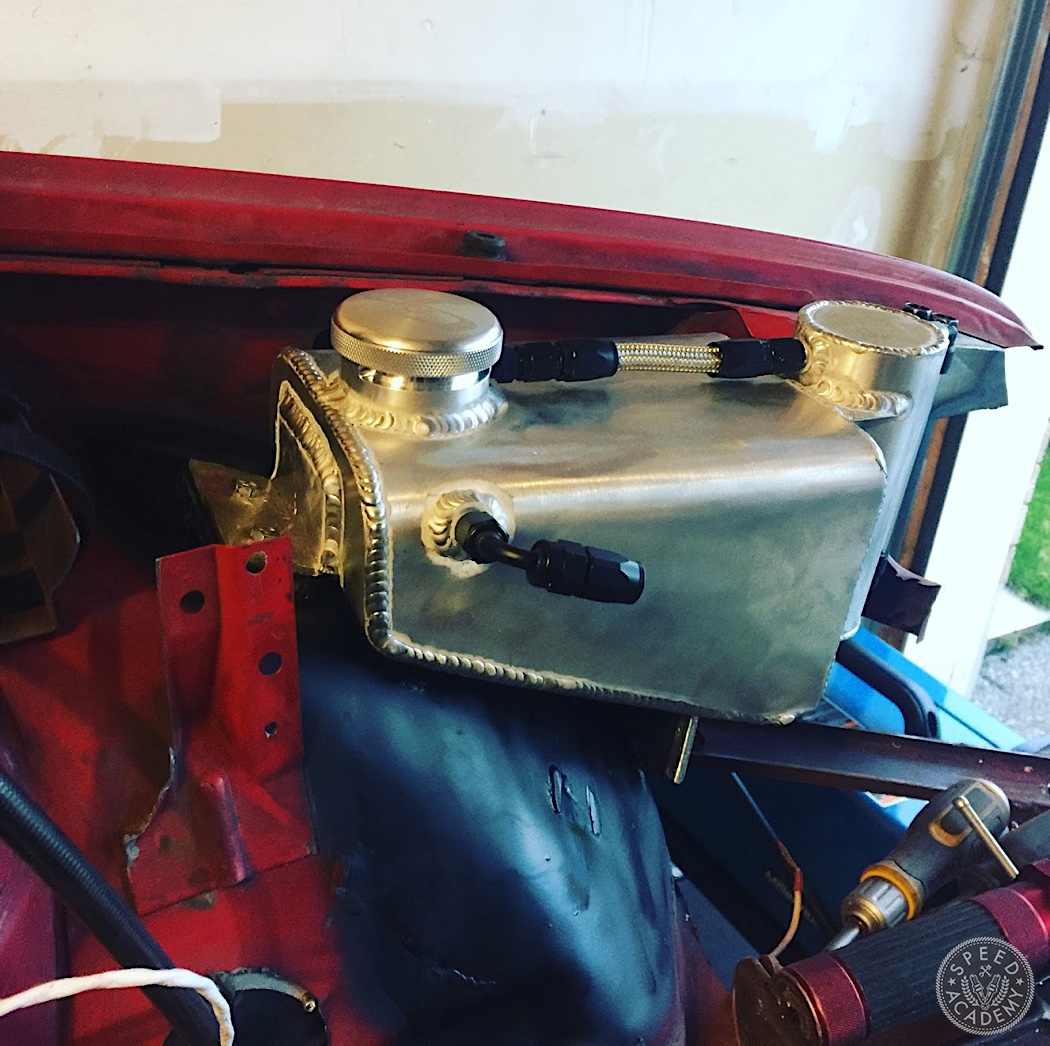
The most common grade of aluminum metal suppliers sell is 6061, usually in T6 temper. This is for good reason – it’s a great structural material, not far off from lower end mild steels in tensile strength. But it is a pain to form and in heat treated form it is quite brittle. I read about annealing where you heat the metal past a certain point and it loses the temper, making it much easier to shape. I was going to make a new coolant expansion tank, so I decided to try annealing with it. I cut the shape out of 6061 sheet. I read that if you rub soap on the other side of the one you’re heating, once the soap turns black, the metal is annealed. I found it’s not quite enough, I needed to heat it a bit further. But then it worked and I bent the plate to shape in the vice using a thick length of angle and a solid rod.

I really like your squishing jig. Good idea.
Do those LED rings function as your headlights?
Yes they do, although he’s since made new housings for round LEDs so it’ll look more E30ish.
Very nice project. Thanks for sharing. Inspiring! I’ll build something similar myself this summer.
Really nice plenum. What size are those runner pipes what you was using? (outside, inside diameter)