“Guys have been doing this for 100 years. You’ll be fine.”
-Perry
If you’re reading this, then I probably asked you to proof-read it. But maybe you’re also like I once was, where you are fascinated by what goes on inside your engine and you have a general understanding of it but you think that building one is for auto manufacturers and professional race shops – in other words, something that will never be in your wheelhouse.
I’m here to try to convince you that you’re wrong. In this series, I will document building a new short block for my 1000-hp E30 using some cool parts from Turn14 Distribution, and hopefully you can see that it’s really not that big a deal. Now, I’m not saying that you and I can build a motor from scratch. But then no one does. Even OEMs have to outsource components.
And that leads me to what this is really all about – spec, measurements. If you’re not designing the engine from the ground up, then the hard part – the overall architecture – has already been done for you by an army of engineers. If you’re going to build a motor, all you need to do is decide what you want to do, select the components, and then carefully measure and assemble everything, using the right tools. We live in a golden age when there are a ton of aftermarket options, which are all easily accessible thanks to the Internet. The only external help you will need is a competent machine shop and even then, you will be specifying and verifying everything.
Why?
Why do this? There is the obvious money savings and the pride and satisfaction of accomplishment, but it actually greatly improves your chances for success. You hear about guys blowing motors all the time and a lot of it is bad tuning, bad operating conditions and sometimes, engine builder mistakes. All of the above are greatly mitigated if you do the work. At minimum, knowing how everything works, will reduce the odds of you either causing the conditions for a catastrophic failure, or at least let you know when to shut it down so the damage is minimized.
But another reason is that, if you take your time and are careful, you are less likely to make mistakes than professionals. You read that right. So how can I start out saying that even you and I can do this successfully, and then say that a professional will make mistakes? I think the answer is complacency. While there is nothing especially difficult about this process, like I said, you have to be careful and take your time. This means being focused, and if you’ve done it 1000 times before, and you need to get 5 more of these done by next week, you start taking it less seriously, maybe rushing. Then you forget something, or screw something up, and then the customer is left writing an angry post on the Facebook after the engine blows, usually blaming the tuner.
The last time I had a motor built, I didn’t think I’d be up for the challenge, and I used someone who had a terrific reputation. He ended up taking almost 2 years to finish. Oh yeah, add that to the list of reasons to do this yourself – these guys never finish on time or budget, not even close. If you want to be reasonably safe, double the cost and triple the time estimates. But besides taking forever, with the endless excuses I’m cynically used to now, he screwed up.
Block back from machining. Going to get cleaned up next. Head still needs a bit of assembly, coming soon.
In this photo of my nicely machined block is a glaring error. I discovered it after I rebuilt the motor myself later on – he left out the oil squirters! Mind you, some guys will plug them on racing engines, something I wouldn’t do on a high boost motor, but he simply forgot them. He denied this when the news got back to him, saying it is absolutely impossible but I dug up this photo from when he first did the work as proof – look down the top bore, you can see a great big hole in the main. Thankfully my engine is drysumped so the loss of oil pressure wasn’t a catastrophic problem.
But if you do the work yourself, with one motor and one set of parameters to focus on, you are far less likely to make these sorts of errors. Because it doesn’t matter how educated and talented you are, how long you’ve been doing it and how amazing your reputation is. We all share the same basic problem – we’re human.
What?
Alright, let’s get down to it. If all you want to do is refresh a stock motor to OEM spec, then all you need here is to gather the specs for your engine and skip to How, to start measuring. But if you want to do something more interesting, there are some decisions to be made. In my case, this bottom end will see a lot of boost, so it will need to be much stronger than stock, and I run the car on E98, so I want to go up in compression.
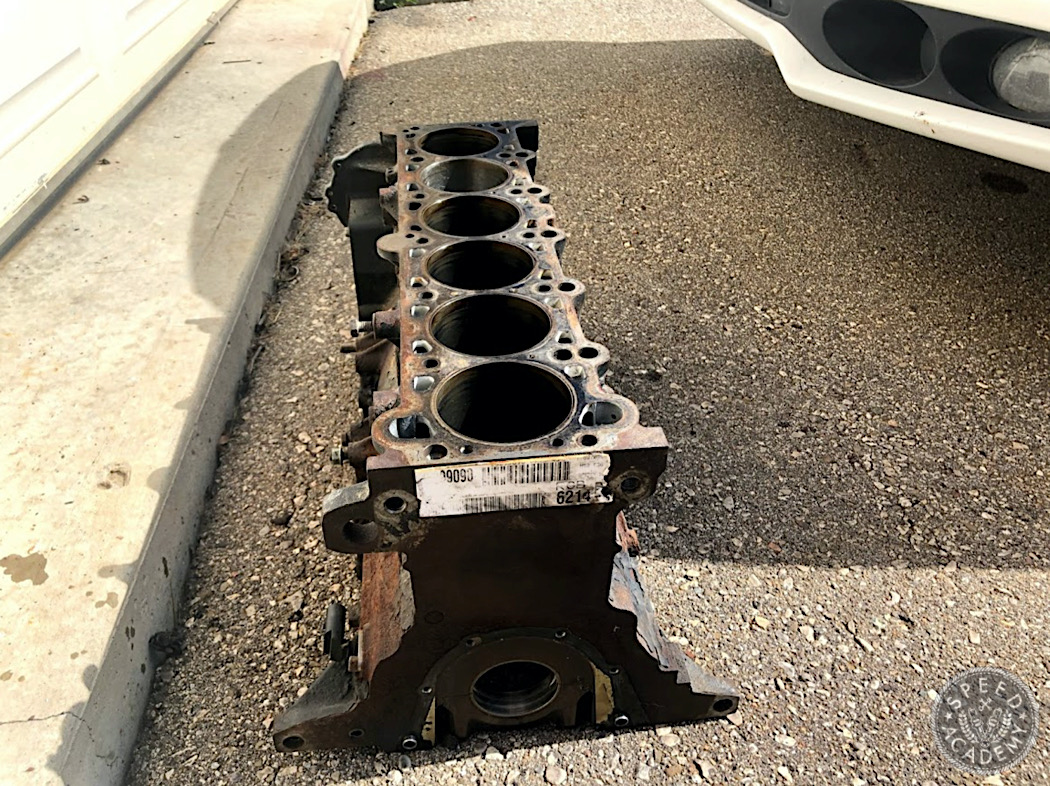
For the block, I picked the thickest cylinder wall version of the M50 family of BMW engines, which has a bore of 84mm. For extra displacement, I will use the S52 crankshaft, so I will need rods compatible with it, which are 135mm long (measured center-to-center, between the crank journal to the piston wrist pin). The stock compression is 10.2:1 but I would like about 11:1 for greater efficiency, thanks to the safety afforded by running on alcohol. Guys have various theories for why alcohol is less prone to detonation and I think the main reason is the same reason why it’s so bad for fuel economy: you need much more fuel per unit air for combustion compared to gasoline, which makes the engine run much cooler. Sorry, I digress.
Pistons
When you have your engine specs figured out, you’ll want to pick a piston manufacturer and give them a call. If you’re lucky, or you intentionally pick a layout that uses an existing part number, you may just need to enter your credit card information somewhere. Otherwise, they all have forms you fill out with what you want made – what engine, what application (power, fuel, road racing/drag racing, boost/nos etc), and any parameters that aren’t stock, like bore and compression. Unless you are building a hotrod version of a motor that is insanely obscure, odds are at least one of the major piston manufacturers will have an OEM profile of your pistons.
Based on your input, you will be sent a set of pistons with a spec sheet. This is where the critical numbers begin. These spec sheets may look intimidating but they’re really just densely written instruction sheets for you to follow. More on this when we get down and dirty.
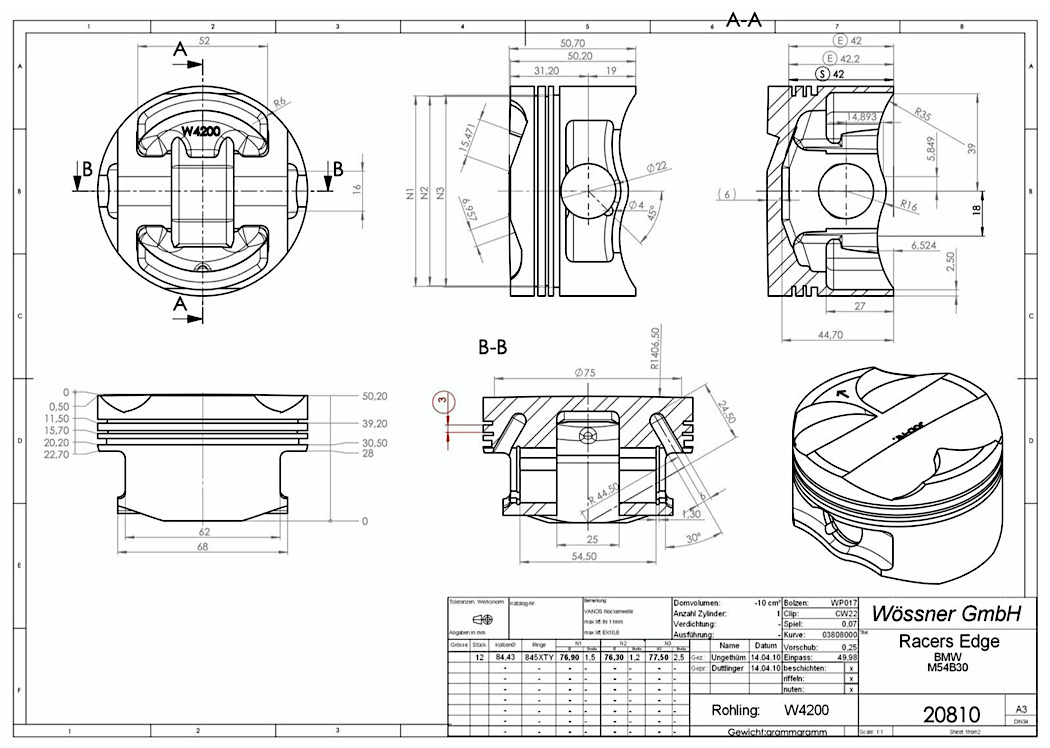
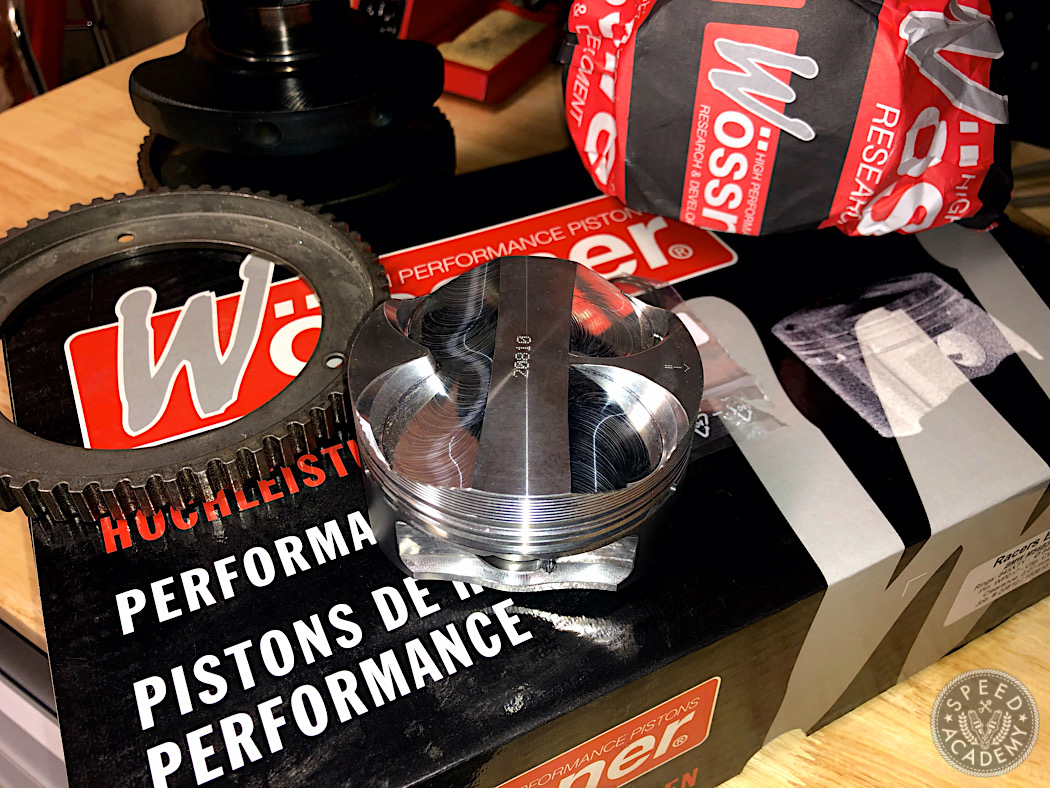
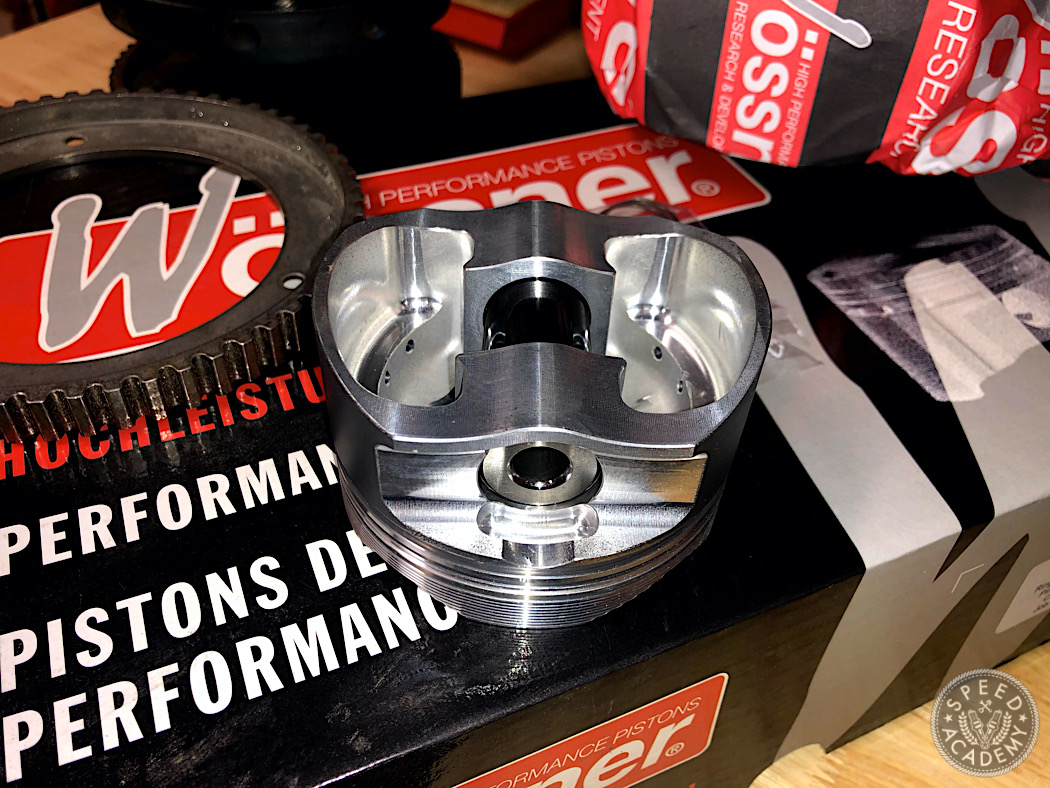
My pistons were made by Wossner, for 11:1 compression and valve reliefs sufficient to clear the lift and duration of the hot CatCams I use. I also went 0.5mm overbore to 84.5mm since the block is quite obviously of the well seasoned and aged variety, so I’m accounting for some material being lost to the boring/honing.
Rods
Rod selection is mainly about figuring out what will fit your application, and if you are using a crankshaft and pistons of stock geometry, it’s just a matter of ordering stock fitment rods for your motor. I personally classify rods into 3 categories: stock, China, and US.
Stock rods can often be sufficient for your power goals but this is something you’ll have to figure out for yourself, either by seeing what others have been able to accomplish or rolling the dice as the pioneer. Some motors will take triple the stock HP with OEM internals, and others are already marginal for stock power levels.
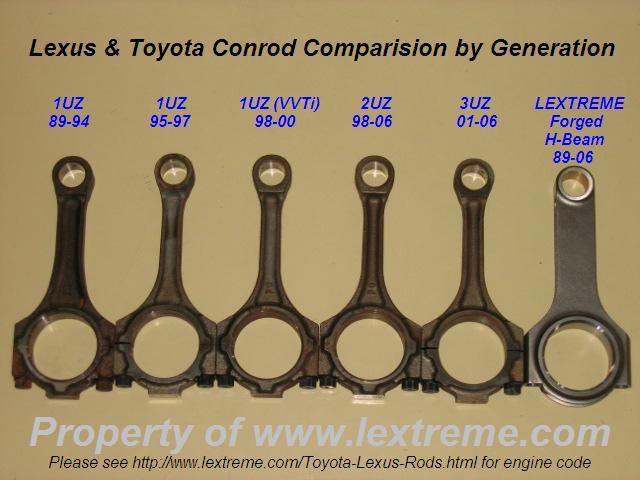
This photo from Lextreme.com illustrates the point nicely. Looking at it, it’s not hard to believe that early 1UZ rods can take a lot more power than later ones, or 2/3UZ motors.
The photo also quite clearly shows the benefit of going to an aftermarket rod if your power goals are loftier. There are several options available nowadays that are made in China, and are of excellent quality while being affordable. Some examples are Eagle, K1 and the economy Manley rods. I’ve heard criticism, for example, of Eagle rods having defective runs with out-of-spec big ends. But there is no excuse for not catching this, regardless of where the part came from. I’ll talk about this more when we get to measuring.
Finally, if your budget permits and your goals call for it, there are rods made by US manufacturers (some European manufacturers also do great work, like Arrow from the UK). These include Oliver, Pauter and my personal favourite, Carrillo. These will usually be made of a higher strength alloy with a superior process (read: expensive) and be designed to handle more power. But they will also give you more peace of mind as the metallurgy is usually much more consistent and less likely to fail, and the odds of having defective machining are much lower. But again, we won’t be assuming anything.
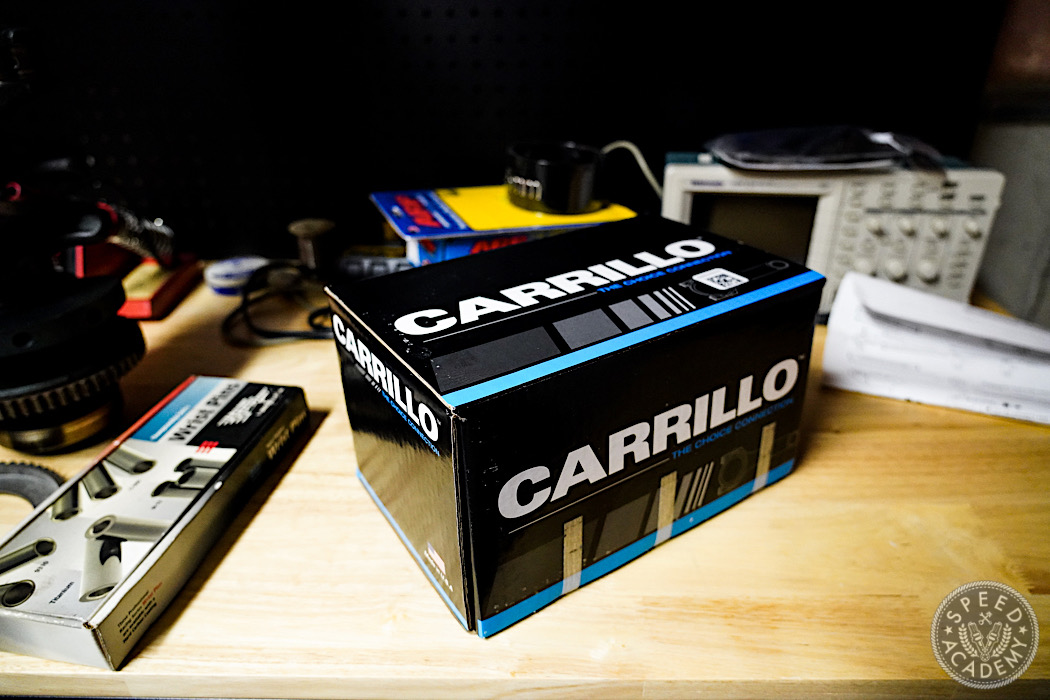
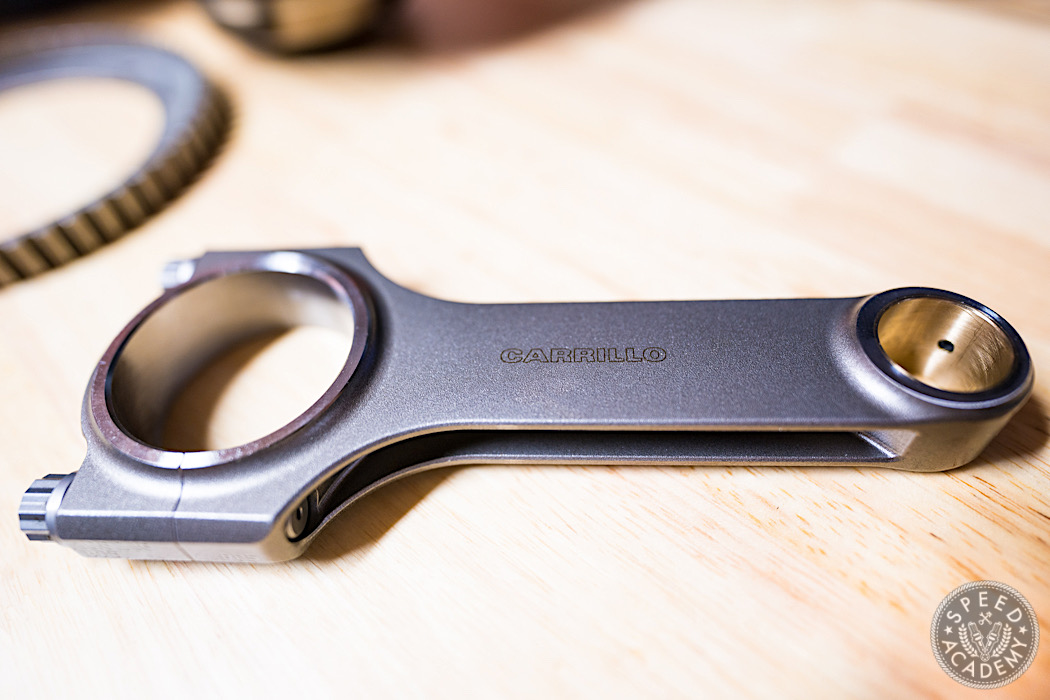
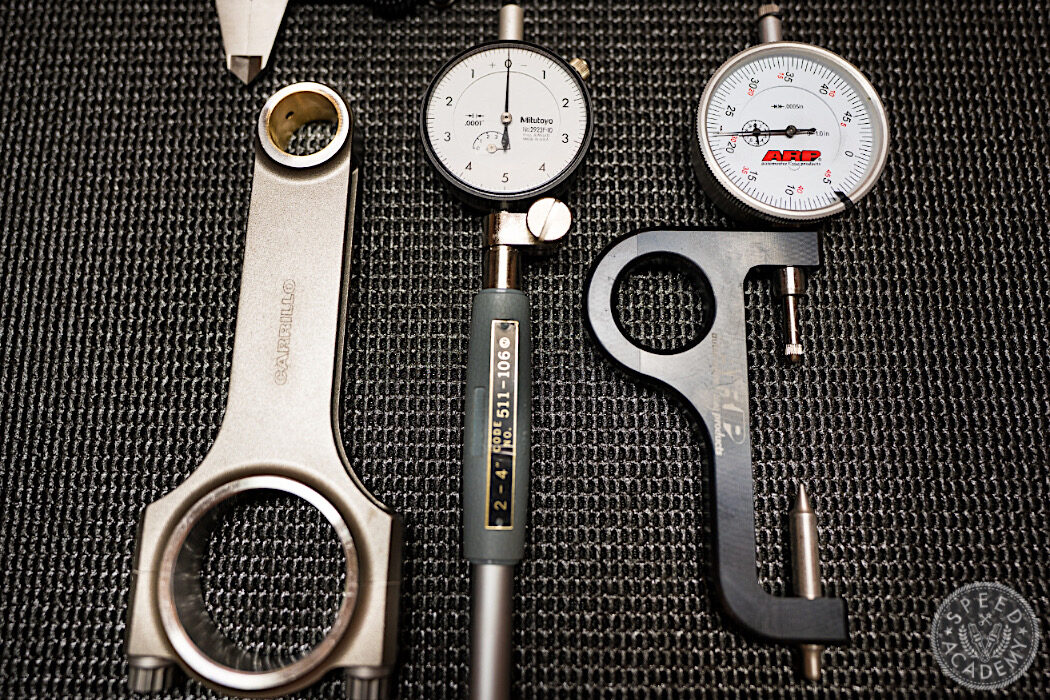
Just like my current motor, I went with Carrillo for this build, sourced from my friends at Turn14. There may be cheaper alternatives that will do the job but Carrillos look like jewellery. But we will still measure to ensure they are made like it too.
Supporting Cast
In addition to the big internal components, an important part of the success of the project is selecting a high quality cast of supporting parts that are up to the task. The most important of these are fasteners, bearings and the head gasket. The bearings will come later after we’ve measured the crankshaft, block and rods to determine what size bearing shells to get.
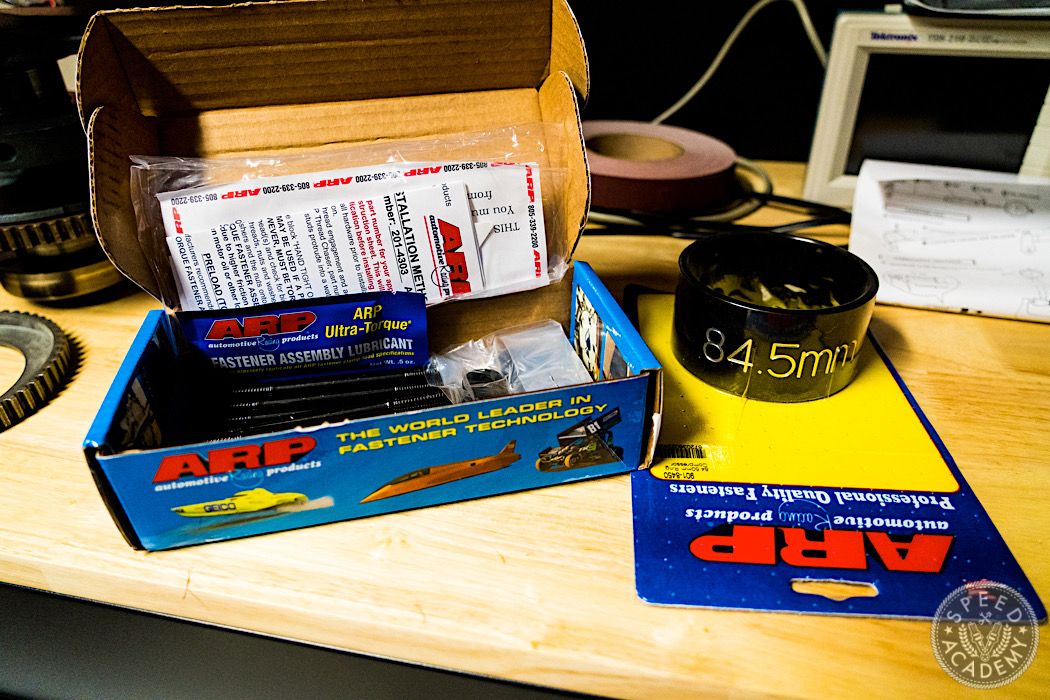
In the meantime, I picked up a set of 11mm ARP2000 head studs from Turn14. The stock size is 10mm but there’s an easy way to be able to use these S54 spec studs using a guided drilling/reaming/tapping kit from my friend Perry.
Also pictured is ARP’s tapered ring compressor. These are bore specific and make piston installation fast and easy, with no danger to the rings, unlike the traditional snail type compressors. These aren’t cheap but they’re inexpensive enough that I personally don’t think there’s any excuse to use anything else. [Note from DP: we broke a ring when installing the pistons using a traditional ring compressor during the Evo6 4G63T engine build, so be like Dmitry and get yourself a tapered compressor!]
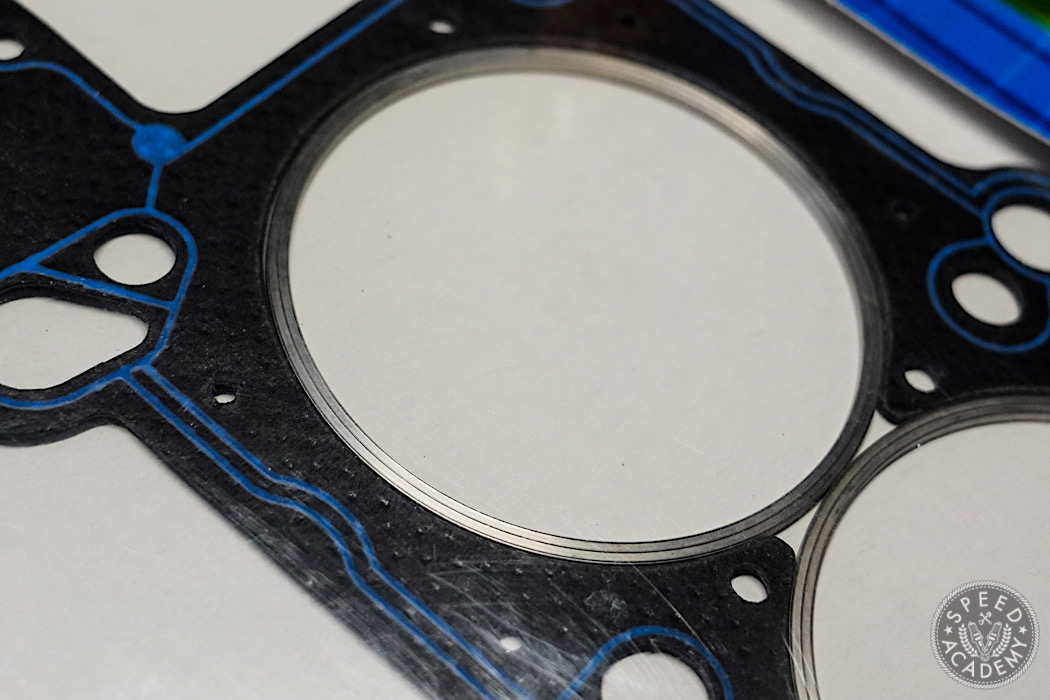
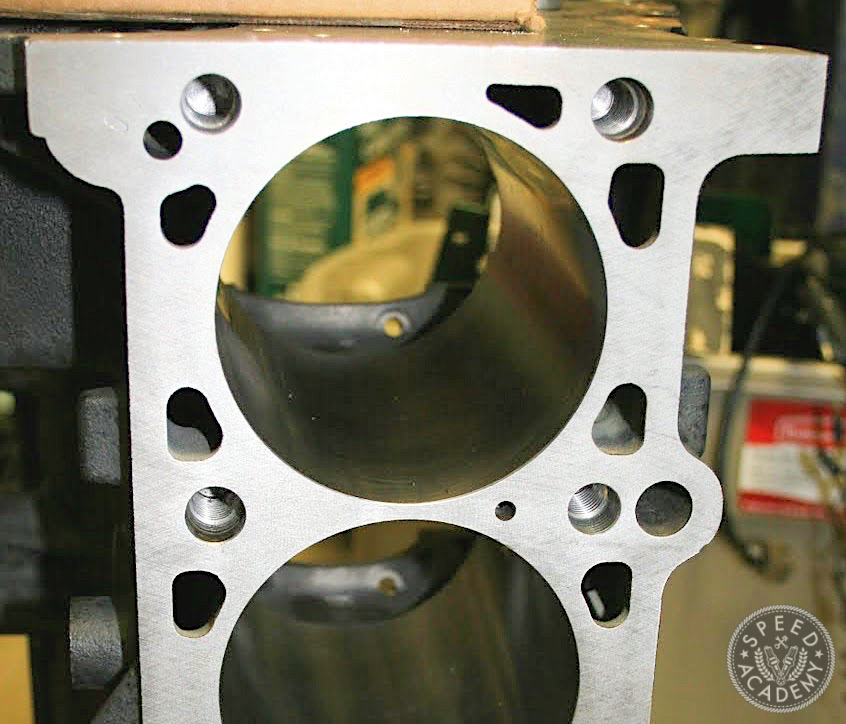
Also sourced from Turn14 is this JE Proseal cooper ring head gasket, made by Athena. Everyone including myself who has discovered these will never use anything else. You can now hold all the boost you want without having to cut and install o-rings or use crazy pyramid rings. These gaskets use an OE-style paper gasket with the fire rings cut out and hard stainless rings set in their place. These have concentric grooves cut into them on the side of the cylinder head, which act like teeth. They bite into the head and when torqued down, will seal anything the rest of your engine can handle. And unlike o-rings, the damage to the head is minimal, and the leftover groove is easily removed with a skim pass that you would do when having a machinist check and clean the head.
Testing