Duty Cycle:
Something to watch out for is duty cycle. This is a figure given as a percentage and an amperage, and what it means is that for a 10 minute time span, what percentage of that time can you spend continuously welding at that amperage. Many welders are misrepresented using unrealistically high output figures at a low duty cycle. A 250 amp machine may sound like it’s better than a 180 but the 250 machine might be 250 amps at 10% duty cycle and 180 at 30% duty cycle, and the 180 machine might be 180 amps at 60% duty cycle. So the 180 is actually a better machine because you can use the power. The 250 could be more useful for you if you really need that extra power for a few short welds but the machine will spend a lot of time down and out with the overheat light on. I also have anecdotal evidence of Chinese machines lying about their duty cycle…
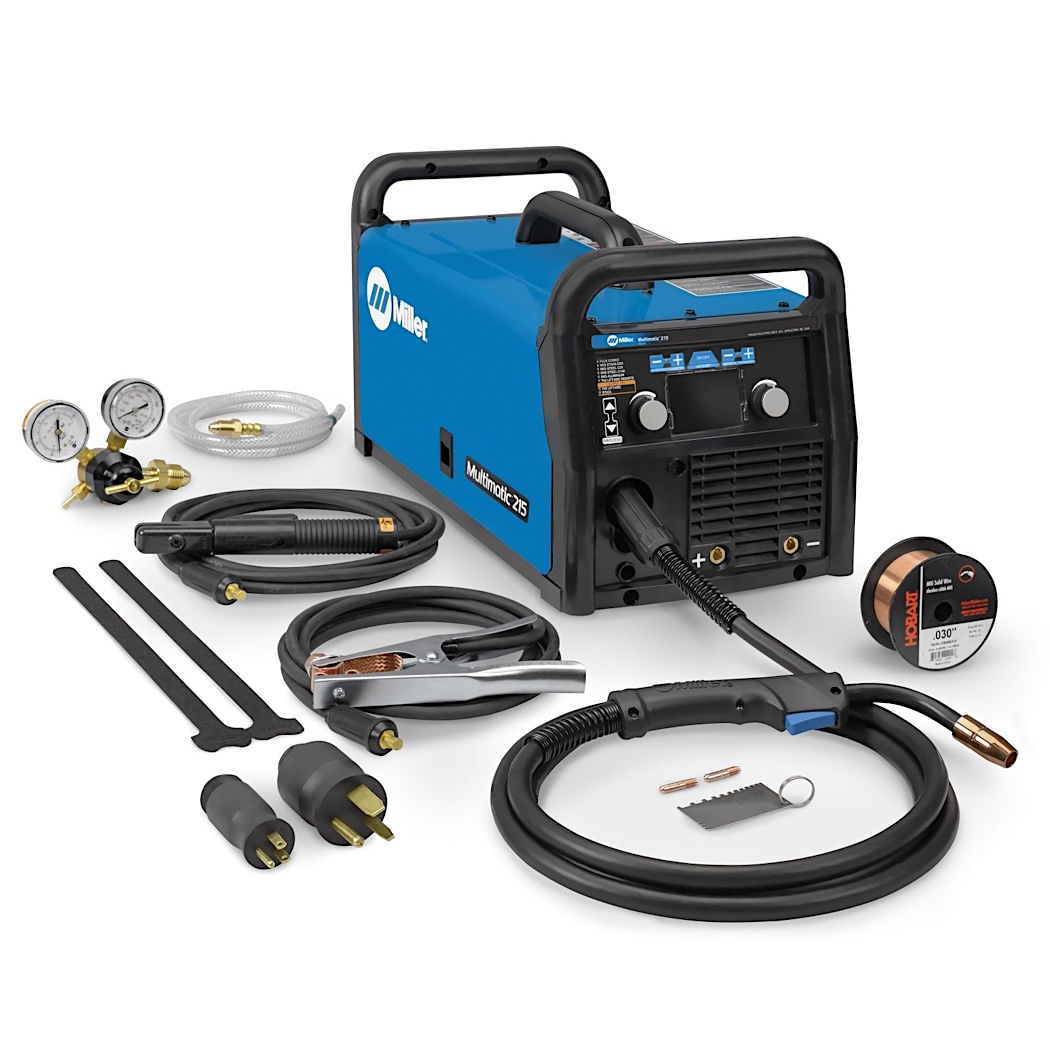
Brand name machines are often better with duty cycle, inverters especially due to better efficiency. But this is also a major thing you pay for when you buy a larger, more expensive industrial grade machine. For reference, from Miller for instance, the Millermatic 211 will do 150 amps at 40% duty cycle on 220v. The 212, a larger heavier duty machine, seems to only offer 1 more amp of power. Except it will deliver 160 amps at 60% duty cycle – big difference. The 252, another seemingly nominal increase, is a further step into heavy duty expectations, will run 250 amps at 40% DC.
Multi-process machines:

It’s been a popular fad nowadays for manufacturers to release multi-process machines. I guess the condescending label I used gives away my opinion of them. I think it’s a gimmick. They’re really MIG welders which COULD do TIG. It’s sort of like calling a stick welder a multi-process machine. Just because you can TIG weld with the machine, that doesn’t make it a reasonable replacement for a dedicated one. These machines don’t have HF start, they will only do lift-start, have none of the good features of real TIG welders and they’re DC only so you can’t really weld aluminum. I’ll go into detail on all that in the TIG article but basically, in my opinion, the multi-process welders currently being offered are overpriced MIG welders (good ones, granted) with a gimmicky TIG mode which doesn’t really do much. If you want to learn how to TIG weld, save your money for a real TIG welder.
There is one exception that is being released in the fall of 2018, the Miller Multimatic 220 AC/DC. This is a properly featured TIG welder as well as an excellent MIG welder. This machine could legitimately substitute for a dedicated MIG and TIG welder. Unlike the previous attempts, this one has AC TIG, balance control, frequency, a decent pulser etc. There are more feature rich TIG machines but for the price, there are no two MIG and TIG machines you can buy that will add up to what this thing is capable of. So if you’re seriously interested in both MIG and TIG and you don’t already have one of them, this thing gets my vote.

Welder grade:
I would recommend starting with one of the smaller, more portable machines like the ones I’ve mentioned. These are usually cheaper, perfectly capable for what we as car geeks need to do and are desirable on the used market should you decide that crocheting and baseball cards are more your thing. However, if you can afford it and don’t need portability or don’t plan to weld on 110 power, the more advanced industrial grade machines offer a lot of room to grow into some more interesting features. I would skip the mid-grade machines and either pick the portable consumer grade ones we’ve discussed or go straight to something like the Miller 350P Aluminum.
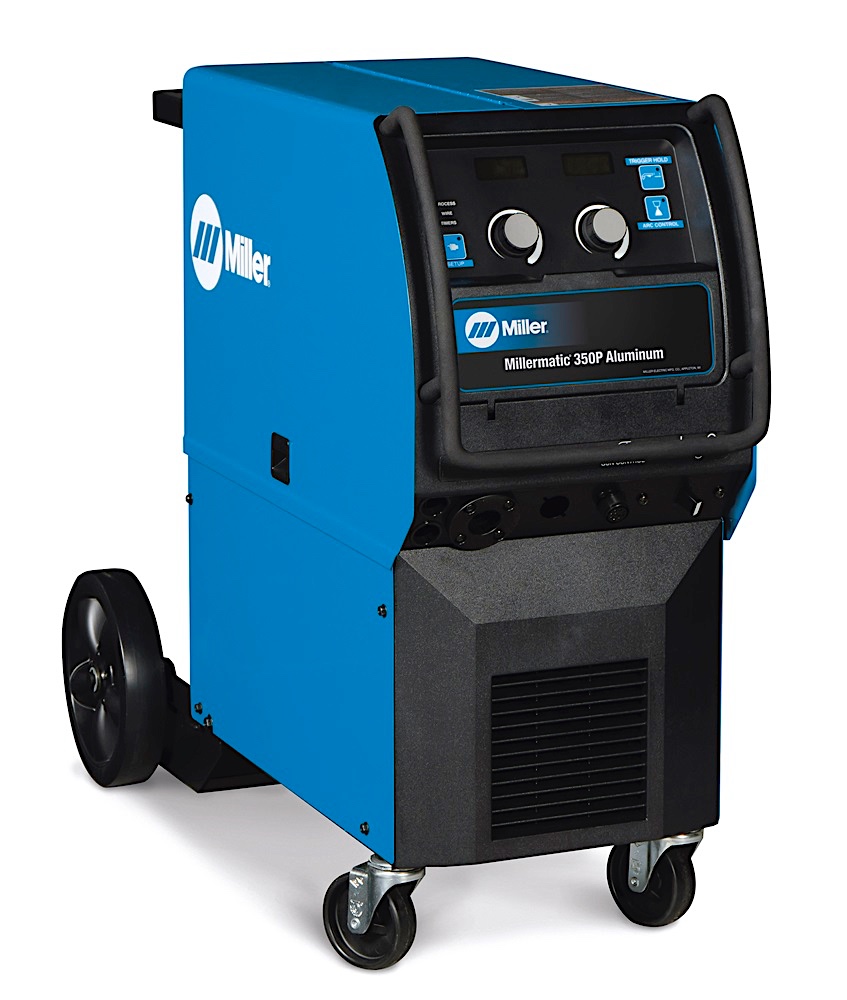
It’s full of all kinds of cool features, not the least of which being spray transfer and pulse but those are beyond the scope of this article. But like the decision between 110 and 220 or dual volt, even if you don’t need it right now, when you’re ready to learn these features, they’ll be there. If you ever decide to start a business, these machines are designed to sing all day.
Flux core:
Like stick welding, flux core wire feed welding doesn’t deserve a ton of attention for our application in my opinion but it does have its place. The main advantage is because it doesn’t use a shielding gas, there is no shielding gas to be blown away. This makes it a good option if you absolutely must weld outdoors and have no reasonable way to shield the weld from wind. Flux core is also a significantly hotter process so if you’re in a pinch and your machine just doesn’t have enough jam to do what you need even with straight CO2, get some flux core and it might do the job. A topic for a more advanced discussion is dual-shield where you run a special flux core wire with shielding gas. You end up with a far cleaner weld, closer to that of normal solid wire MIG welding but you get a lot more heat and penetration. It’s become a go-to process for many industrial applications because you can weld very quickly without paying the price of nasty stick or regular flux core welding.
Gear:
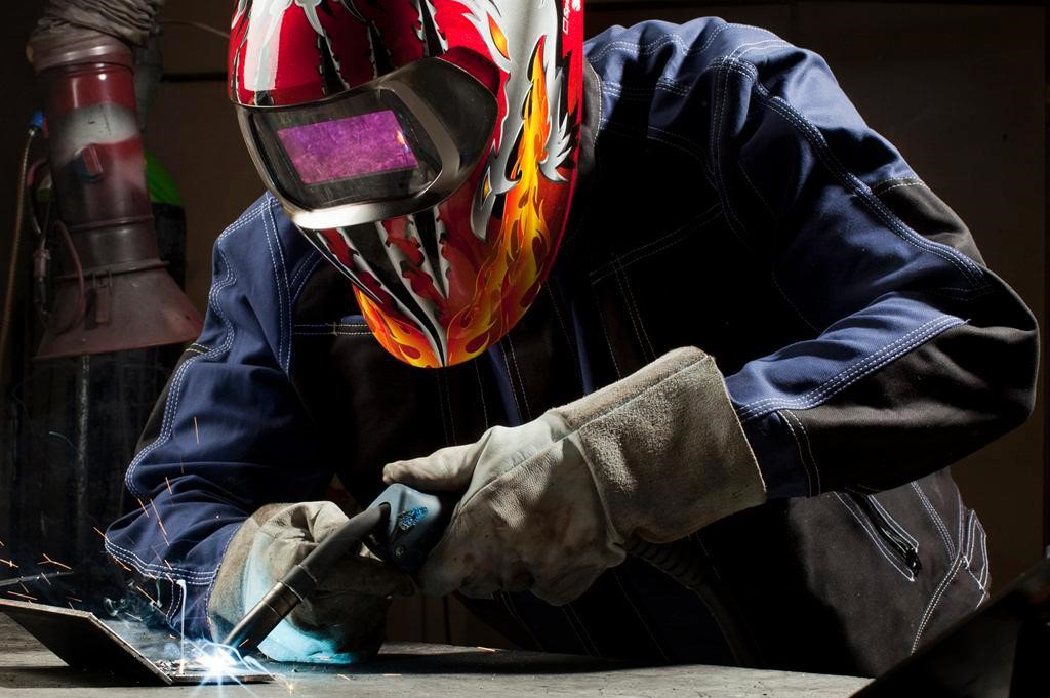
I will cover equipment in more depth in a dedicated instalment, but let’s talk about some fundamentals. Don’t be that guy, protect your body. MIG welding isn’t as bad as TIG in terms of UV emissions but it still increases your risk for skin cancer. MIG also throws a lot of sparks so you generally want something heavier and flame resistant. At least wear a long sleeve flannel shirt and jeans. If polyester catches fire, you’ll basically end up like someone who poured molten plastic over their body. Ideally, get yourself a good welding jacket. I like the Miller ones which are light fabric except for the sleeves/bib/collar where the sparks are likely to land, which is good heavy leather. Also don’t be shy of investing a bit extra in good brand name gloves. The heavy sheepskin gloves from Harbor Freight work but they’re best left for using an angle grinder to protect your hands from an exploding cut-off wheel. You just can’t feel jack in them. Good MIG gloves such as those made by Miller (yes, I’m a fan boy but the other brand name welding companies make good gear as well) are sufficiently heavy duty for protection against MIG spatter but are still comfortable and let you feel what you’re doing.
Lastly and most importantly – PROTECT YOUR FRIGGIN EYES.

Like many others, I initially fell for the appeal of the cheap Harbor Freight auto-darkening helmets. Auto-darkening helmets are amazing. Some old school guys refuse to use them but I don’t really buy any of their reasons. Good auto-darkening lids are light, with huge viewing areas and have a lot of adjustability (including shade which is something you can’t change in a fixed shade lid). But this is not where you want to save your bones. I have personally been flashed by the cheap helmets. I don’t know if they don’t quite react fast enough or what but the difference to me is undeniable. Especially when welding for a long time, I’ve gotten headaches and had tired eyes for a day or two after. But actual safety is just the tip of the iceberg (a big one, to be fair) because you get so much more for your money. This is one area you want to splurge on, even more so than the machine if you have to pick one.
If money is tight, as with welders, my recommendation would be to look for a good deal on a used high end helmet. These include Miller Elite and Infinity, Lincoln Viking 2450 and 3350 and 3M Speedglas (the best one you can afford). I have no personal experience with Optrel but I hear everything they make is excellent. I’ve heard good things about the Jackson Balder. My current lid is the Miller Infinity and I want to get another one for no reason other than that I like it so much (I tell myself it’ll be a student lid to help me teach guys but I just want another one for the sake of admiring it). We’ll go deeper into details about what you get for the higher prices of different models in the equipment discussion but for now, I’ll leave it at my plea to you that you do not cheap out on protecting your eyes. You’re welcome, preemptively.

Technique:
Alright, you’ve done your homework and got your first welder with good safety gear. Now you’re ready to lay some beads.
If it’s a shit-show at first, that just makes you the same as pretty much everyone else. Some guys seem to pick it up quicker than others. Maybe they’ve got history with a paintbrush or something similar. In reality, it doesn’t take much to be able to lay down a successful MIG bead. There are a few things you need to get right and once you do, you’ll at the very least end up with a perfectly sound weld:
- Get your settings right – start with the canned suggestions inside the wire spool door, and make sure your power and ground leads are attached correctly for MIG. See your manual but the ground clamp should be on the -ve terminal and the torch lead on the +ve – called electrode positive, many machines are shipped in flux core welding configuration where the leads will be backwards and that will make things go so badly you’ll want to quit.
- Don’t try to weld non-metal. This includes grease, paint and rust. MIG is very forgiving but just like any other process, the cleaner you get the metal, the nicer things will go, the better they will look and the more sound the weld will be. Also make sure where your ground clamp sits is clean metal.
- Watch your stickout.
Stickout:
There are exceptions in special circumstances that we’ll talk about another time together with other advanced tricks but generally, keep your stickout tight. This is the distance from your contact tip (the thing the wire comes out of) and the weld puddle. Try to keep it to under a half inch. The tighter, the better, within reason. Tighter stickout will maintain better shielding gas coverage and keep more heat in the puddle (a longer stickout increases the resistance, so for the same output voltage of the machine, you’re getting fewer amps into the puddle). You will sometimes not notice that the stickout is getting away from you and what was welding smoothly at first is now popping and spitting – tighten it up and it will go well again.
One of the more challenging things to learn about welding is seeing the puddle. It’s like trying to paint with a short, fine brush that has a sledgehammer handle and you’re wearing a helmet. It’ll take time to find a comfortable position and it can be frustrating at first but stick with it. Good helmets with large viewports help with this.
Start with the desired stickout. Keep a pair of side cutters handy to trim the wire as needed. I often just let the thickness of the side cutter determine the trimmed wire length, it gets you close when you’re in a rush. You’ll find yourself using it frequently when you’re first learning or you’re welding in a really awkward position where you keep triggering the gun by accident and end up with a bunch of wire sticking out.
Lay it down:
You’re now ready to start running beads. Don’t try to do anything special at first, don’t even join pieces. Grab some plates from the off-cut rack of your local metal supplier. Get hot rolled steel, cold rolled can make welding go funky and you don’t need any curveballs at this point. You can usually tell hot rolled from cold rolled by the edges – hot rolled have sharp, square ends and cold rolled have more rounded/bulging ends (like from crushing a marshmallow). If you’re in doubt, ask the guys there.
Set your machine for the thickness of the plate, trim your wire, and get comfortable with a good tight stickout. Your gun hand will eventually develop to where you’ll be able to weld one handed quite well but even at this point I still use my non-gun hand for gun manipulation when it’s feasible. Basically, use the gun hand to hold and trigger the gun, and use the other hand to prop the nozzle and work together with your gun hand to manipulate the nozzle.
Watch and listen:
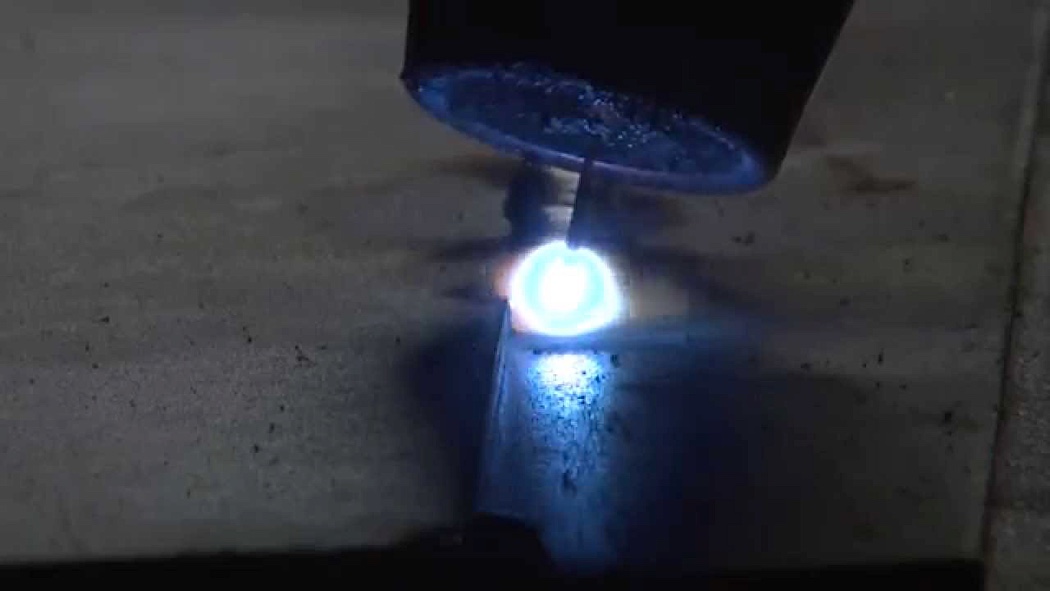
The common advice you hear for the sound of a good MIG weld is frying bacon. I don’t know what kind of bacon these guys are frying but the sound of some good fat bacon frying is the sound of a dirty or cold MIG weld. You don’t want to hear distinct pops – these are momentary losses of arc. A good MIG weld should sound more like a zipper being done up combined with TV static – a nice consistent buzzing/hissing sound.
Visually, you want it to look like a good caulking job. If it’s a fillet weld (joining 2 perpendicular pieces) and you cut it in half, it should be a nice consistent isosceles triangle with the short sides about equal to the metal thickness (or if uneven thicknesses, then the thinner of the two). The edges of the weld shouldn’t be below the surface. This is called undercut and it means the weld is too hot – either turn down your jam or add wire feed and move faster. The weld should also not be flat or concave (sunken in), this is also an indication of it being too hot. A good MIG weld should be a little convex. You don’t want it to be too convex or have a clear ridge wrapping around at the edge – this is called having cold toes and the weld is too cold, you’ve basically just dumped a bunch of metal on top but it isn’t fused well with the base.
If the weld is spitting and popping, and you have good gas flow (aim for around 25CFH, go up to about 30 if you’re going to go thick like ½” or if you’re doing thin sheetmetal, you can try going down to 20), good stickout and the metal is clean then try messing around with wire feed. You can often feel when the feed is too high because in addition to popping, you will feel the wire pushing your gun away from the puddle because it’s pushing more than the arc can melt into the puddle. Too slow a wire feed will make the wire start burning up before reaching the puddle and you momentarily lose the arc before enough wire is delivered again. This can get so bad that you burn your contact tip and possibly even weld your wire into it. Buy a package of contact tips, maybe get one of each of the common wire sizes (around 0.023, 30 and 35). If you melt one, even fuse the wire in, just unscrew it, pull the wire out a bit and snip the wire. To put a new tip on, feed the wire until plenty comes out, then slide the tip over it and tighten it in place. They sell special pliers to do this but don’t bother, any pair of pliers work just fine. Just snug it down, no need to reef on it.
Trace it out:
For making the actual bead, at first start by just drawing straight lines. Experiment with travel speed until you get the sound and visual desired. When welding thin pieces together and a small bead is needed, this type of straight line welding is all you need to do. When you need to create a wider bead, you will need to wash the metal around.
You can try a step/pause technique, where you stop for a moment to let the puddle build up to the desired bead size, then move forward and repeat.
A more common approach is to manipulate the gun side to side as you go, drawing cursive “u”s or “e”s – the e means tracing back into the puddle and results in more metal being deposited. So depending on how much more metal you want to add, trace back or just go side to side and forward (ie draw Us).
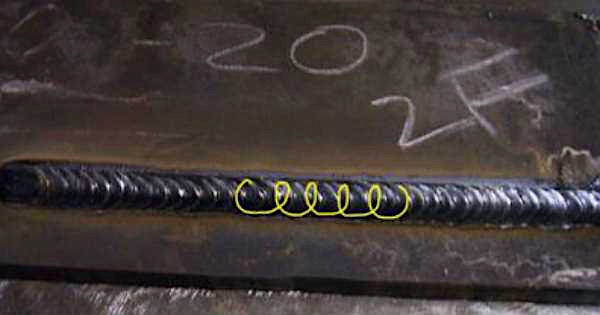
As far as how far to move each time, move the width of the puddle. Say you’ve built up the bead at the current spot to the right size, notice where the leading edge of the puddle is and move the wire to that spot next and build up your next puddle there. This is where you get that ripple effect. The ripples are called “freeze lines” because the ridge that is formed is the rear edge of the puddle that solidifies first as you step forward.
Stay in position:
One of the more common mistakes beginners make is getting out of position. You’ll get nice and comfortable, find a good position for your arms, stick your head where you can see what’s going on and start welding. The problem is that after the bead is long enough, the perfect position you were in is now bad. If all you did was rotate the gun to aim it where you want the weld to move, it is now at a sharper angle and the stickout is probably becoming long. This is what makes pipe welding hard for some guys to learn because they never got this lesson and on a pipe, your angle has to change with every step (otherwise you’re moving off at a tangent).
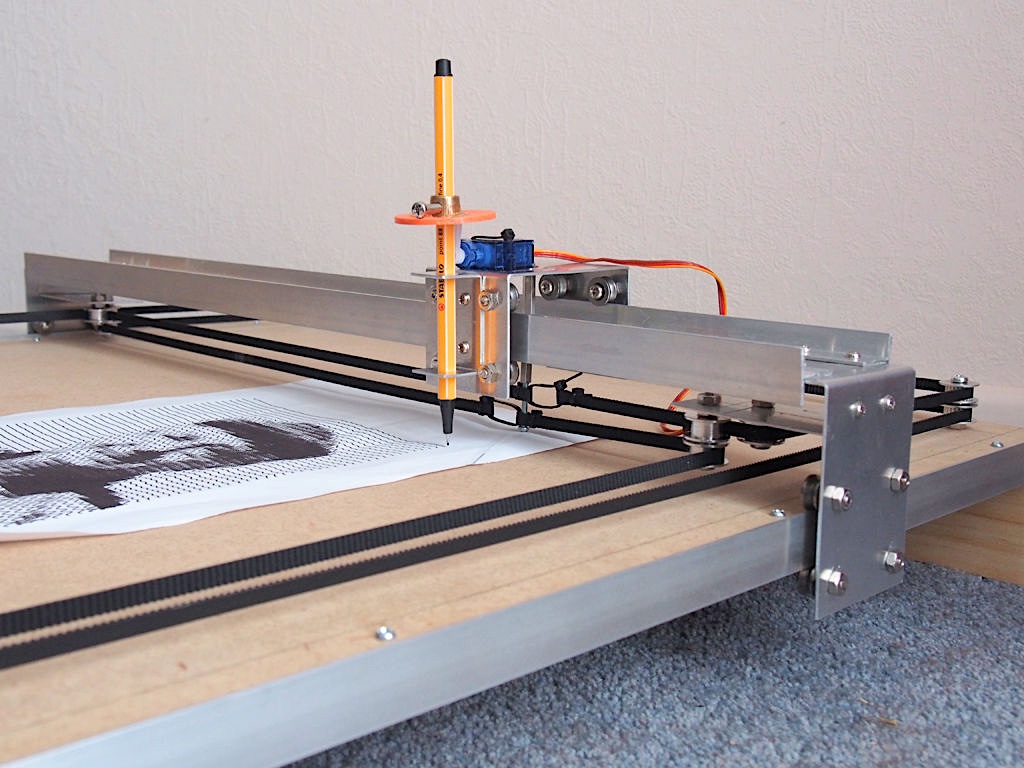
Unless you know you will be making a short weld, you want to set yourself up so that you aren’t resting on your arms but you can move yourself like a CNC plotter – the torch stays at a fixed angle and your body will move it along the weld direction. Try to do this more often than not while you’re practicing. In real life, it’ll be rare that you’ll have to do long runs like that but you don’t want to have to learn how to do them when it matters.
Take dry runs! All of the best pros do this, you should too. At this point, for you it’s mainly to get extra practice with muscle memory. But even when that is in place, a dry run will let you ensure that you’ll be able to complete the task. You’ll often find that half way down the planned weld, your torch hose or glove gets snagged on something, or your helmet gets caught up. This is the time to find that out.
MIG welding will let you get away with quite a bit of bad technique but why practice bad technique? Try to do it perfectly, especially while practicing. If you ever decide to take up TIG welding, you’ll be happy you followed this advice.
Wait, there’s more…
But that’s for another time. This will get you started and in an advanced techniques article, we’ll talk about things like pulsed MIG, tricks for building up holes, welding thin sheet metal like bodywork without burning through or building up too much metal and while avoiding distortion and other cheats – like using the advantages of MIG welding and then making it look pretty with the TIG.
Don’t forget to let us know if you’re getting ideas for specific topics to cover in the coming installments.
Up next, TIG basics!
If you’re looking to make a career out of welding and fabrication check out: https://scitexas.edu/welding/ Please note, we have no affiliation with SCI Texas nor were we paid to put this link here.
That’s cool that MIG welding only requires you to use one hand. I imagine that can be really useful in any number of industrial projects. If I worked in an environment where I had to weld regularly, it would be nice to use equipment that is convenient and safe.