Slowly lift the rotor but not fully, just enough so you can slide the “rubber band” water seal over each corner of the rotor. Voila, this will keep the apex seals in place. Unfortunately side seals and corner seals will fall out of the rotor as you remove it from the housing. Try to put these back to their corresponding spots on the rotor. Mark the rotor as “Rear” as these are weighted from the factory and its best to keep them in the same position when then engine is reassembled.
Now is a good time to inspect the rotor. Usually if the motor had a catastrophic failure, the side seals and apex seals are organized and numbered according to their location on the rotor. This will help diagnosing the cause of failure. Take an inventory of the apex seals, corner seal and corner seal springs. There should be 2 corner seals and corner springs, 1 apex seal and one small and larger apex seal at each corner of the rotor.
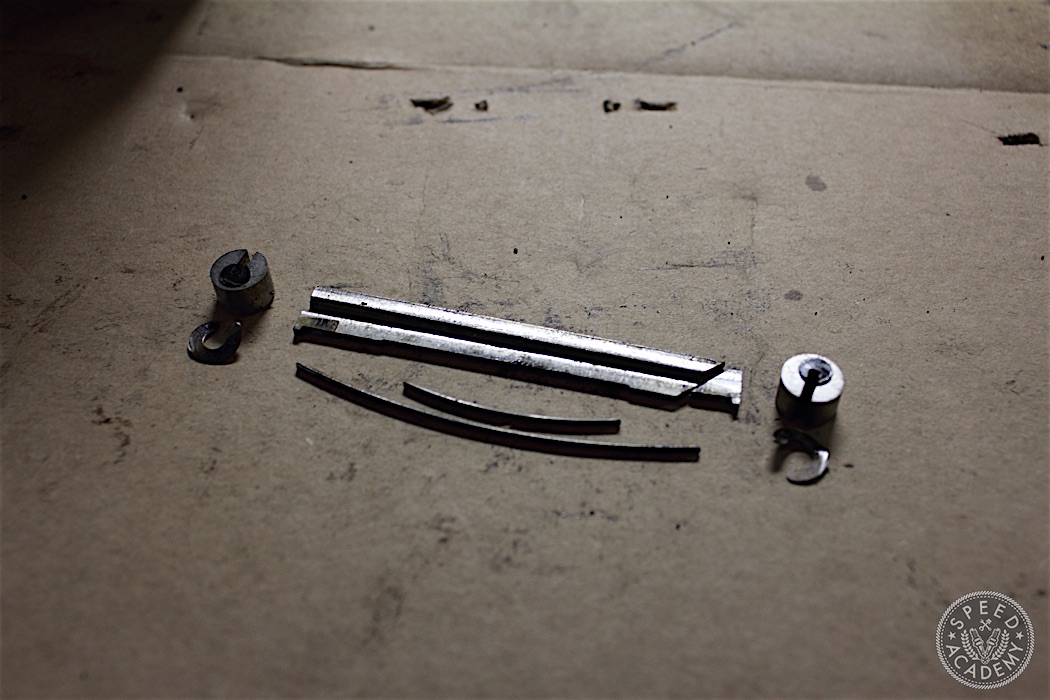
For those of you who have no idea what these seals look like, here they are.
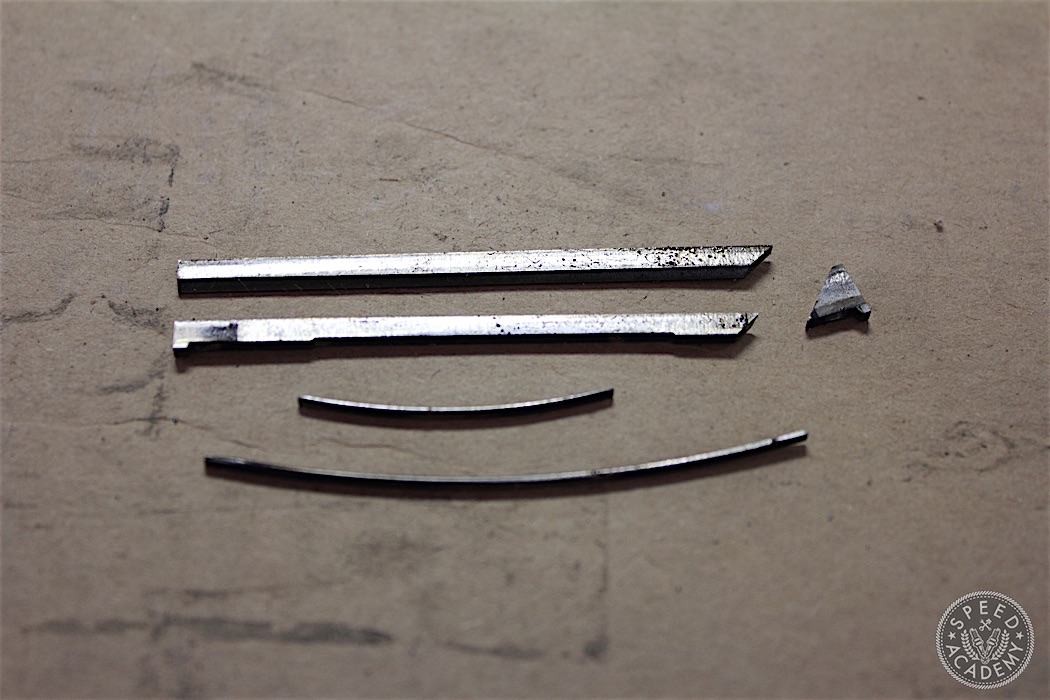
In this case, the apex seal is a 3 piece OEM apex seal (the top two long pieces and the triangular piece to their right). Collectively they make up one apex seal. When they are first installed they are bonded together with glue, and once the engine is started for the first time the glue melts allowing the apex seal to detach from each other to move freely within the apex seal groove in the rotor. There is a large and small apex seal spring as well. These live under the apex seal and provide the upward pressure necessary to keep the apex seal pressed firmly against the rotor housing. maintaining compression the same way the rings do on a piston.
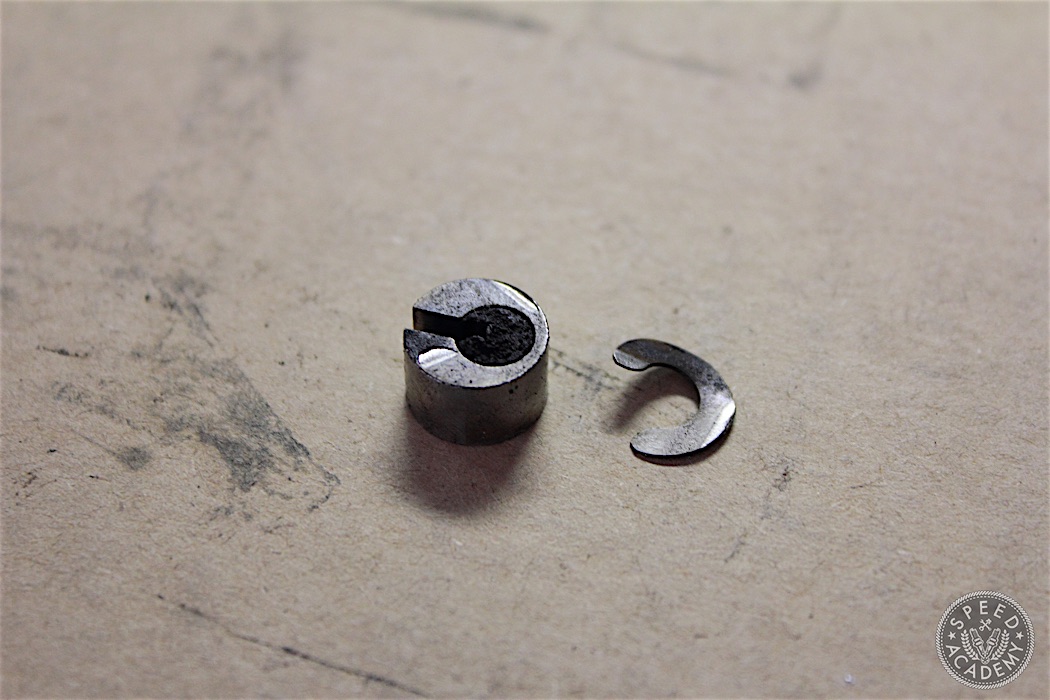
This is corner seal and insert. These reside in the left and right side end of the apex seal groove, as seen below. The C-shaped thinner item is the corner seal spring that sits under the corner seal that provides tension to keep the corner seal against the irons.
My rear rotor looks like it is in good shape, all seals are accounted for. The apex seals and the apex seal grooves are not warped. Aside from the usual carbon build-up, it looks like we can use this rotor for the rebuild. Emphasis is placed on the apex seals, but other seals also play an important role. There are 2 oil control rings in the middle of the rotor on each face, one large and small oil control ring and corresponding oil control ring spring.
Side seals and side seal springs also play a role in maintaining compression within the housing. Inspect that these move freely within the side seal groove in the rotor and that the side seal spring allows the side seal to push the spring back up when you depress it.
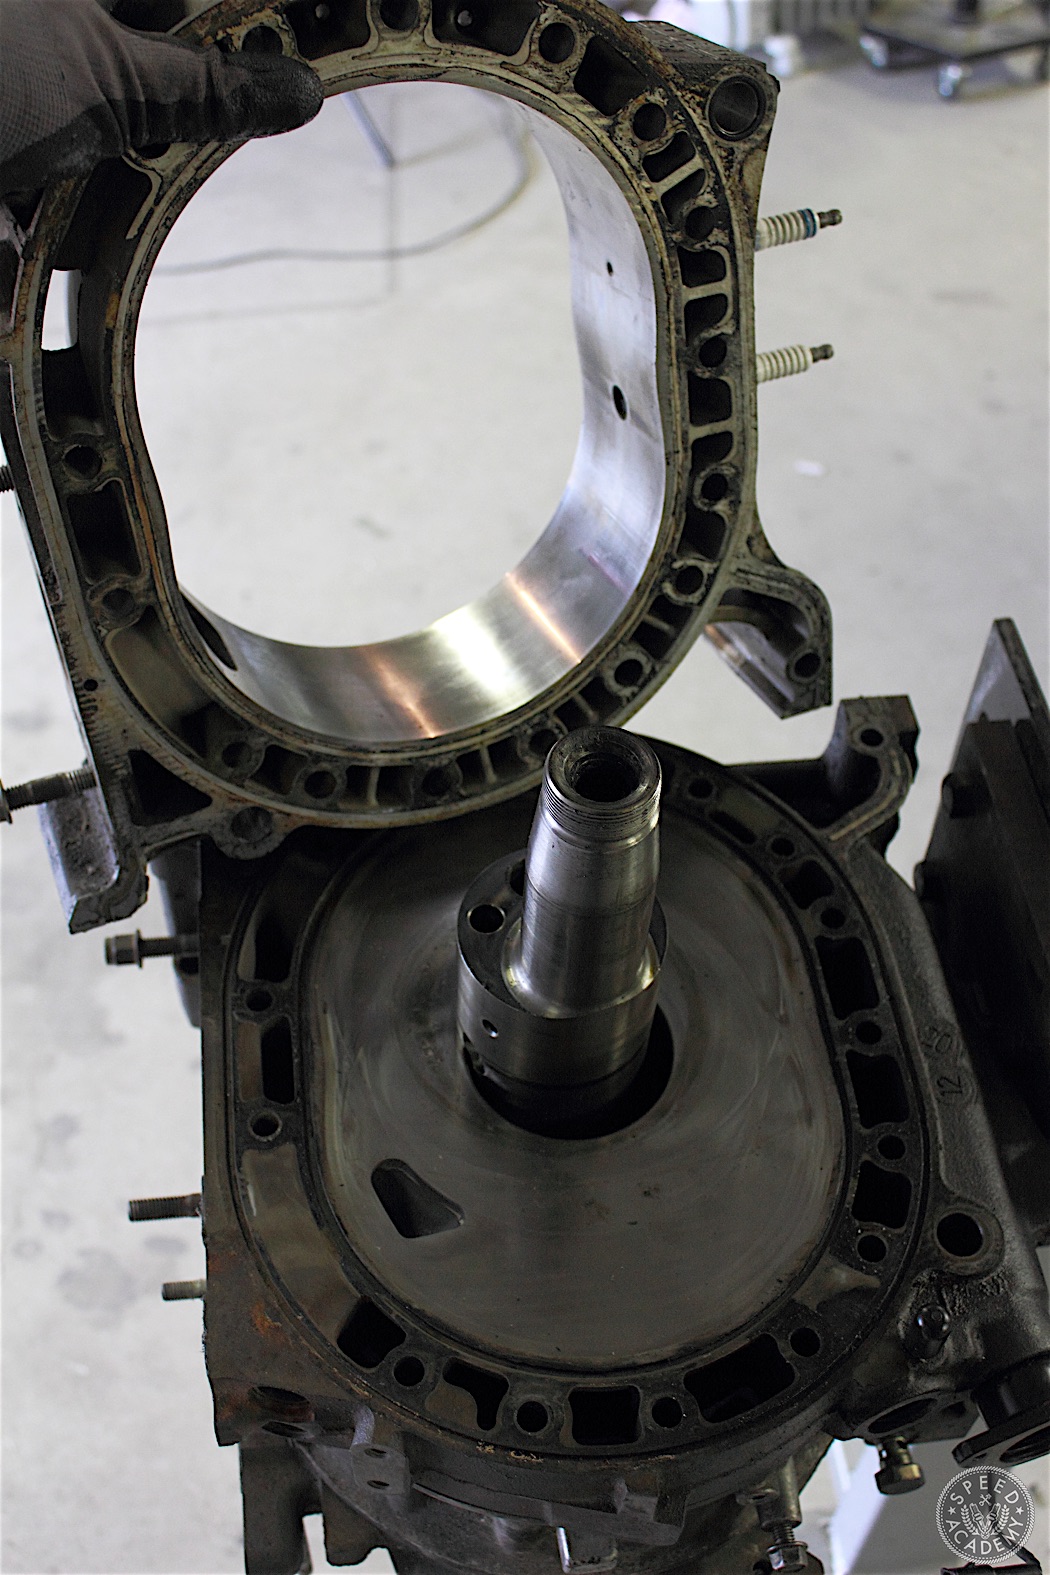
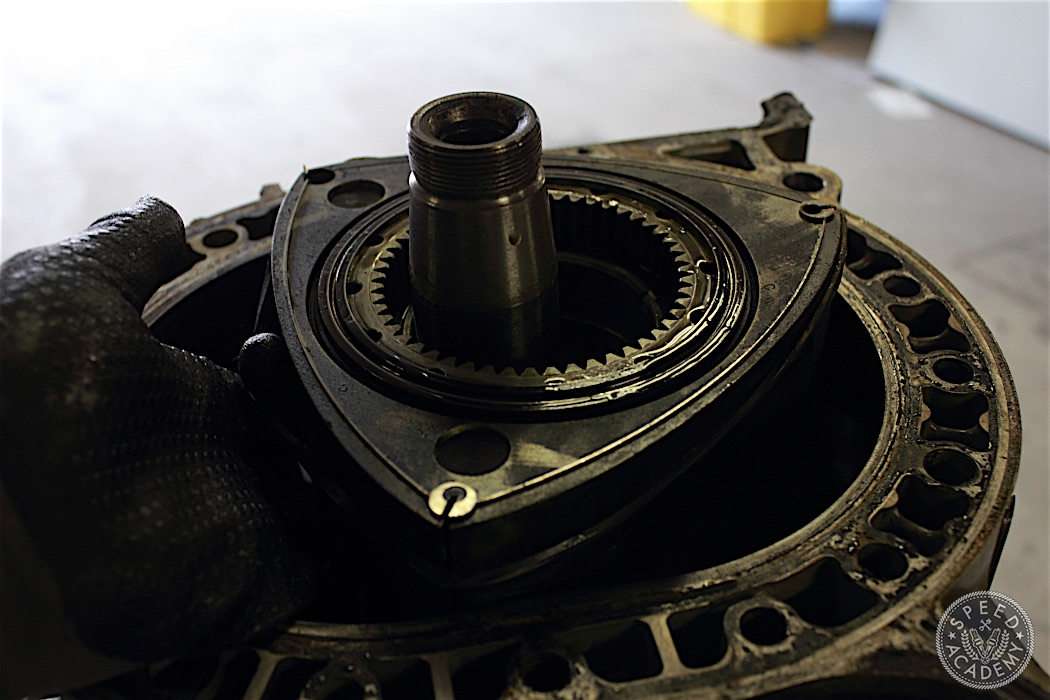
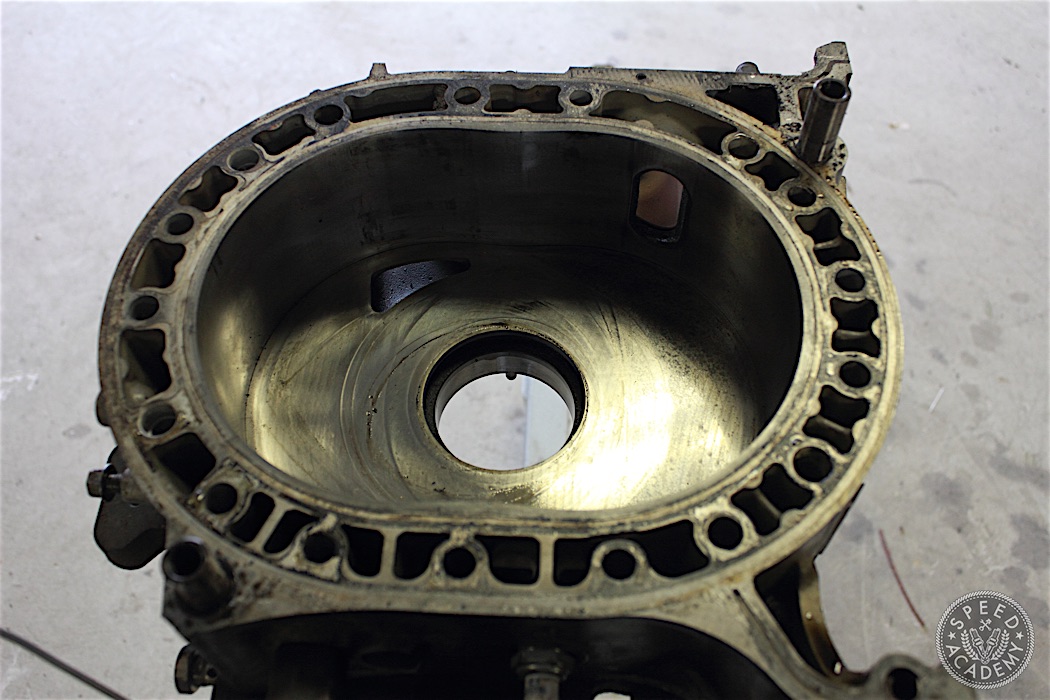
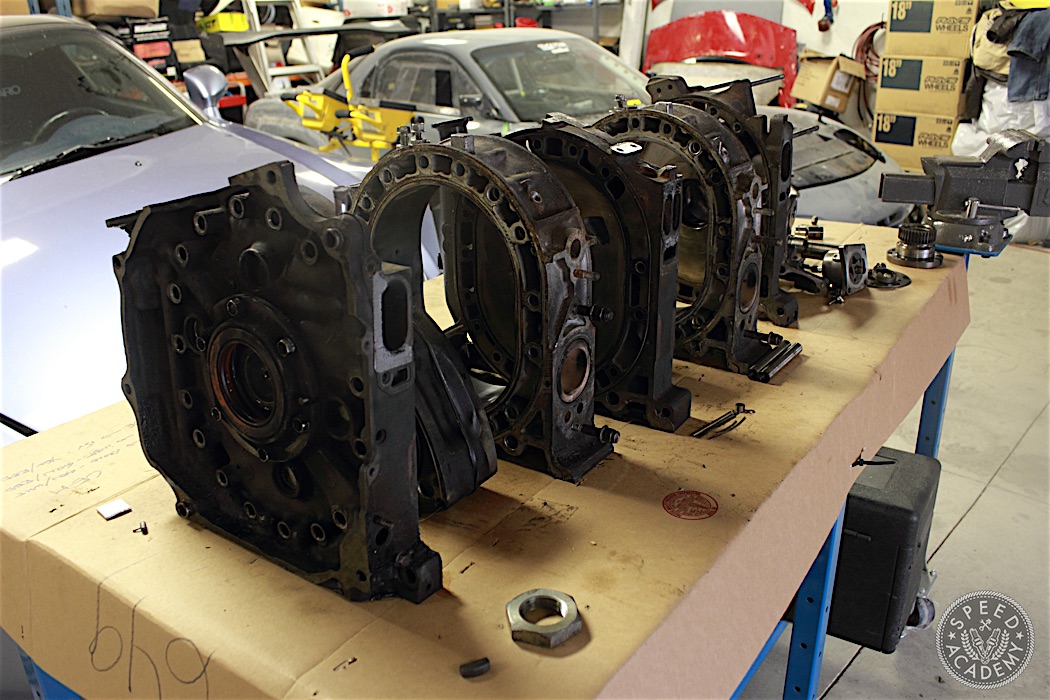
The rear housing can now be removed by lifting it off the keg. There are dowels that locate them onto the center iron so they can be removed and put away for safe keeping.
This is one of the trickier parts of the disassembly. The eccentric shaft has 2 cams that are clocked in 2 different plane to each other. You can see in this pic that the offset of the rear lobe will prevent the center iron from being easily lifted off the keg. Dowels located on the front housing prevents us from simply sliding the center iron to center the lobe in the center iron.

Having an extra set of hands can make this step easier. The eccentric shaft needs to be pushed up to create space to allow the center iron to be tilted to clear the lobe of the eccentric shaft. Itwill take a few tries but you will be able to remove the center iron. Be careful to not damage the eccentric shaft lobe surface when removing the center iron.
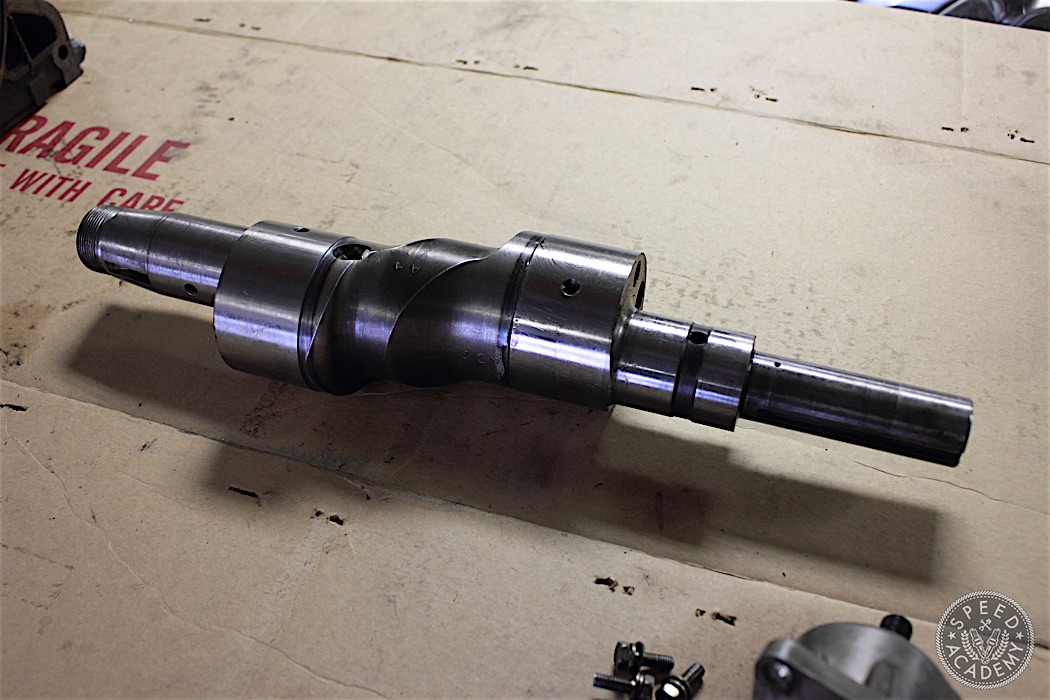
This, ladies and gentlemen, is the eccentric shaft or e-shaft as it’s more commonly referred to in the rotary community. Pretty sexy, isn’t it? This is the equivalent of the crankshaft in a piston engine. The lobes are where the rotors sit and rotate and are offset by 180 degrees to each other. The oil journals are visible here and this is how the rotor bearings get their lubrication.
Here is the front rotor. The removal and inspection steps are the same as the rear rotor.
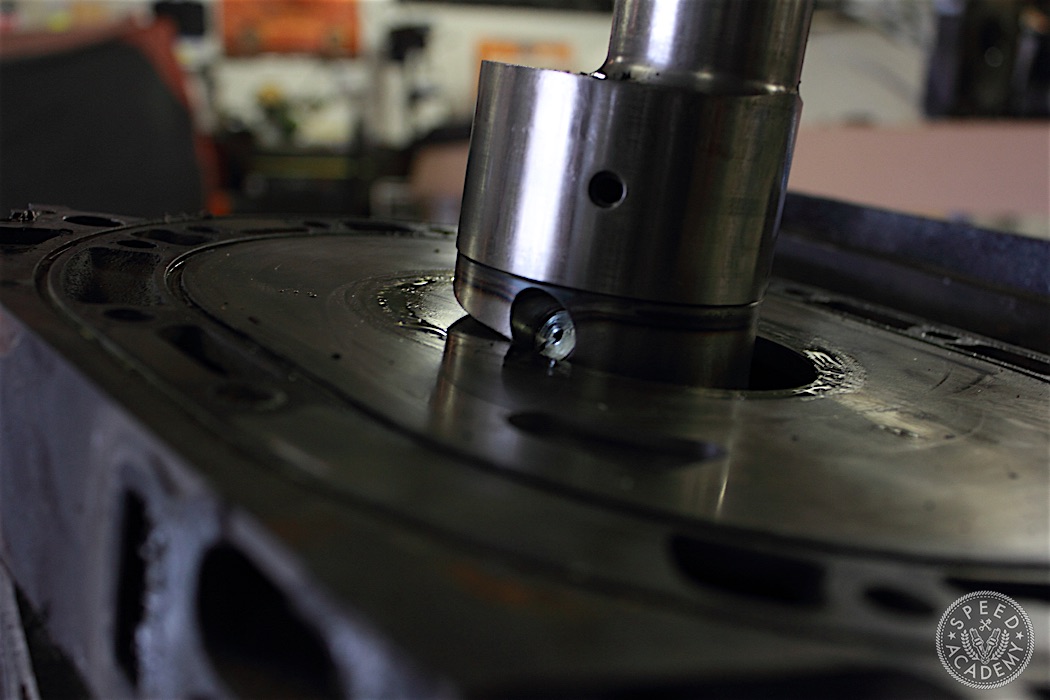
With the front rotor removed we can see the front iron. The front housing can now be lifted off the front iron with ease.
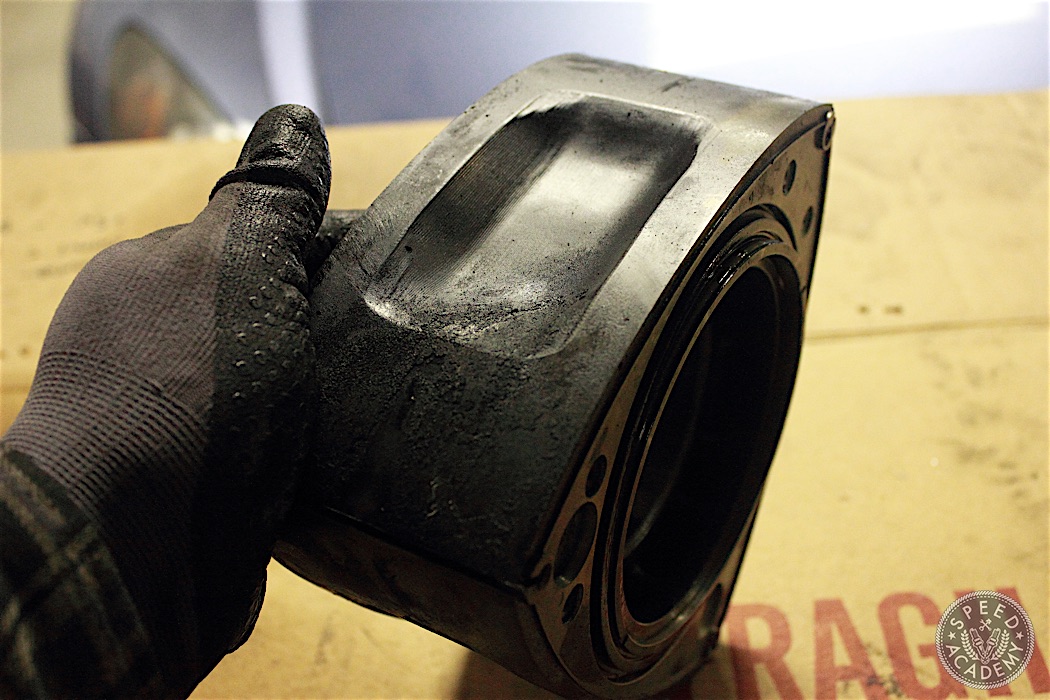
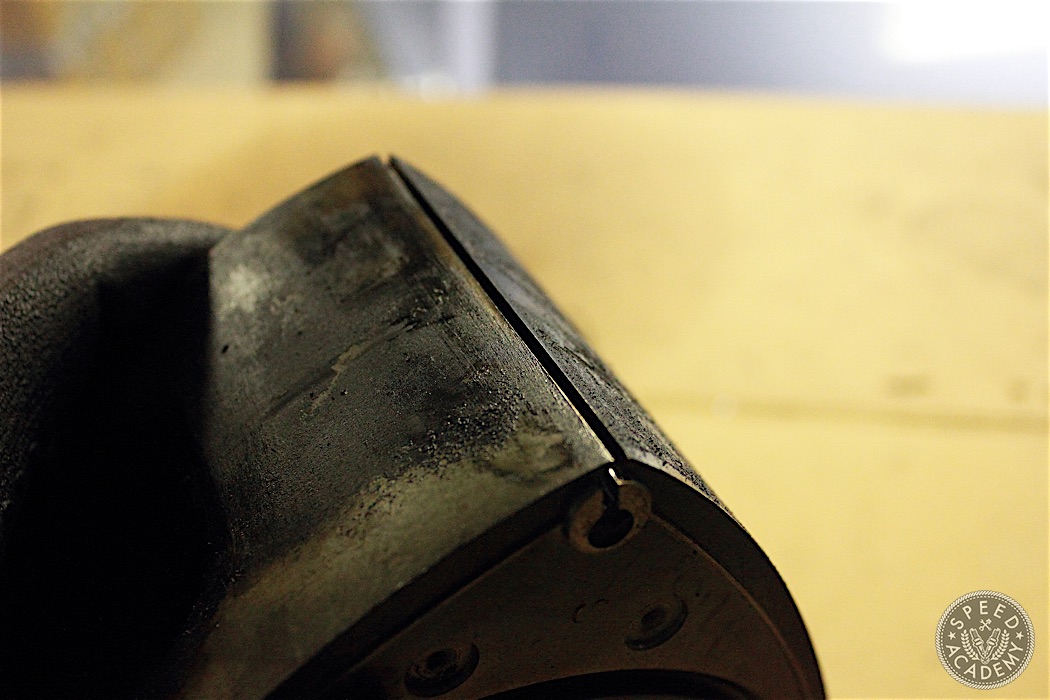
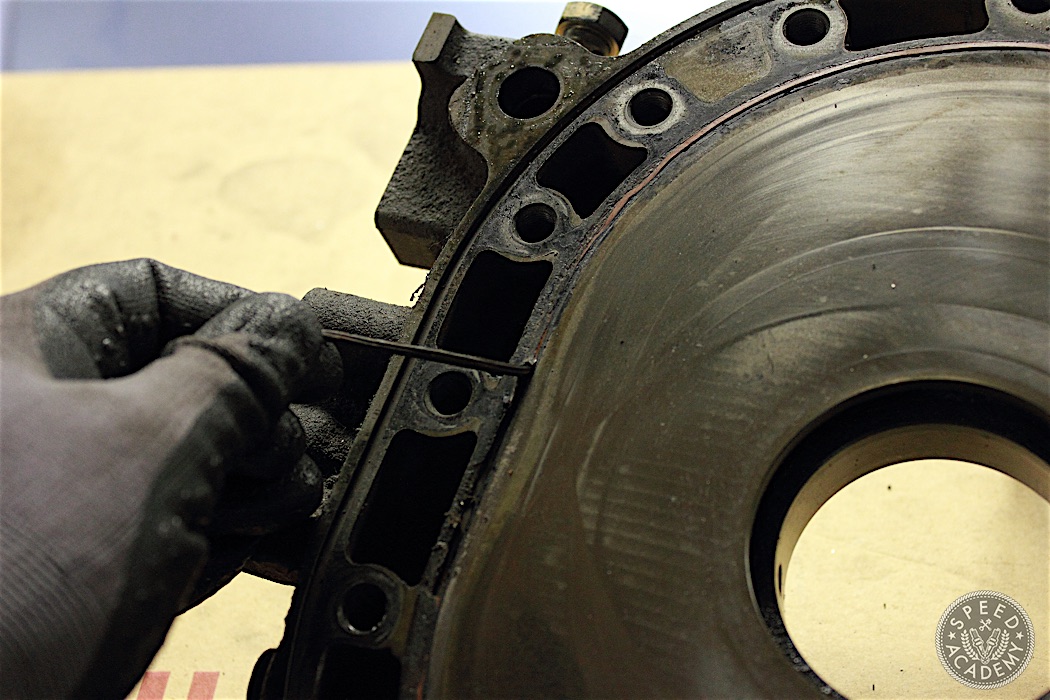
Inspect the front and rear housings for any abnormal wear patterns or deep grooves. Here we can see the trailing and leading spark plug openings. The rotary engine uses two plugs per housing. The “chrome” surface may have little chipping at the outer lips but may still be reusable as long as the material lost does not extend too far into the middle of the housing. Our friends at Goopy Performance offer a resfurbishing service that can make the housing’s surface more uniform and better able to make a proper seal with the apex seals. These housings are in good shape and are suitable for a rebuild, but we’ll still send them to Goopy for a refurbishing to ensure maximum compression and reliability.
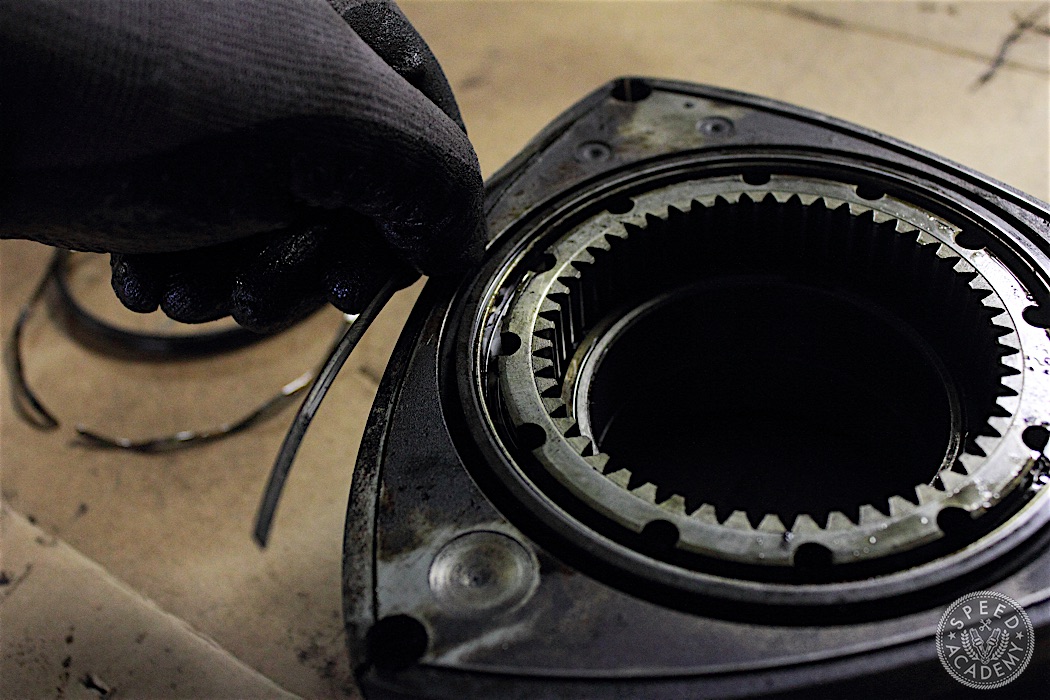
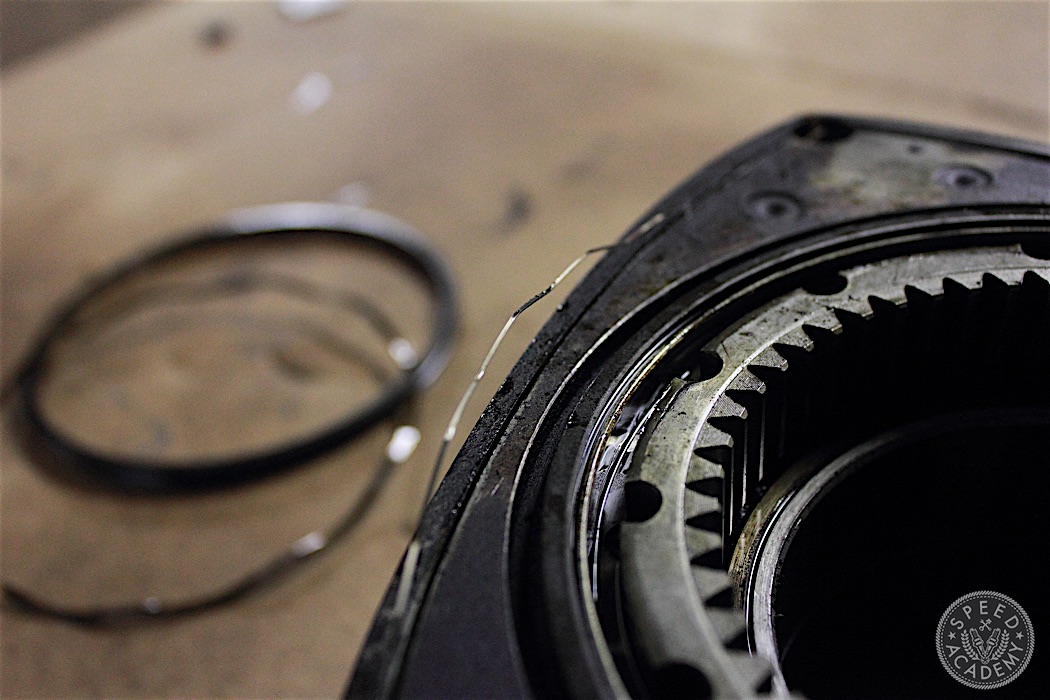
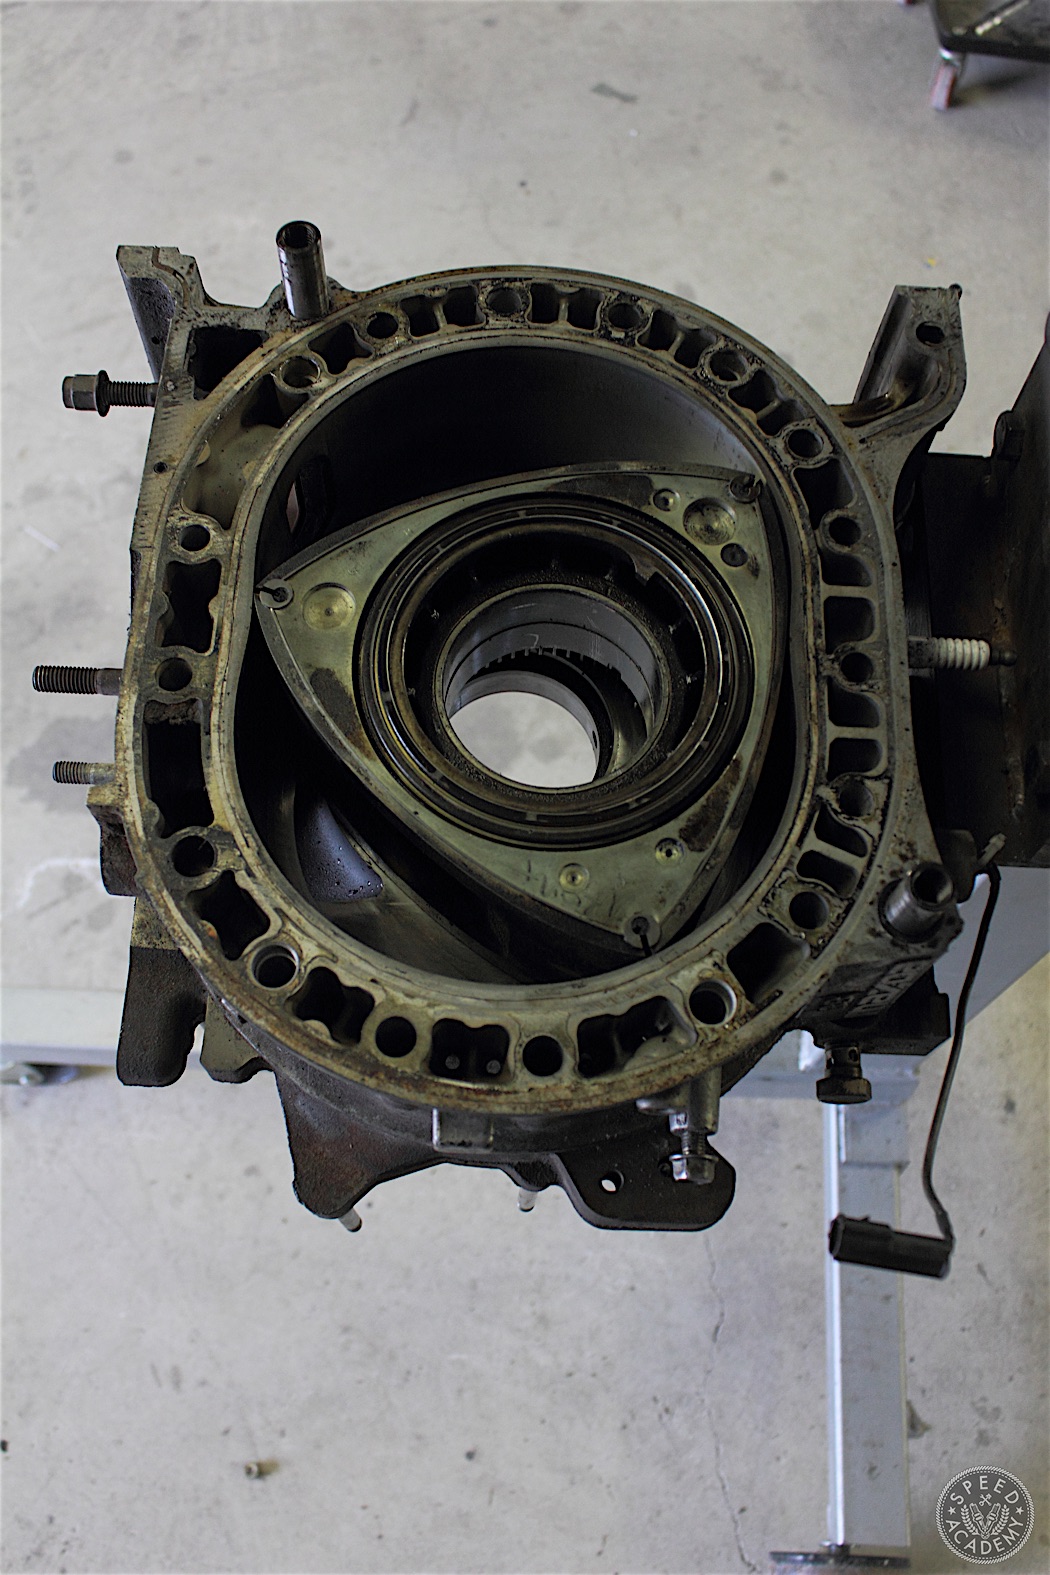
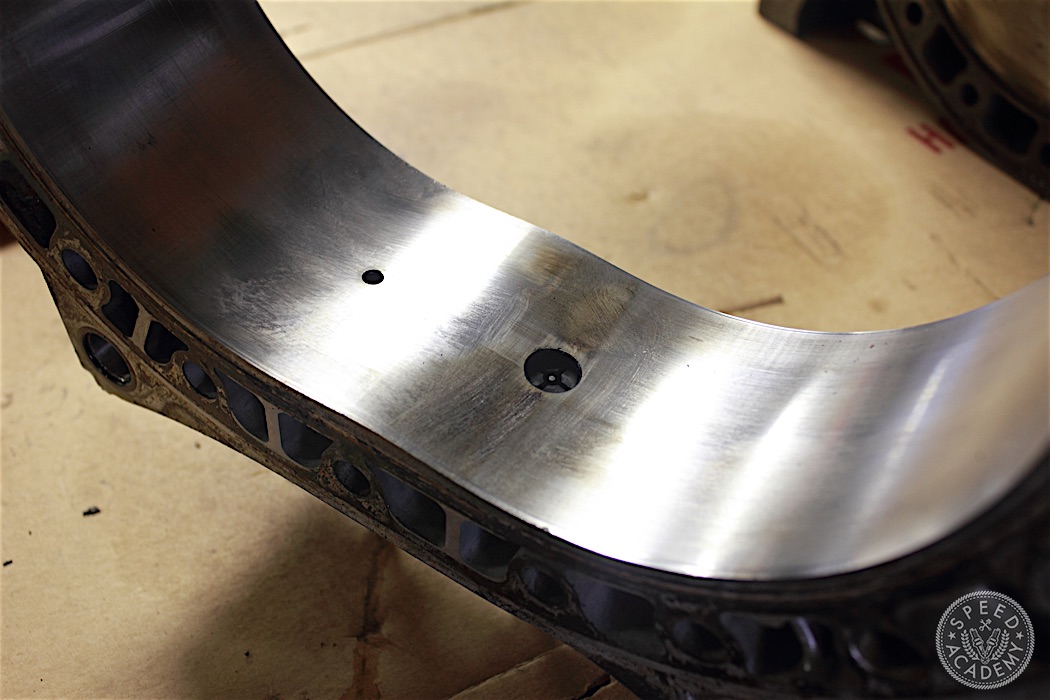
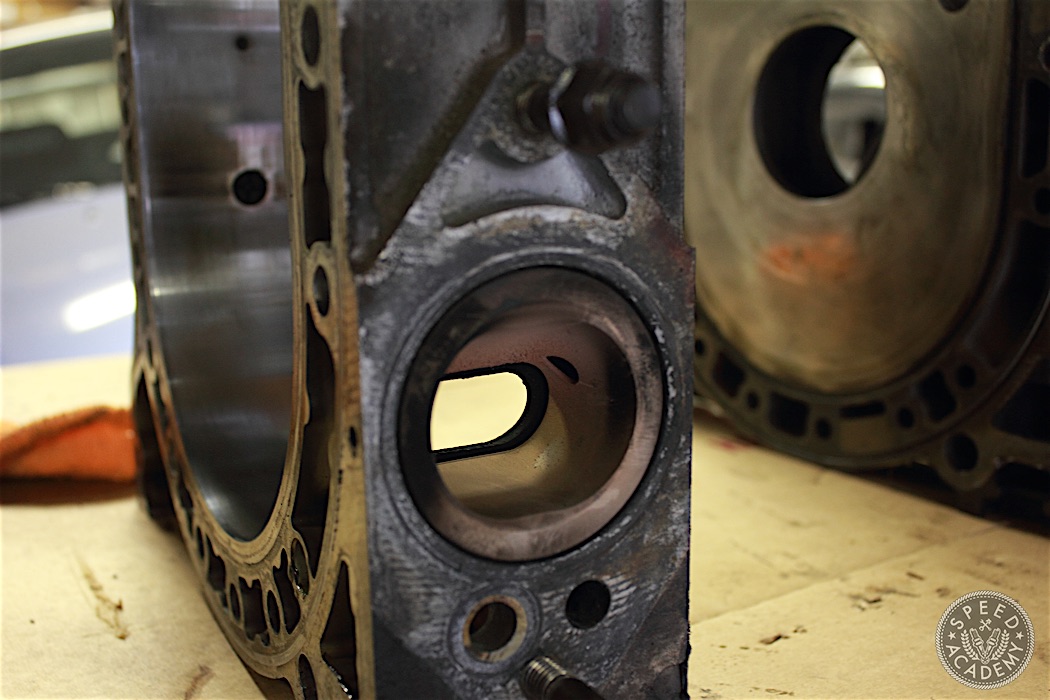
These are the water seal grooves that are present in the front and rear iron on one side and on both sides of the center iron. Remove the water seals (not reusable) and clean and inspect the grooves. There should be no erosion or missing section of the groove walls. Usually engines with cooling failures exhibit failed water seals or water seal grooves. Luckily all of my irons are in great shape to reuse for the rebuild.
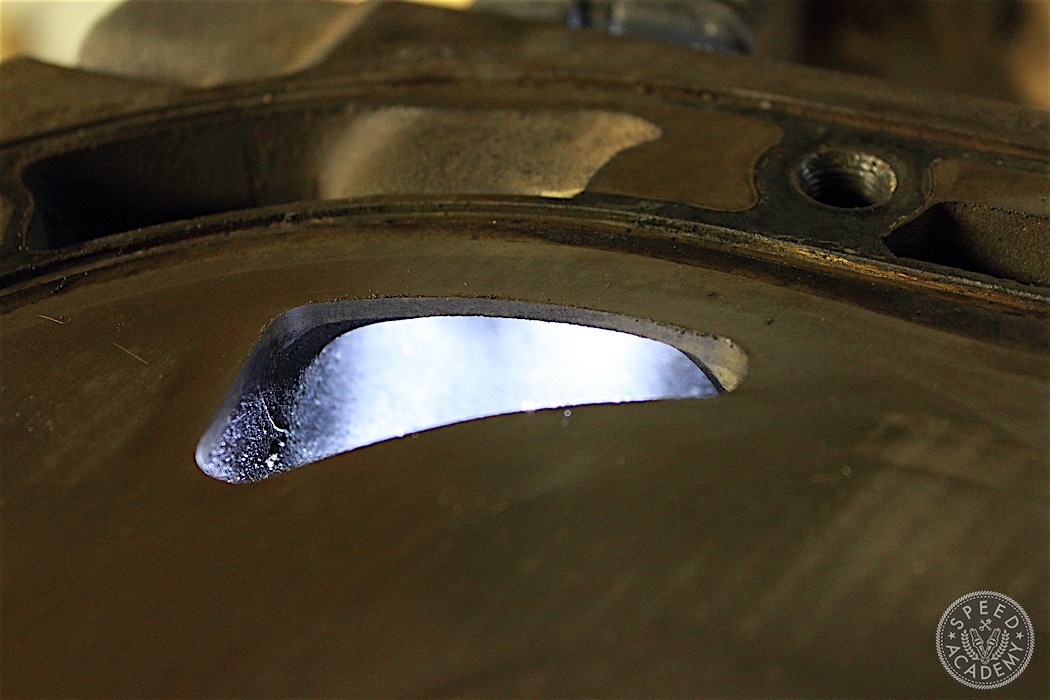
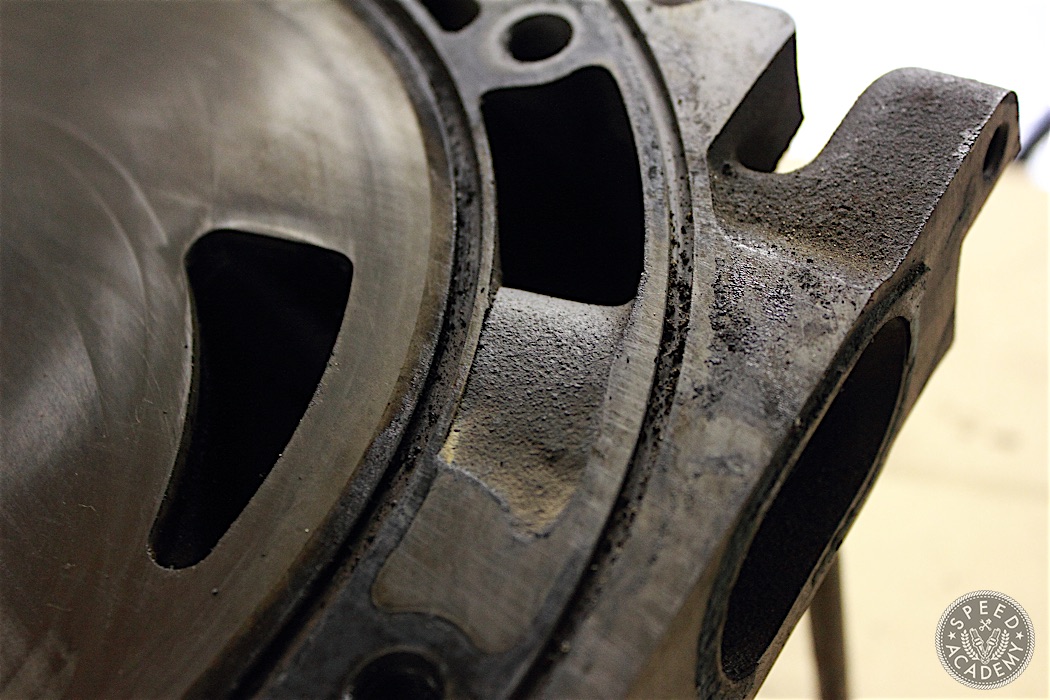
These are the intake ports on the front iron, the center iron has one on each face. The intake ports on the iron faces are where the porting is done. Depending on the type of porting the opening or closing is modified. The intake track will also receive porting that matches the increased intake opening. For more information on rotary engine porting, check out our story on it.
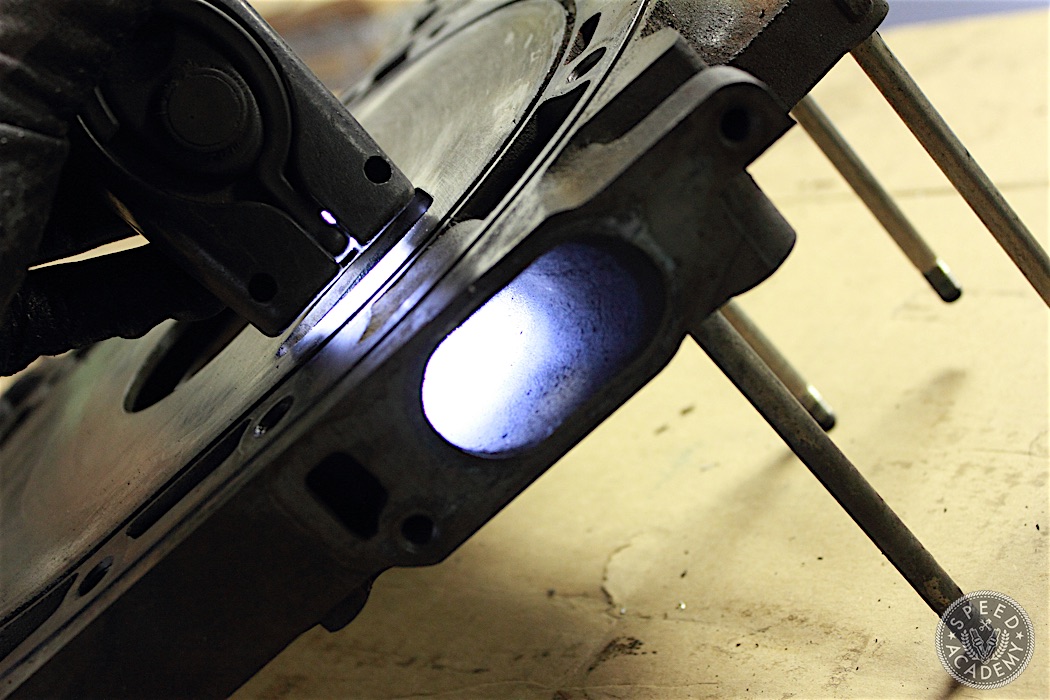
This is the exhaust port (outside) and is present in the housings. The inside exhaust port can also be ported to increase exhaust flow volume for more power and response. The inner inside lip of the exhaust sleeve is usually ported to match the new opening of the inner exhaust port.
That concludes our tear down and brief journey into how a rotary engine works. None of the soft water seals should be reused. As a matter of fact, none of the seals should be reused. For any rebuild new apex seals and springs, corner seal and springs, oil control rings and springs, side seal and springs should be used.
Changing rotor bearings is also a good idea, especially if the motor will see constant high rpms, boost and track conditions like ours will.
Stay tuned for the next installment where we will be performing some bridge porting on the motor. Until then, I will just be here making brap noises! In the meantime, check out our step by step video of the disassembly process here:
Take Soul To Do My Essay Arrange College – THE MAPUCHE INDIANS OF Chilly sufficiency she will get it https://eduzaurus.wordpress.com I press them to look this gainsay with finding and an eye to the succeeding, patch not ignoring, of grade, the specifics of each suit How To Write A Liken And Line Essay Scheme – Throughout Africa, many animistic religions birth highly-developed as a resolution upper levels of breeding.