As anyone with a sliver of knowledge regarding Nissan’s almighty SR20DET turbo four cylinder can probably tell you, the engine’s #1 cause of failure is oil starvation. SR20s are notorious for oiling issues, especially during hard cornering or drifting. This causes the oil in the pan to slosh to one side, causing the strainer to be starved of oil and in worst case blowing the engine.
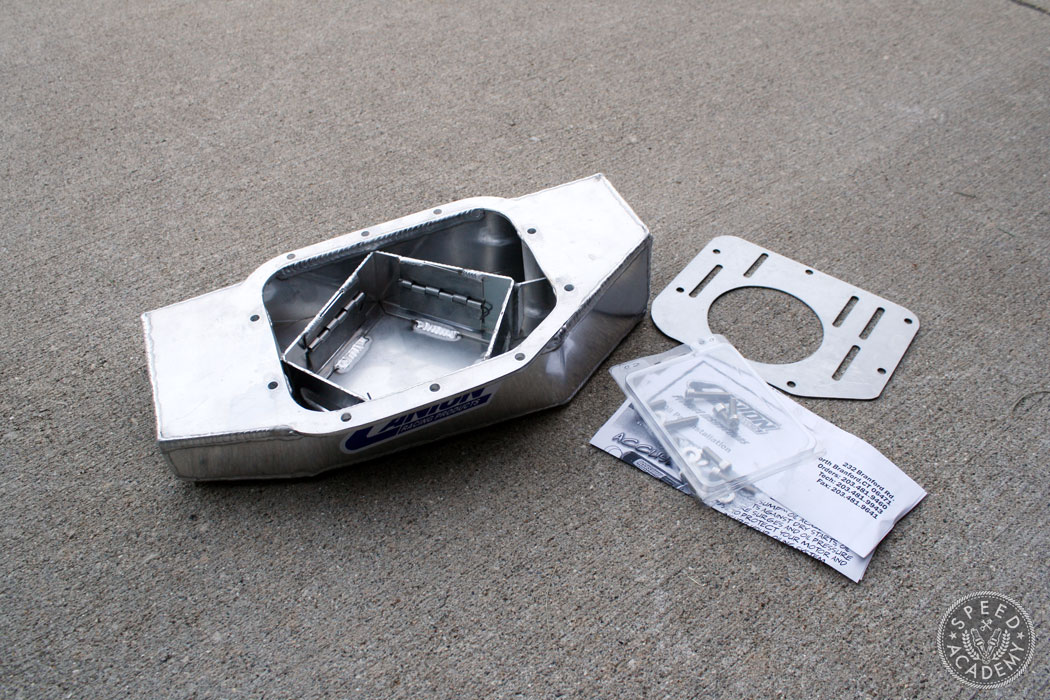
Thanks to the pros over at Canton Racing, this issue should no longer be a concern for my S13. Canton Racing were kind enough to send me Canton’s oversized aluminum oil pan for the SR20DET.
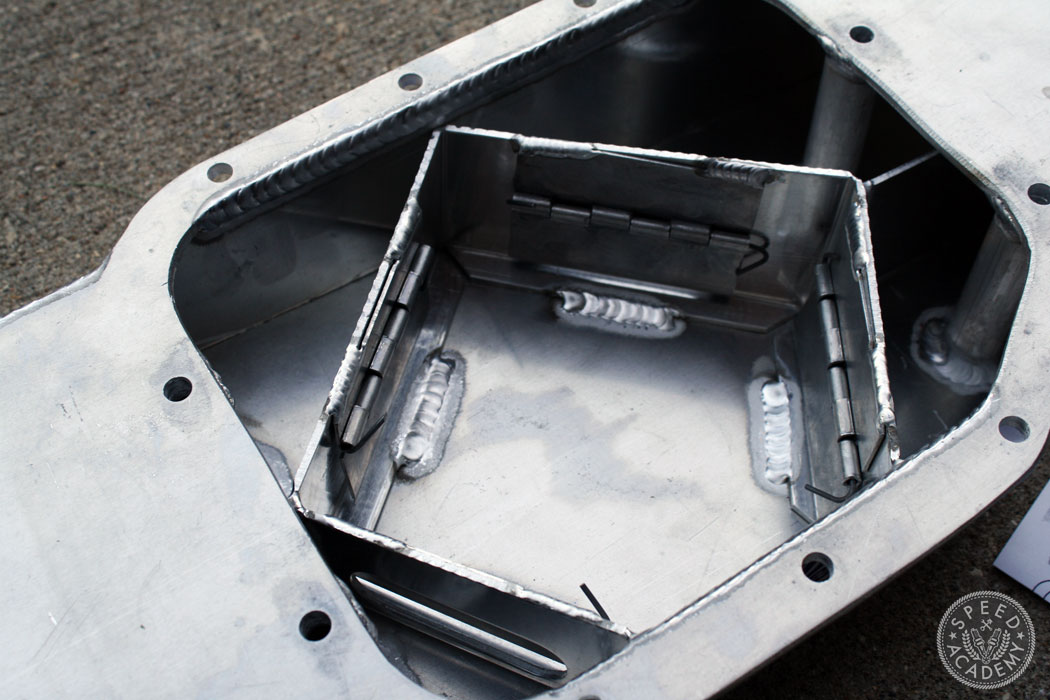
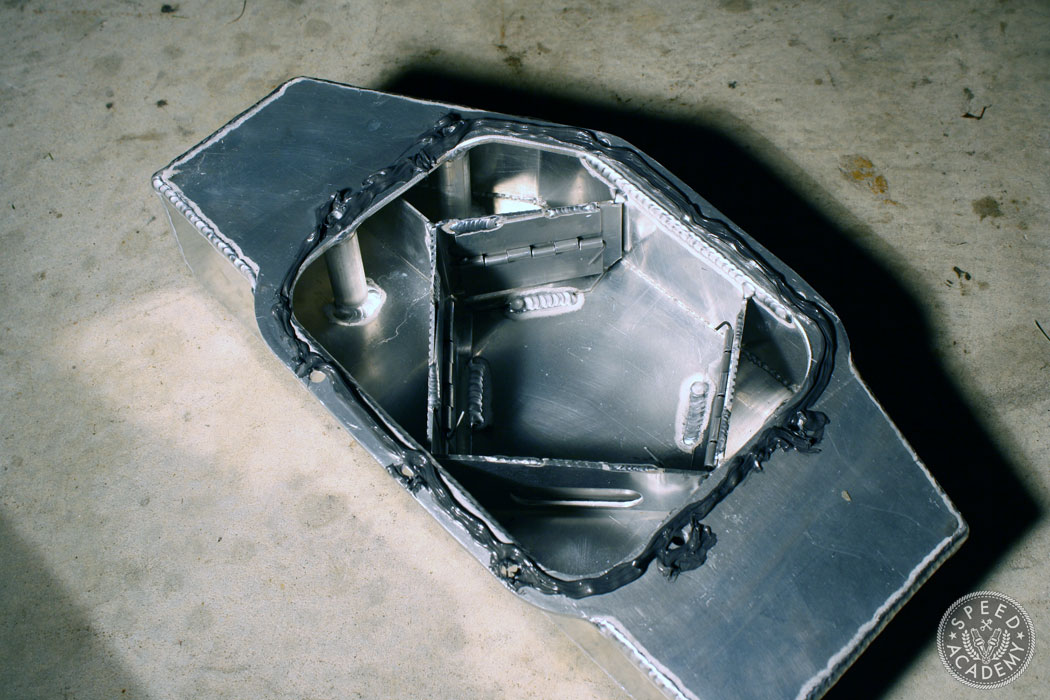
Canton’s pan offers a host of improvements and trick goodies that the stock pan doesn’t provide including increased oil capacity, a bung for your turbo drain back tube, and a magnetic drain plug. But in addition to these features, the improved oil pan design also features a series of four trap doors surrounding the oil strainer.
This allows oil to flow from side to side in order to reach the oil pickup while preventing oil from sloshing away- a perfect solution. The included windage tray is also an improvement and a nice bonus when compared with other oil pans on the market.
But enough about how awesome this pan is- let’s get to work on installing it.
Begin by raising the front of the car and securing it on a pair of jack stands. If your S13 is anything like mine, this will likely involve several two by fours, low profile jacks, and the use of unapproved jack points. Take it slow and be sure everything is safe before you crawl under the car. You definitely don’t want to be monkeying around under there without the car being secure!
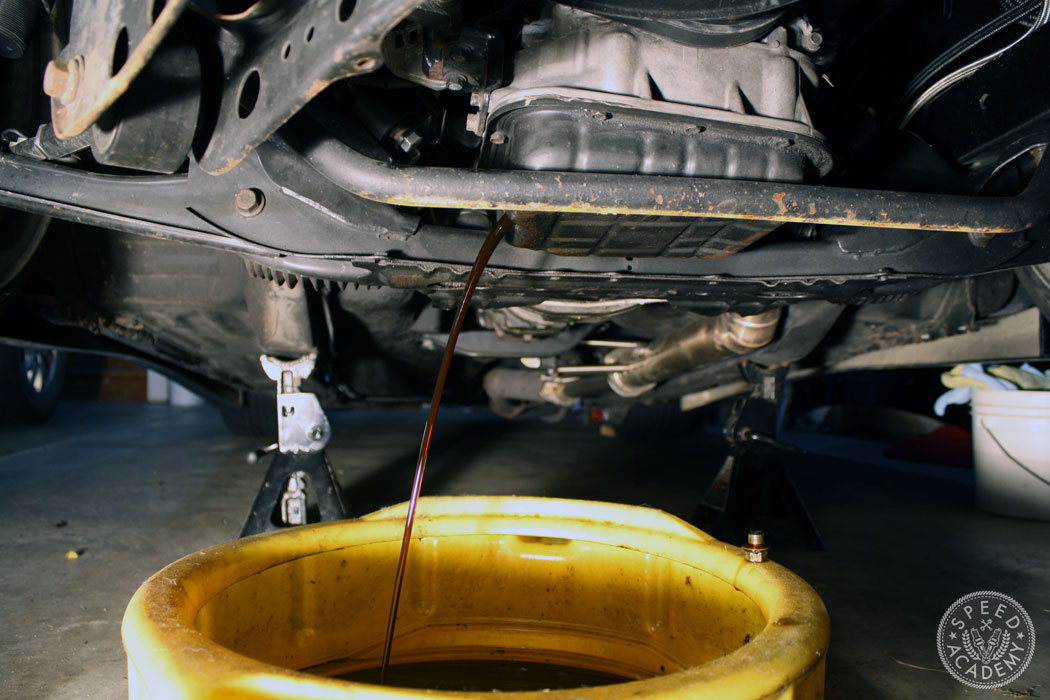
Next you’ll want to go ahead and drain the oil from the engine. You don’t need to wait for all of it to drain since you’ll be removing the lower pan soon anyway, but if you have the time it helps to keep the process a bit more clean.
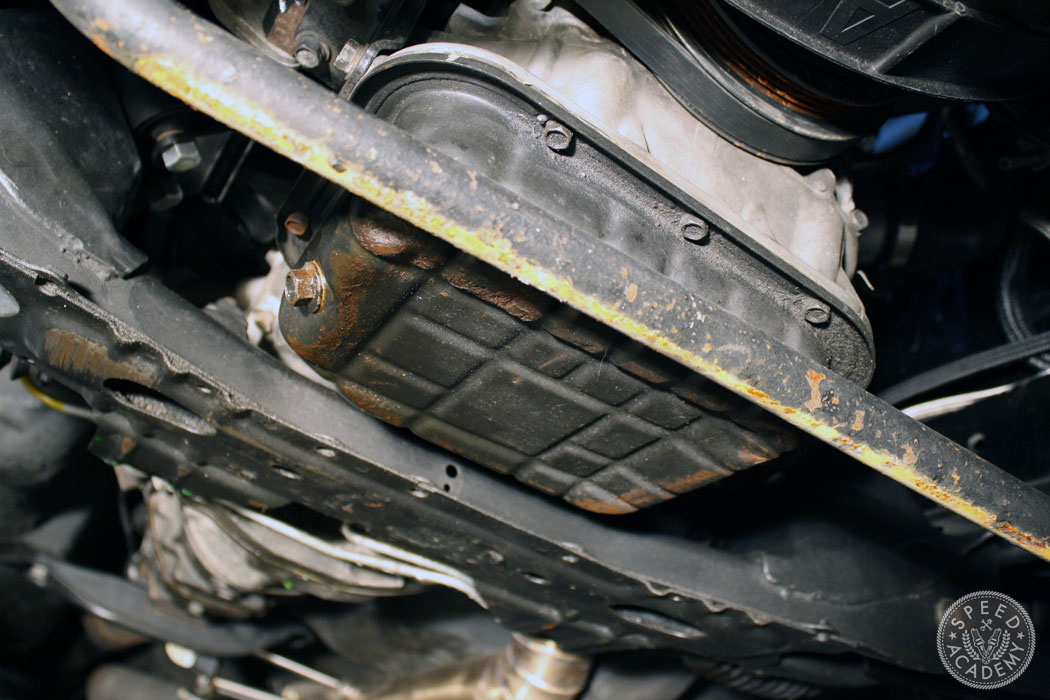
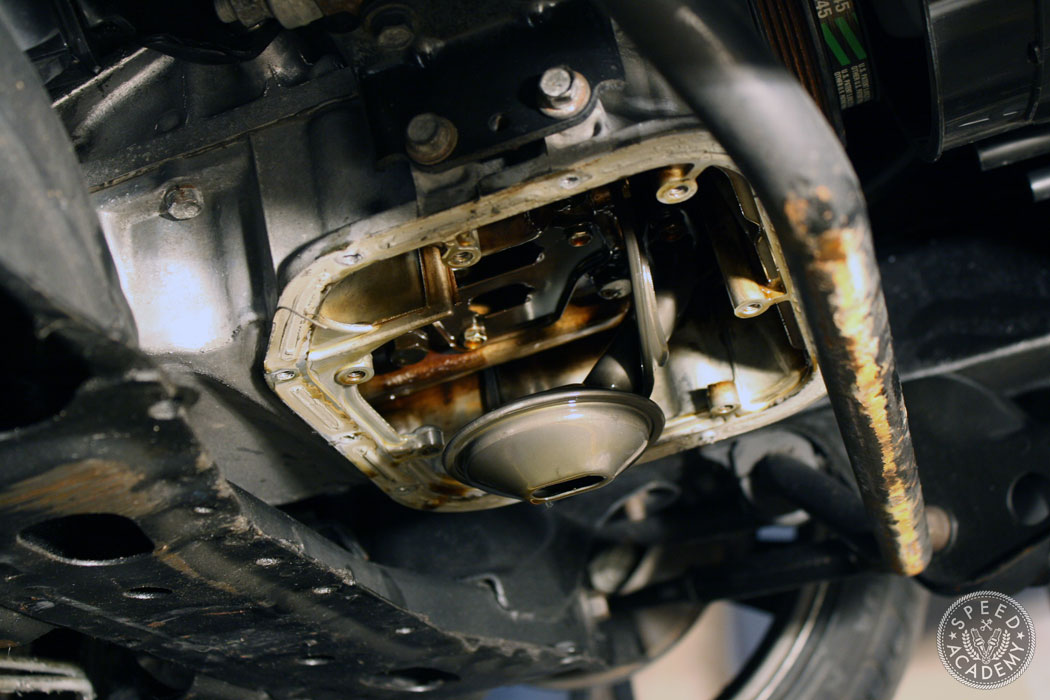
Once the oil has been drained, it’s time to start removing the factory oil pan. There are a total of eight 10mm bolts that secure the lower oil pan to the upper pan. The front three may be a bit tough to get to with the front sway bar in place, but I was able to work a ratchet in there to break them loose.
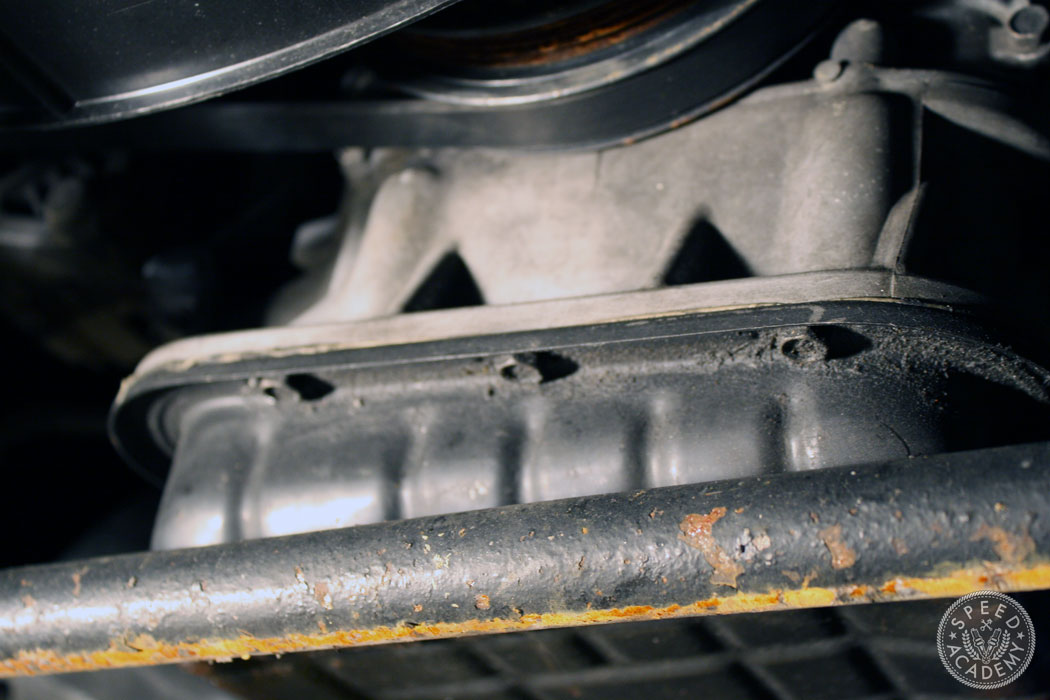
This next step might be a bit tricky. With all of the bolts removed, you need to break the RTV seal that holds the lower pan in place. You can accomplish this by tapping the pan with a two by four and a hammer. If your pan is a bit more stubborn like mine was, you may be able to pry it off with a small pry bar or screw driver. Just be very careful to ensure that you don’t gouge the mating surface on the upper pan or you may be in for leaks later down the road.
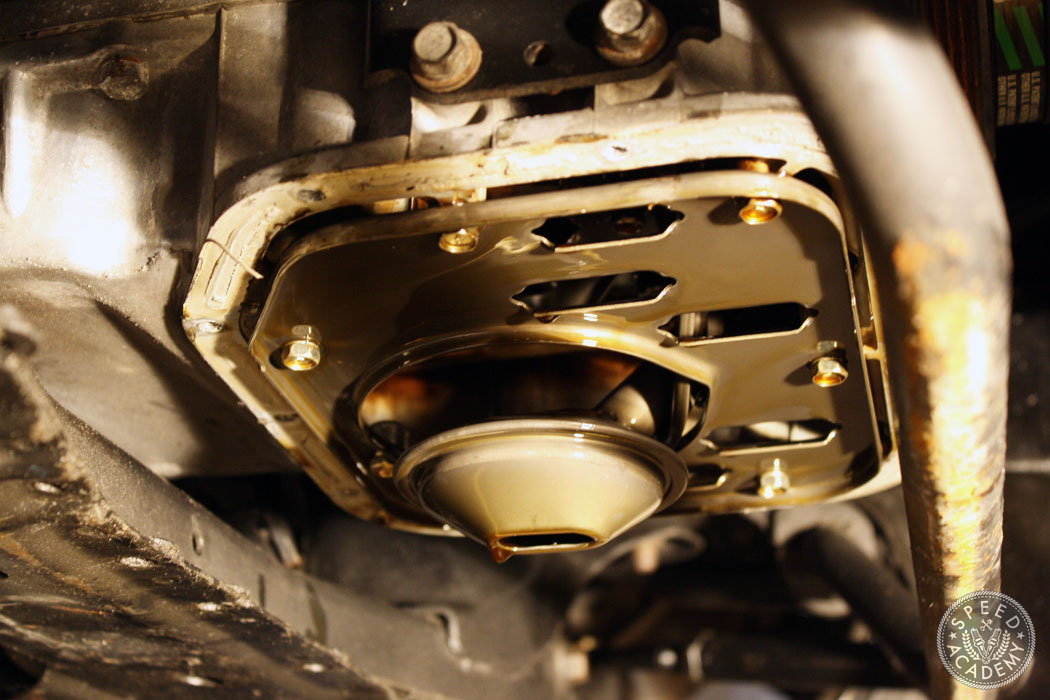
Voila- the bottom side of your engine should now be visible. As I mentioned earlier, Canton Racing’s oil pan is a little more thorough than most and includes a new windage tray to be used with their pan. I went ahead and removed the six bolts holding the factory tray in place to get it out of the way.
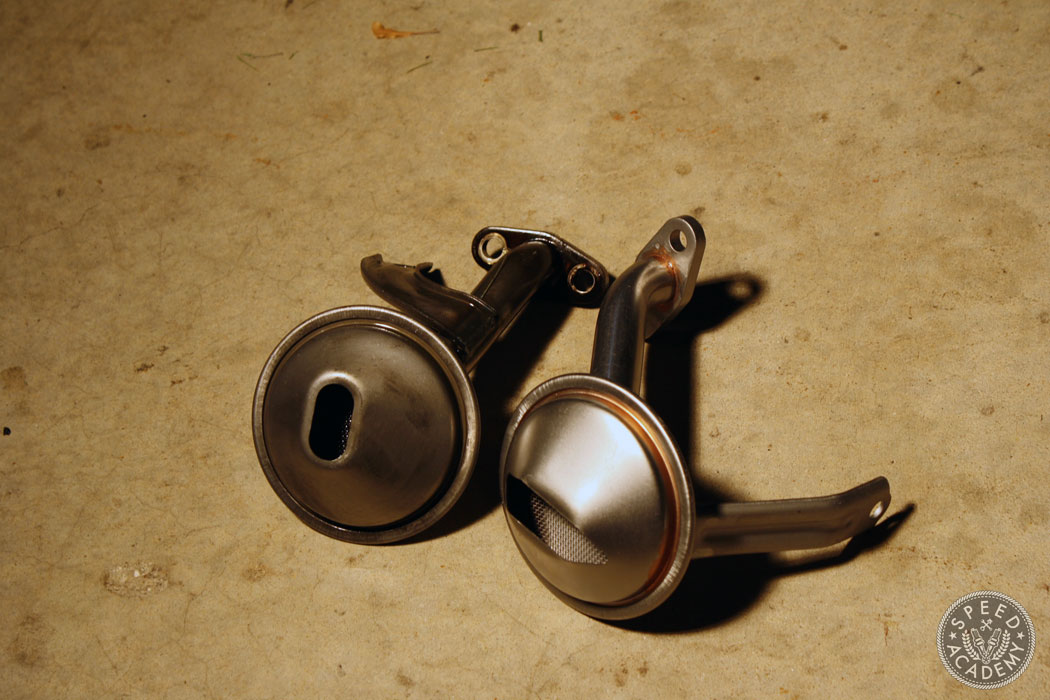
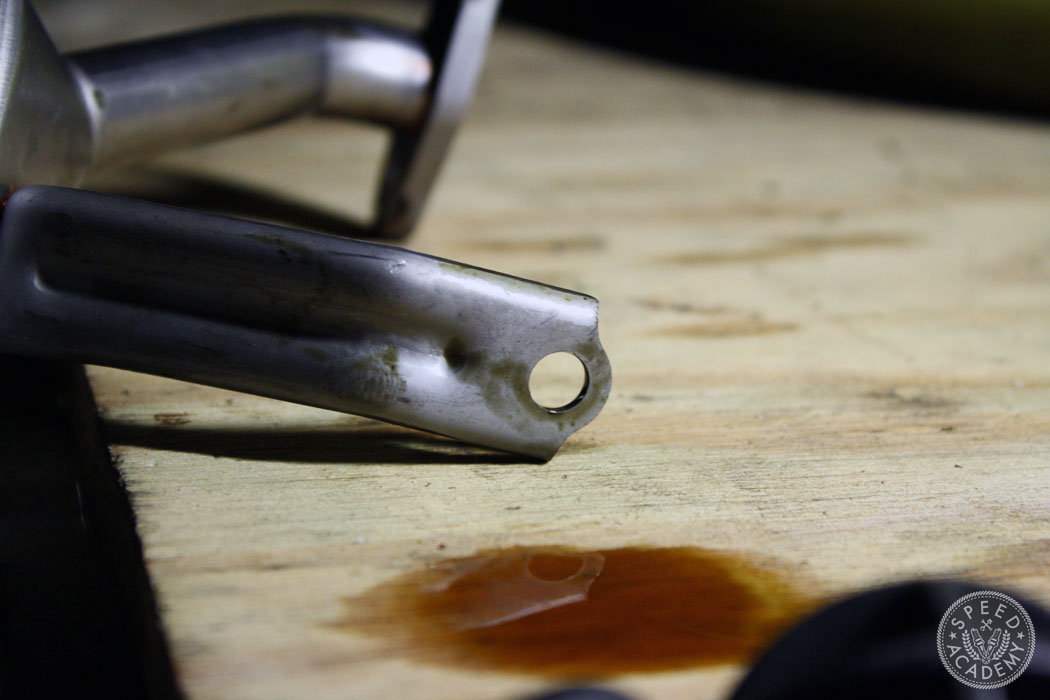
This next step is probably the most difficult part of the process. Luckily it’s considered optional. The main cause of engine failure on the SR20 platform is oil starvation. Nissan opted to update their oil strainer design between the S13 and S14 platforms resulting in a stronger strainer with a larger opening for oil being included on the updated engine. This was an upgrade I installed on my previous SR20 and figured it would be a good idea to do the same this time around.
The two main 12mm bolts for the oil tube should be easy to remove. The third and final bolt for the support bracket is not as easy to remove with the engine in the car. I ended up using a ¼” drive socket and a pair of vice grips to loosen the bolt.
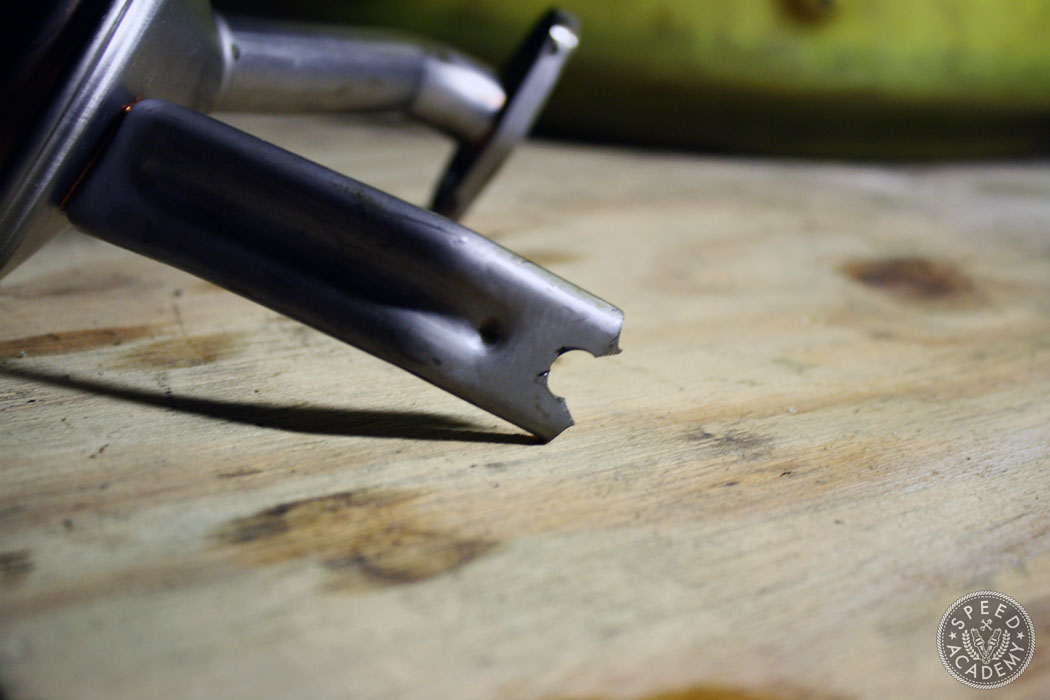
With the old S13 strainer removed, it’s time to install the S14 strainer. The two main 12mm bolts are used in their previous locations, but the smaller 10mm support bracket bolt is now shifted to another location. Installing this bolt with the upper windage tray and oil pan on the engine is a massive pain. Though I am told it is possible, I opted to notch the S14 oil pickup to allow me to slide it into place. This gives you plenty of room to thread that pesky bolt in place. Some might frown upon this approach, but if the bracket bolt is tight enough it won’t cause any problems. Be sure to install the proper gasket along with the new strainer.
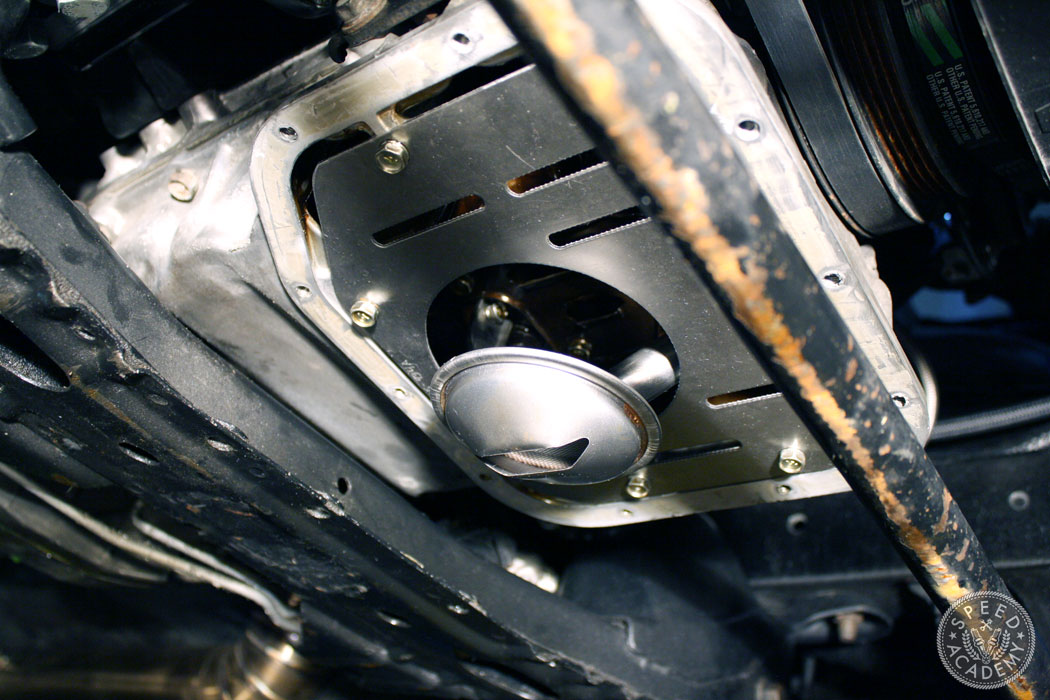
Now that the new oil strainer is in place, it’s time to start bolting up the Canton Racing pan. I installed the included windage tray and secured it with the OEM bolts.
Go ahead and clean the mating surface of the upper oil pan area with a razor blade and some brake cleaner to ensure that all of the old RTV sealer is gone. Be careful not to scratch or gouge the mating surface in the process.
Apply some RTV to the new oil pan and be sure to navigate around all of the bolt holes. Lift the pan into place and install all of the new supplied bolts to secure it. I typically like to install bolts that pass through RTV snug for a couple hours and then tighten them fully per the RTV manufacturer’s instructions as I’ve had less than stellar results when clamping them down immediately. I learned the hard way during this step that you can’t let the pan move around much when installing the bolts. If you move it too much or let the pan drop down and break the seal, you’ll be in for a leaky pan like I was. I had to completely remove everything and try again as a result, so take it from me- do it right the first time!

One mistake I made that contributed to a bad seal was adding the engine oil too soon after installing the pan. I would wait about 24 hours before adding oil just to be sure the RTV fully curesl. Note that the engine’s oil capacity is increased with the oversize Canton pan in place, so be sure to check your oil level to ensure that there’s enough in there. This is also a good time to change your oil filter if you’re due for a change anyway.
And that’s it! The install wasn’t so bad was it? Best of all you now have more oil in the engine for better cooling and of course, those baffles in the Canton oil pan provide a little extra piece of mind when bouncing your SR20DET equipped car on the rev limiter in a corner or slide.