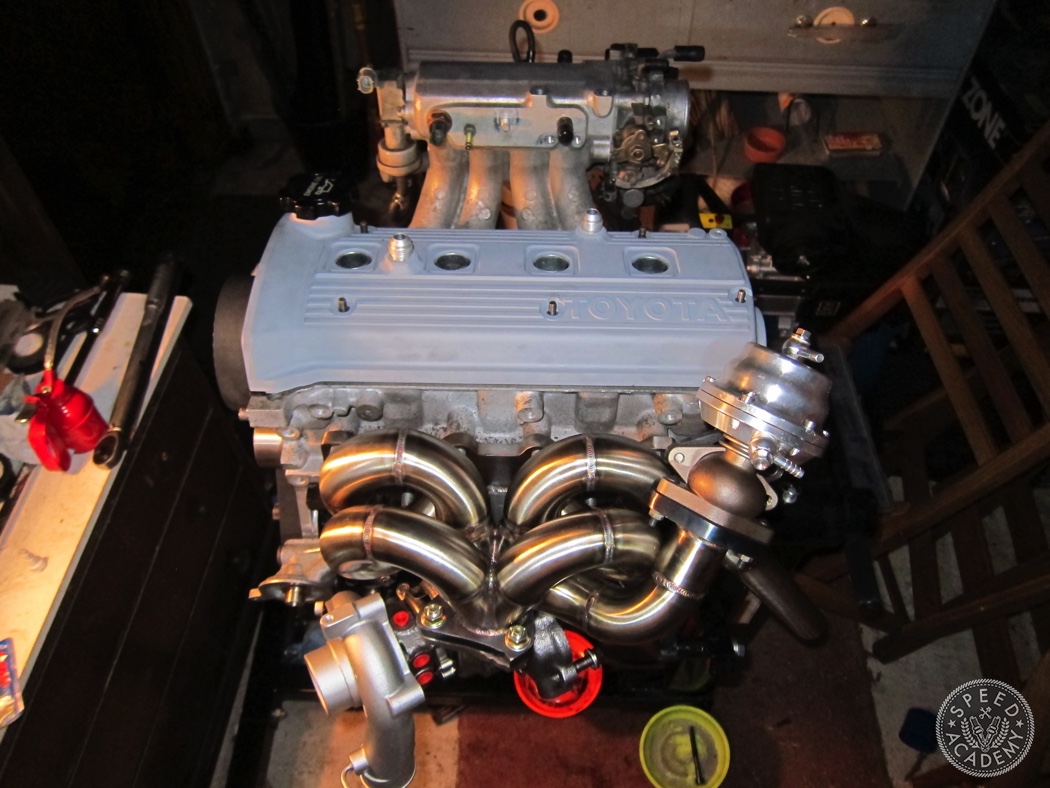
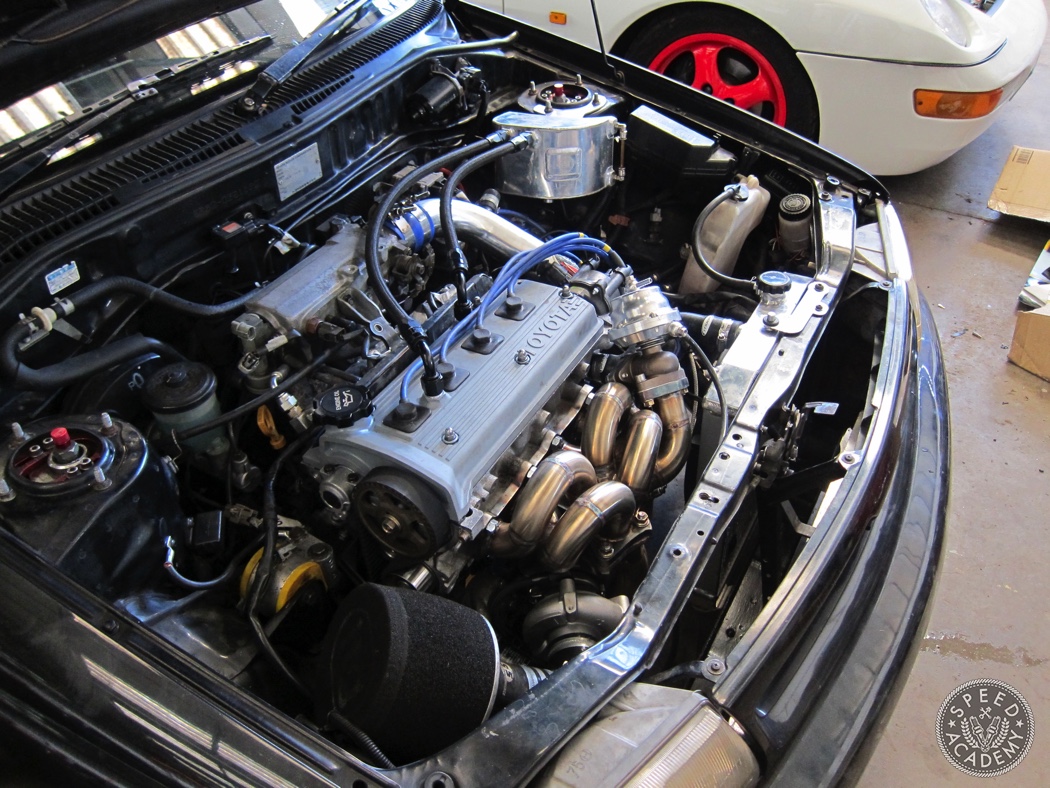
Feeling fairly accomplished, it was now time to carry said assembled short block down a flight of stairs, numbnuts here had figured it was a good idea to build the engine in my first floor man cave, it would be clean, I thought. It’s a good job I like a visit to the gym. With the short block now in the shed, I gave it a lick of paint and fitted the cylinder head. The shiny WickedEP Racing exhaust manifold is new, as is the TiAL 38mm wastegate, there was also an upgrade to the turbo, but more on that later.
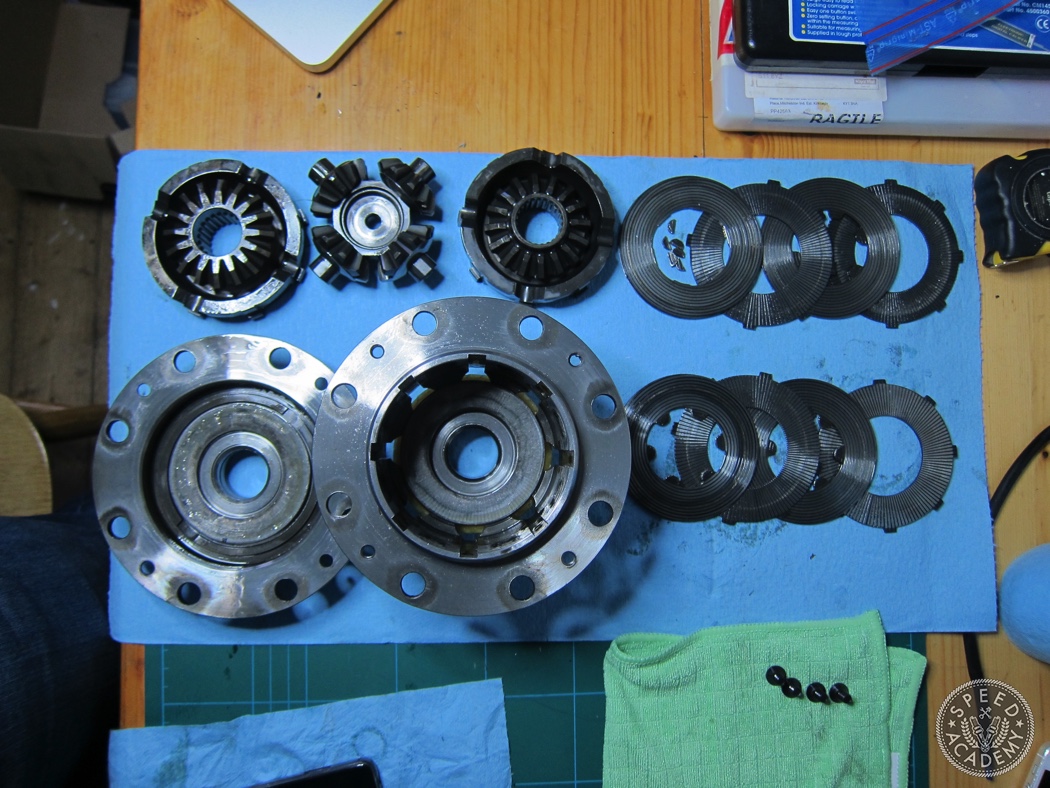
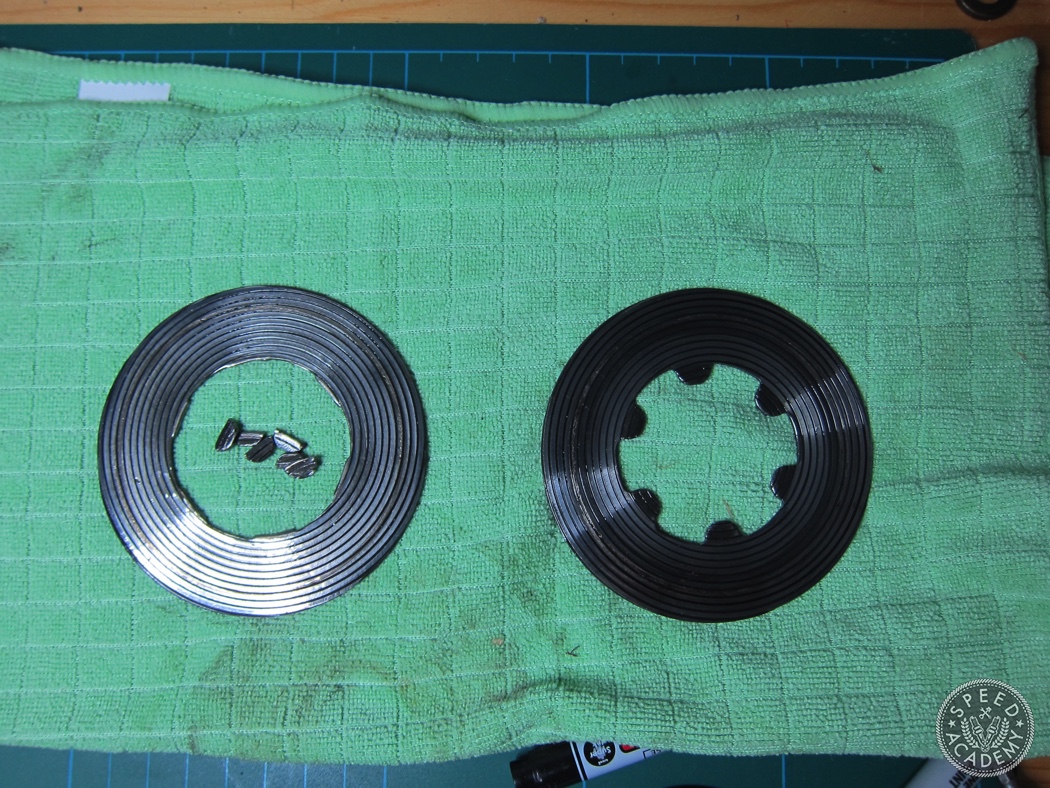
With the engine “complete”, it was time to turn my attention to some other bits and pieces. Namely the KAAZ LSD, which had never felt all that aggressive, not something you come to expect from a plate LSD. Interestingly, you can re-order the plates in a Kaaz LSD to adjust lock. I figured that mine had been set to one of the milder settings, but upon opening it up, it was clear to see why the LSD wasn’t working quite as well as it should be.
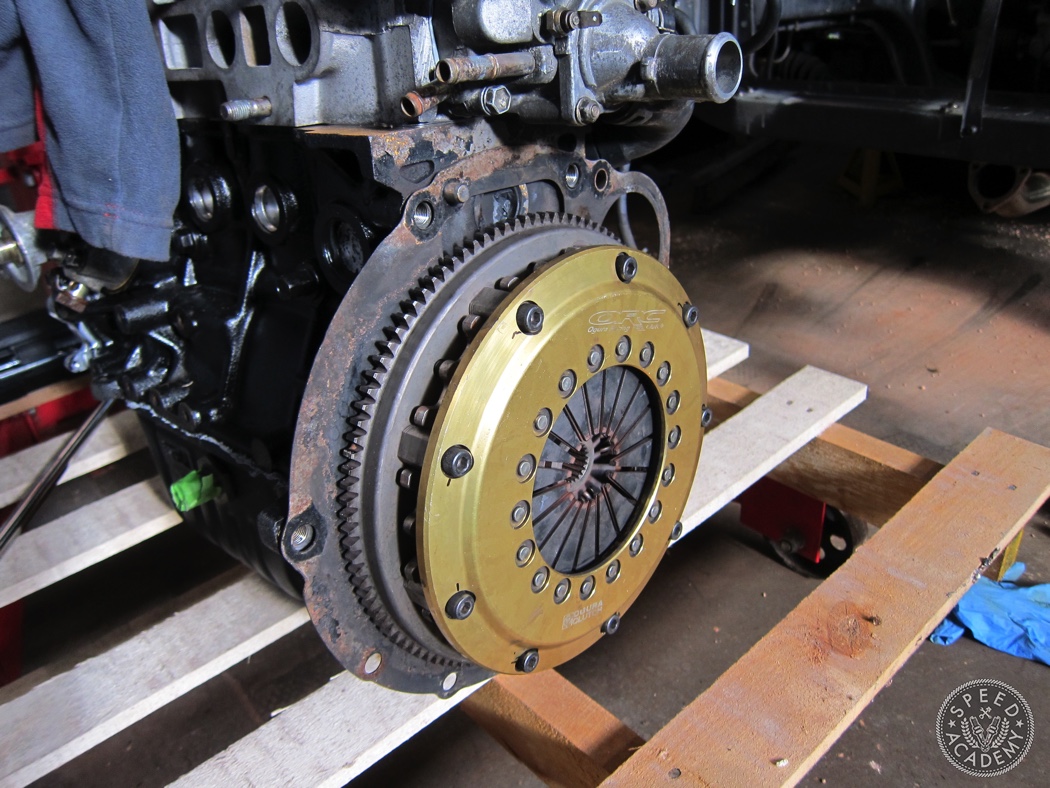
With a full set of replacement clutch disks fitted, and the KAAZ LSD in one piece, I installed it back into the gearbox and refitted the ORC clutch, replacing the release bearing at the same time.
After 18 months or more, it was finally time to put the engine back where it belonged. With help from a couple of friends we had it back in the bay within an hour or two. Then, it would be time to tentatively turn the key for the very first time.
The engine immediately fired into life, ran great for 10 seconds or so, then cut out, refusing to restart. This took me a while to figure out, but would turn out to be an incorrectly routed vacuum/coolant hose on the throttle body. The colour of the oil I drained after figuring out what had caused the problem was almost completely white, very scary. A few runs up to temperature along with 4 or 5 oil changes, the oil looked like oil again. I was very lucky not to hydrolock the engine.
Due to the car not being road legal, I had two options to put some miles on the refreshed engine. One would be to book a track day, the other, find someone with a rolling road that would put some miles on the car in a more controlled environment. I decided on the latter, but I did find time to sneakily run the car up and down the quiet back road at the back of the workshop first.
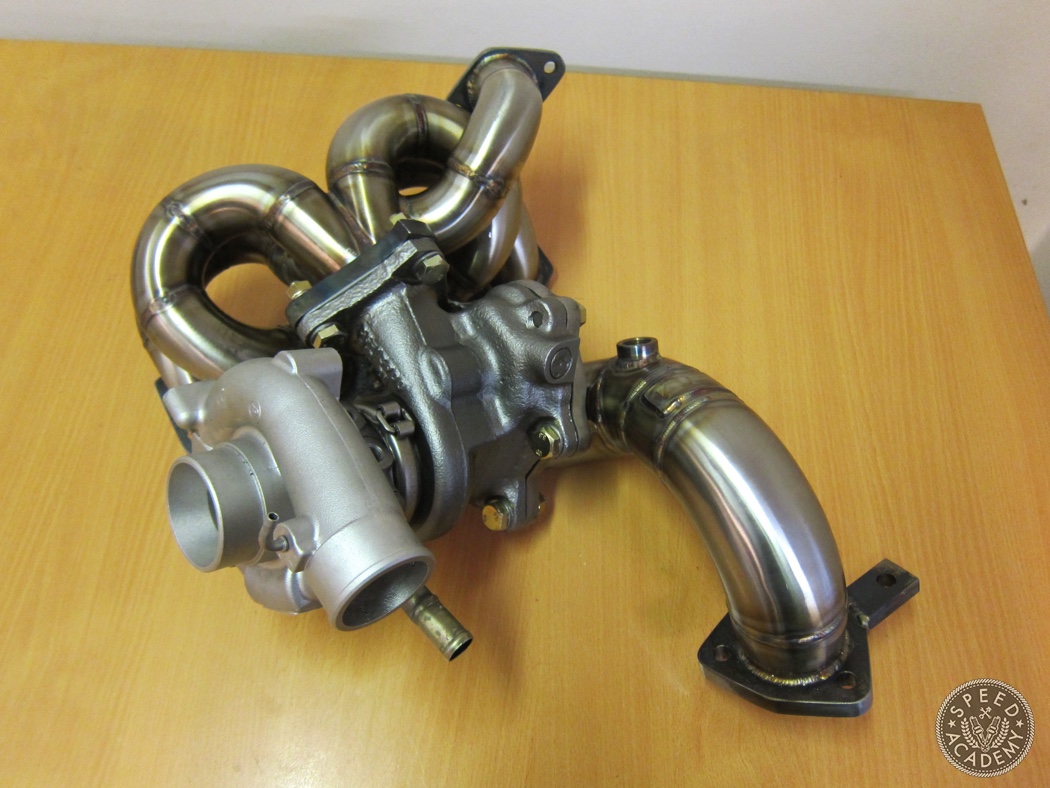
Along with the new manifold came a new and slightly larger turbo, a TF035 turbo from a Subaru Forester. I decided to send the turbo away to Midland Turbo for a full rebuild, Liam at Midland would clock the cold side to suit the Starlet and also have the internal wastegate penny welded shut.

Back on standard engine management and at only 7psi of boost, the new turbo setup would make very close to the same numbers as the previous hybrid turbo setup. Great news, and I can’t wait to turn the boost up in the future.
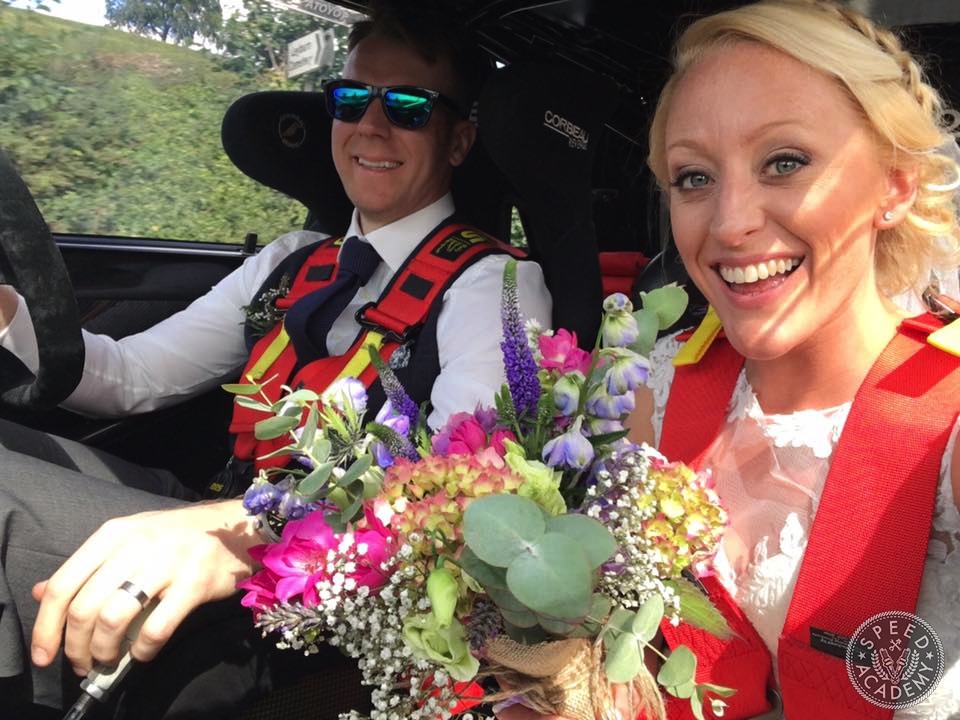
The car would have one final hurdle to cross. Earlier in the year I had somehow managed to talk a real life female into agreeing to marry me. I really wanted to use the Starlet on the day of the wedding, so I set about making the car road legal, which in the UK isn’t quite as easy as just registering it for the road. I would need to find specialist car insurance and fit things like windscreen washers and fog lights to pass an MOT Test. Fortunately it all came together quite quickly, and I was able to use it on the day without too much trouble.
So what’s next? Well I’ve still yet to use the car in anger, but I’m keen to get the engine management situation sorted out before I do. Previously the car had a Greddy e-manage piggy back computer fitted, which I’d wanted to upgrade to a standalone ECU for a while now. I was unsure which ECU to go for, of course there are plenty to choose from Haltech, AEM, Motec, and Link, to name but a few.
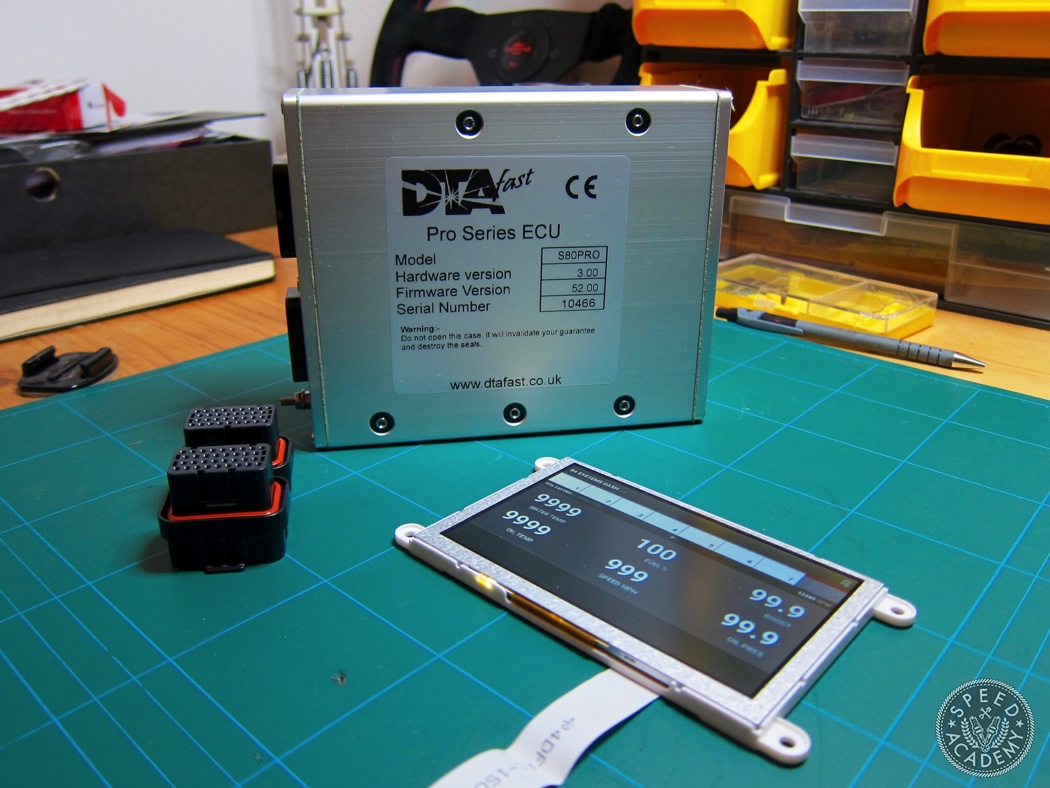
In the end I decided to use the UK based DTA Fast, specifically their DTA S80Pro ECU, a little overkill for my car, but it has all the inputs and outputs I could ever need. With DTA Fast being based in the UK, the number of people who are familiar with their products here is vast. I’m looking forward to sharing the process of installing the new ECU into the car, from building my first wiring loom, to replacing the chassis harness, and finally designing and building my own full colour CAN display. I can’t wait to get started!
