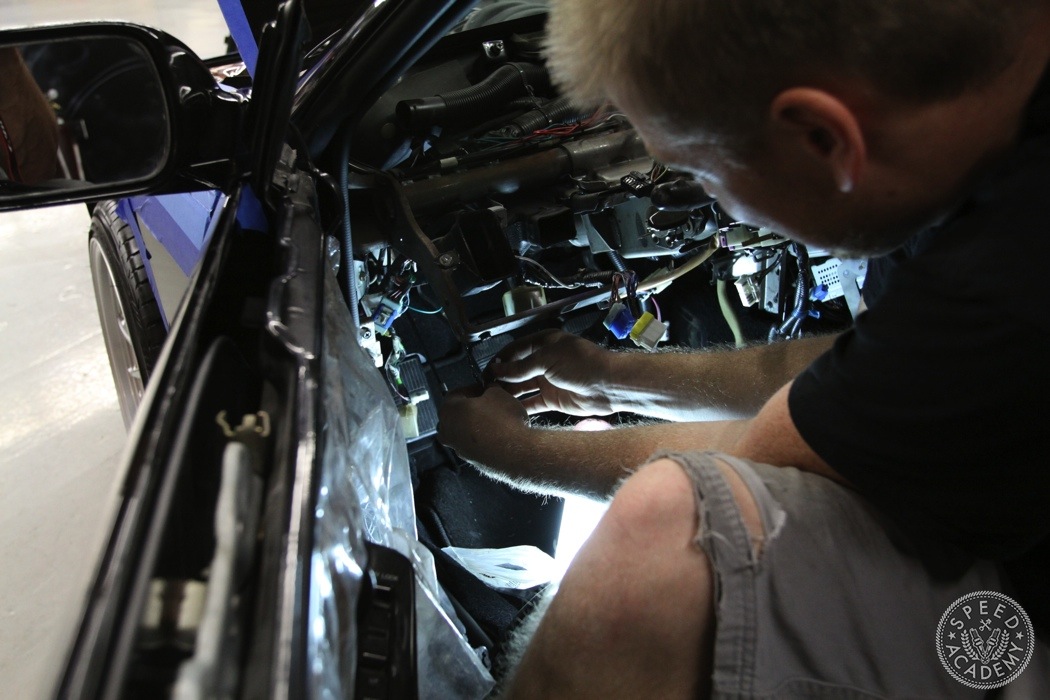
 Wiring is something I don’t mind doing but I’m slow at it and given that I’m usually on a very tight deadline with my builds I called my buddy Jeff Jordan. He runs Jordan Innovations and has done many custom wire jobs into swapped street and race cars so it’s safe to say he made easy work of it. If you’re planning to do the job yourself it’s not as daunting a task as I thought. Inside the cabin you have to run some harness connectors and wires to connect a check engine light, tachometer, speedometer, and engine temp to the cluster and probably a few more wires that I’m forgetting.
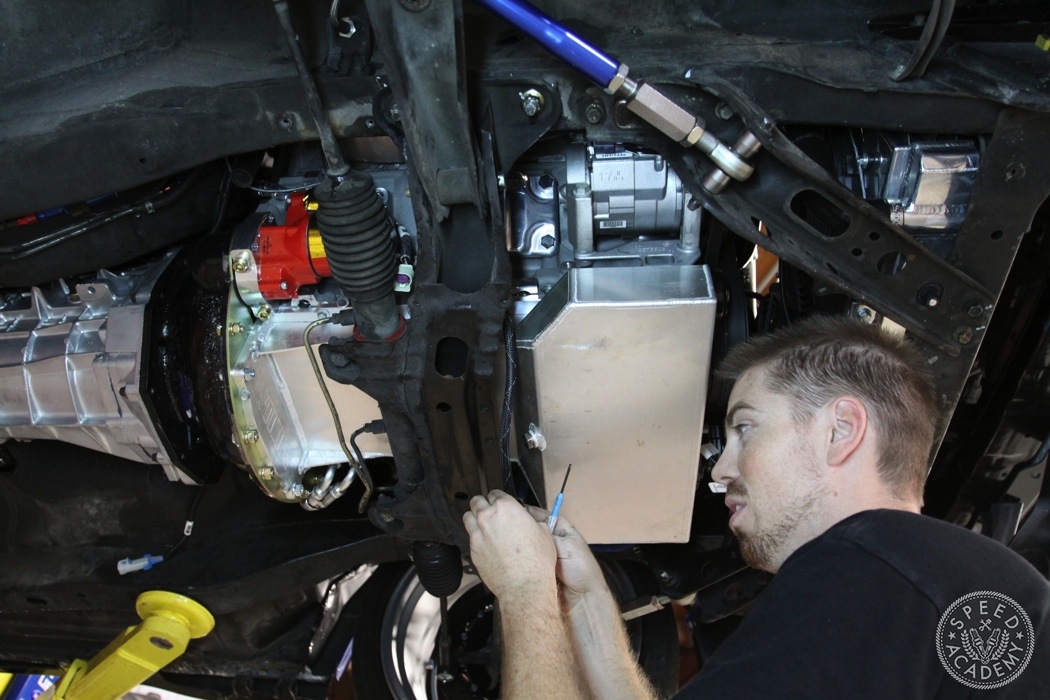 Underneath, a power harness has to be built to provide juice to the starter from the battery and alternator.
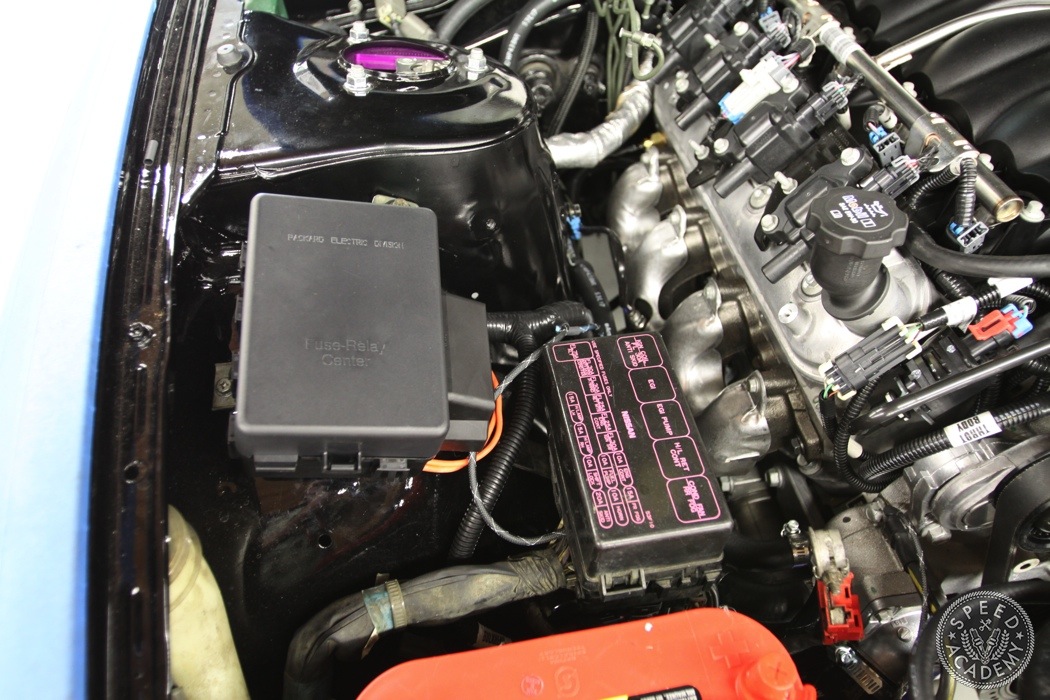
 And it all runs to this GM relay box. It controls pretty much all the functions of the engine and being prewired makes wiring this swap pretty pain free. Every wire and connector is even labelled so for example, the wire labelled fuel pump was spliced into the OEM Nissan relay box (right next to the GM one) and just like that the fuel pump has a trigger.
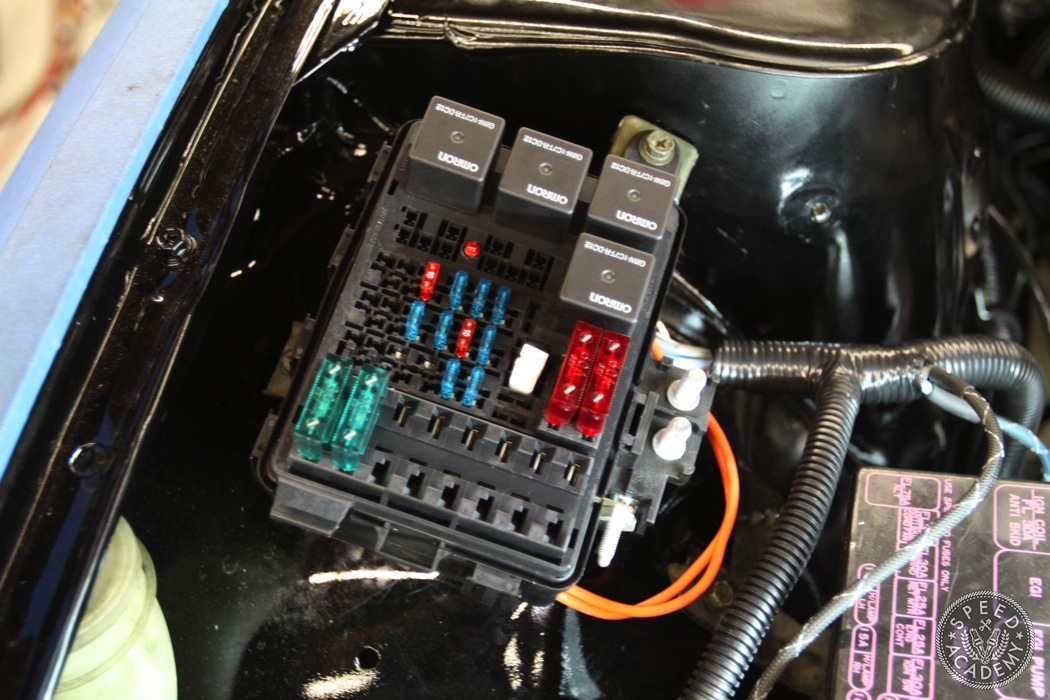
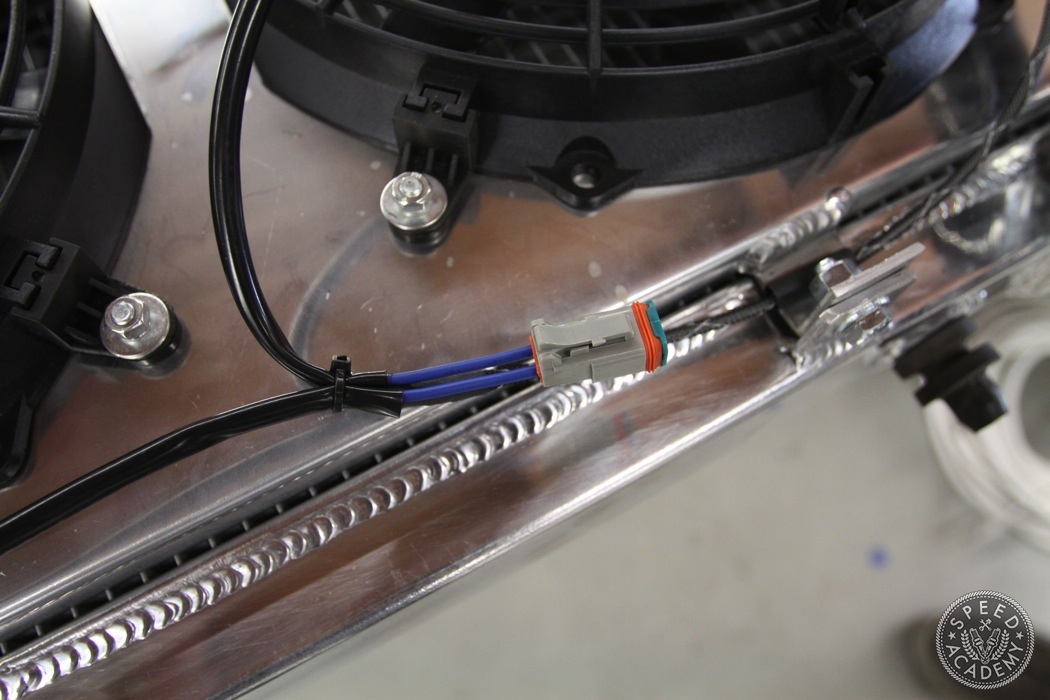 There’s a bunch more wiring that I’m sure forgetting to mention but it’s not that hard to figure out. Here’s a great shot of a connector Jeff used for the fans, all good quality stuff means I don’t have to worry about shorts or wiring issues later on.
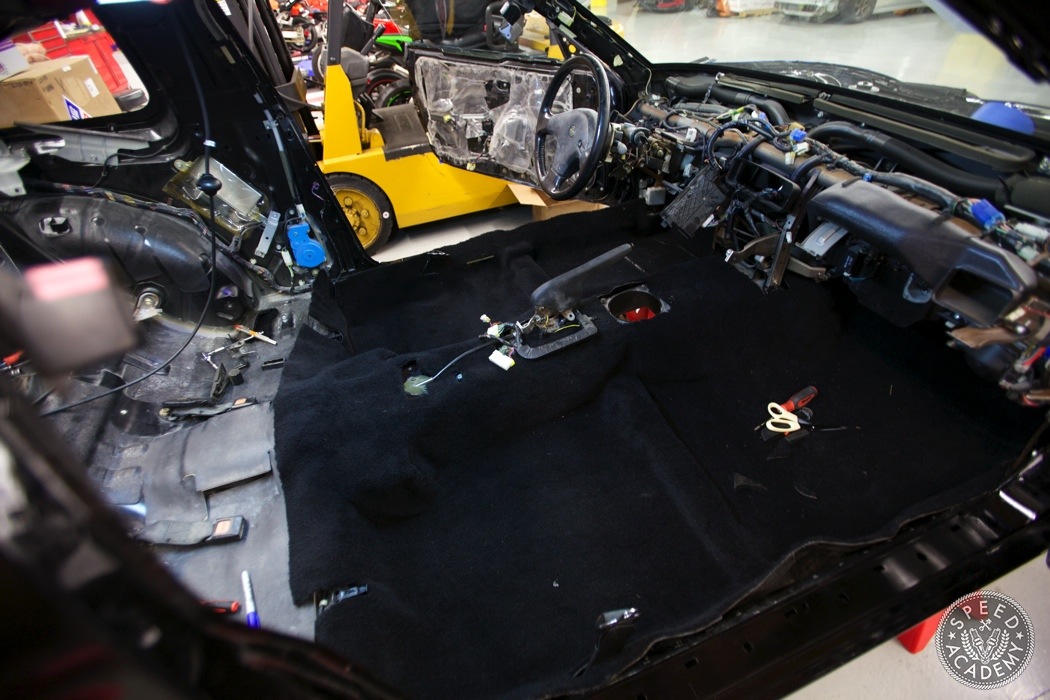 For some reason I can’t find any photos of where I installed the GM ECU but it tucks right up into the factory Nissan ECU spot. The main harness running to the ECU fits through the factory firewall hole so really there’s not much to it. Having the dash out is a must unless you have tiny arms and hands that can easily fit underneath it.
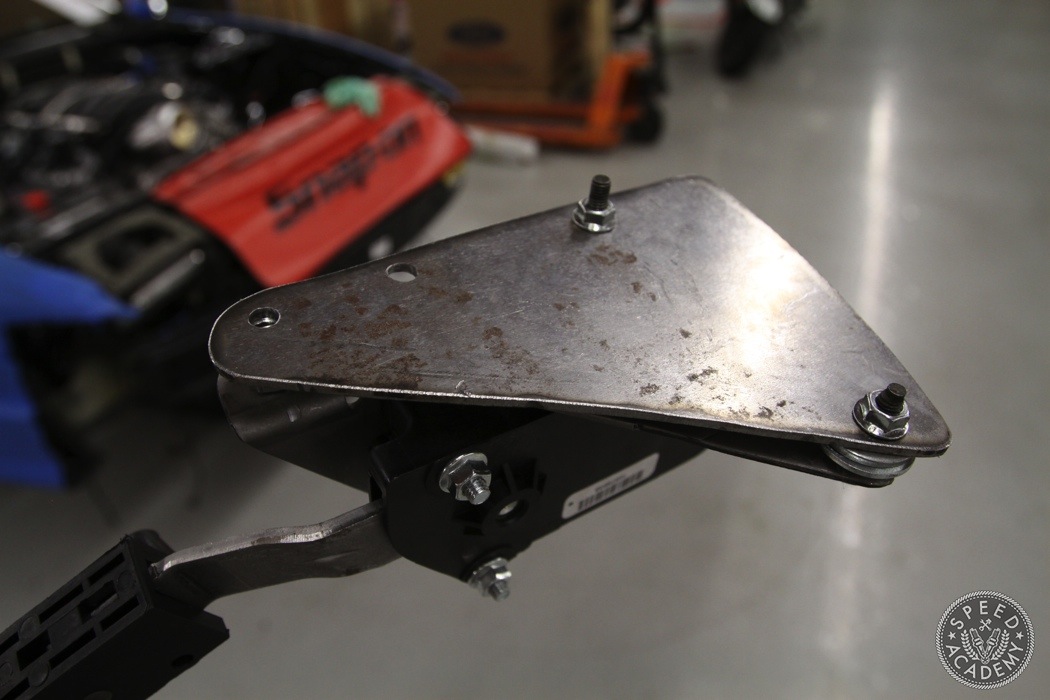
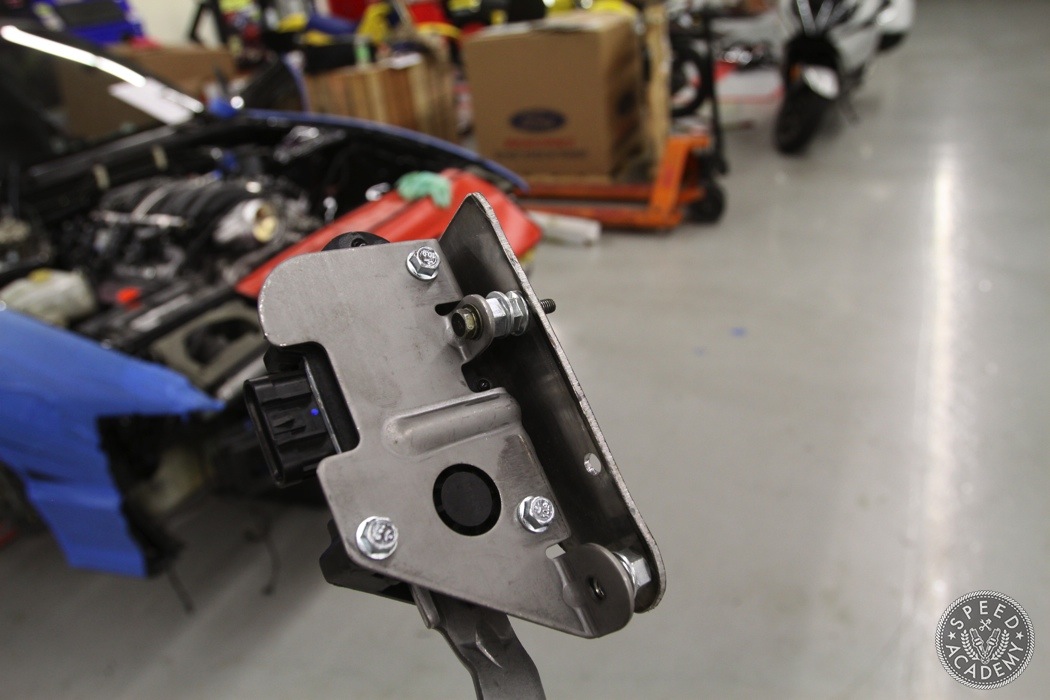
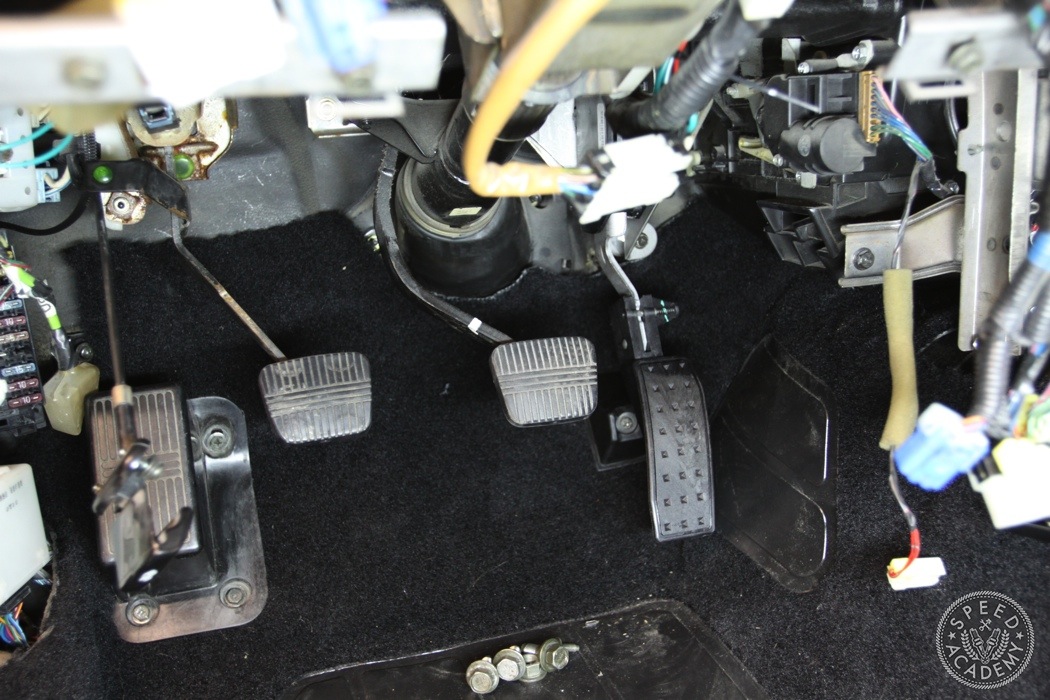 The LS3 has a drive-by-wire throttle and GM includes a pedal that needs to be installed. After some measuring and mocking up, I made a simple bracket that used the existing gas pedal mounting points and bolted everything into place.
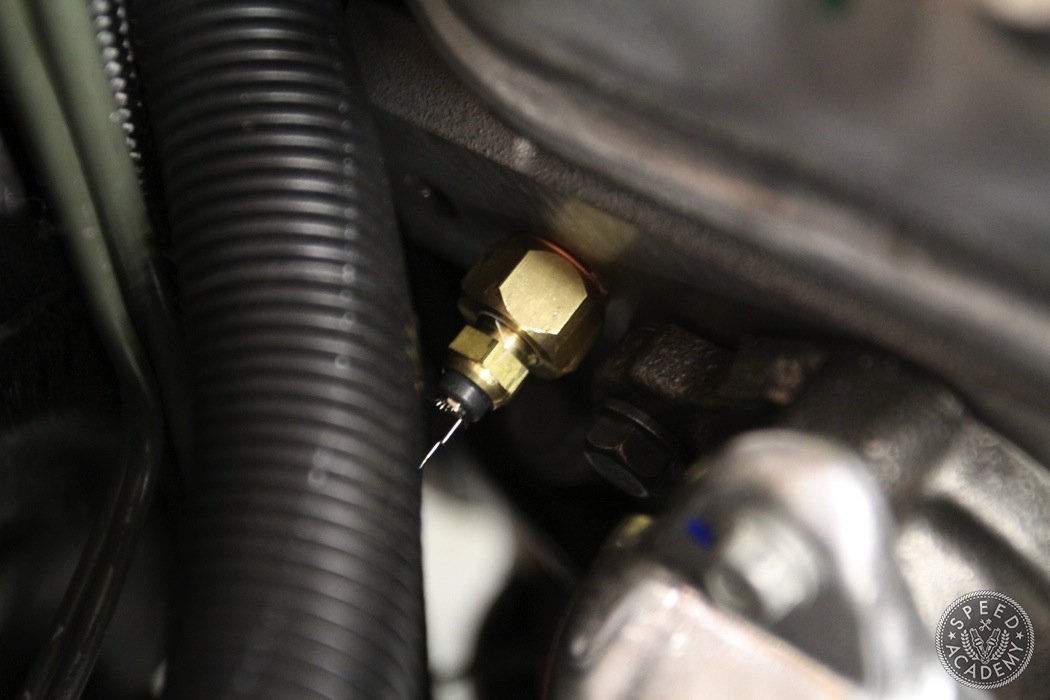 In order to have the factory temperature gauge read correctly, you’ll need to mount the S13 Nissan temperature sensor into the LS block. At the back passenger side of the block, right next to the manifold, there’s a water port that is blocked off with a bolt. If you remove it and build an adapter you’ll have a proper and accurate temp gauge.
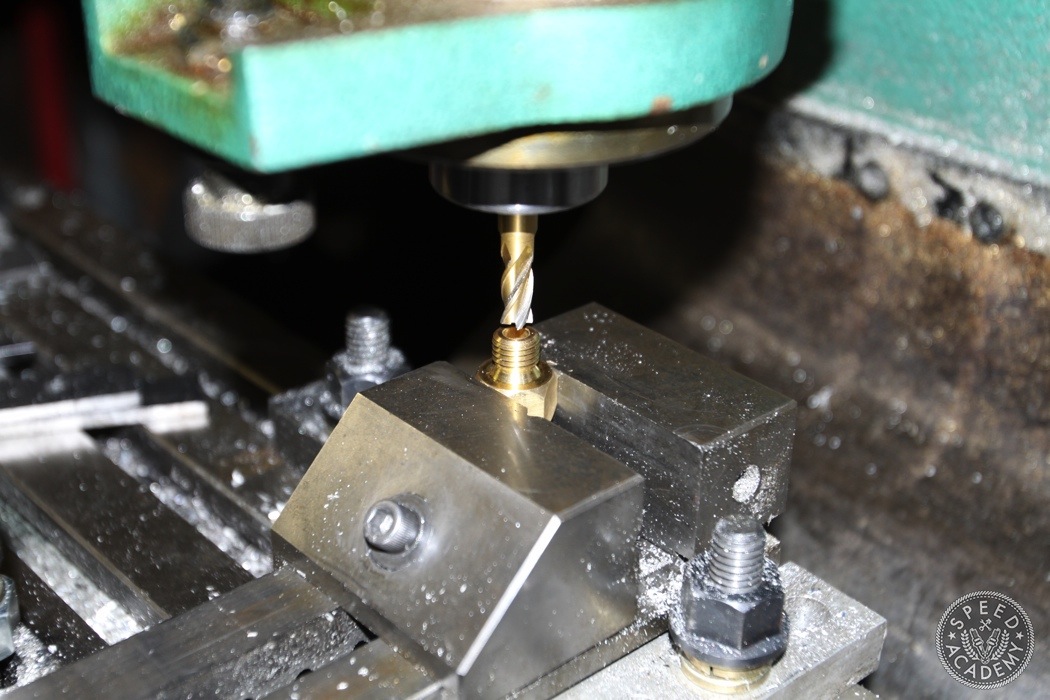 Sadly I don’t remember the thread pitch or where I sourced this bung but I’m sure with a little research you can find what you need.
 A drill press comes in very handy here as the center of the bung needs to be bored out to accommodate the Nissan temp sensor. The walls are very thin so be very careful when drilling and don’t use too big a bit.
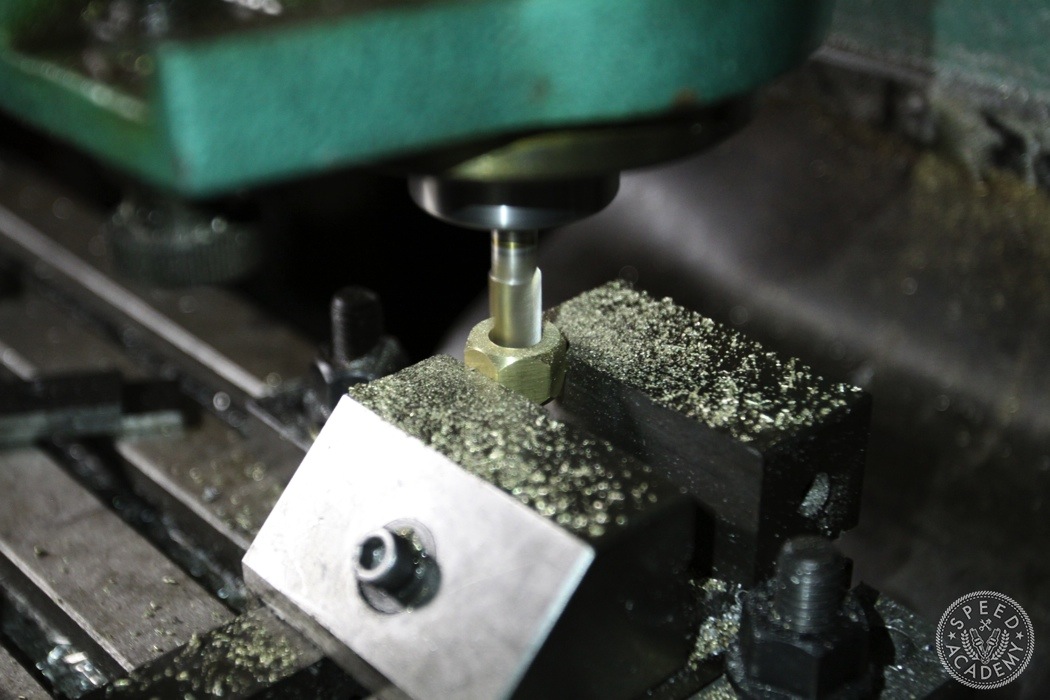
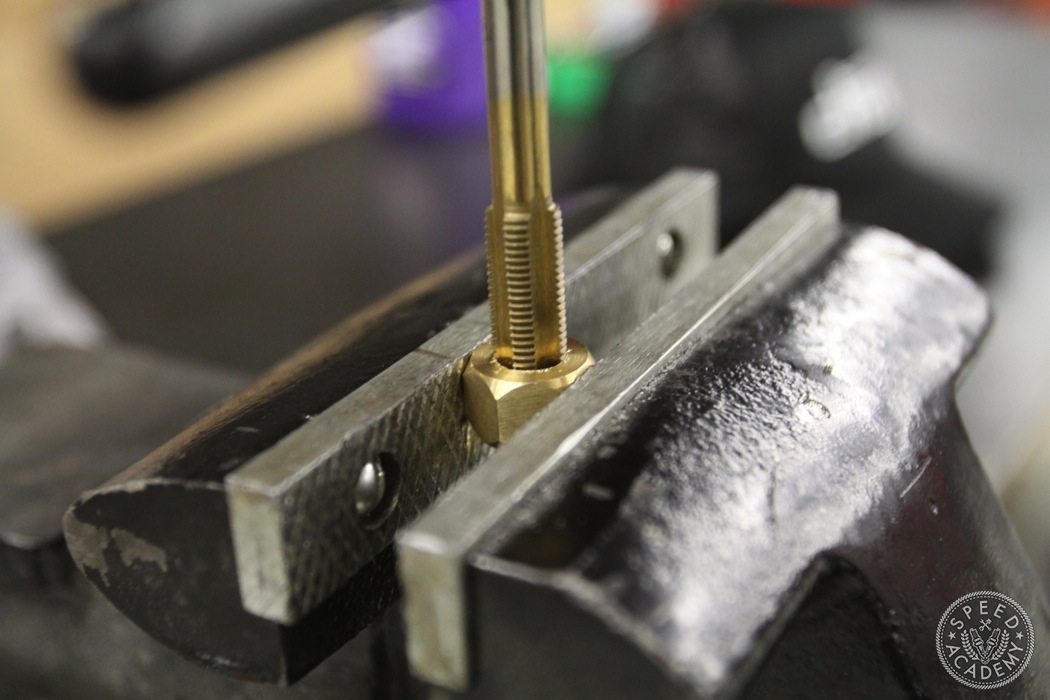 After all the above is taken care of, tap the bung and you’ve got yourself a mounting solution for the temperature sensor.
Do we have a price on the complete build..btw this is the only swap im ever doing on my 240sx
Around $15K for the engine, swap parts, trans, and everything else needed to complete the swap.
im curious for my rx7 fc build im throwing in a pretty roudy small block 400 with a th350, i need to figure out a rear end that can handle the power and i dont know much about the stock rx7 rear ends especially the fc’s.